



0

Andra

preview

cross-posted from: discuss.tchncs.de/post/71048204

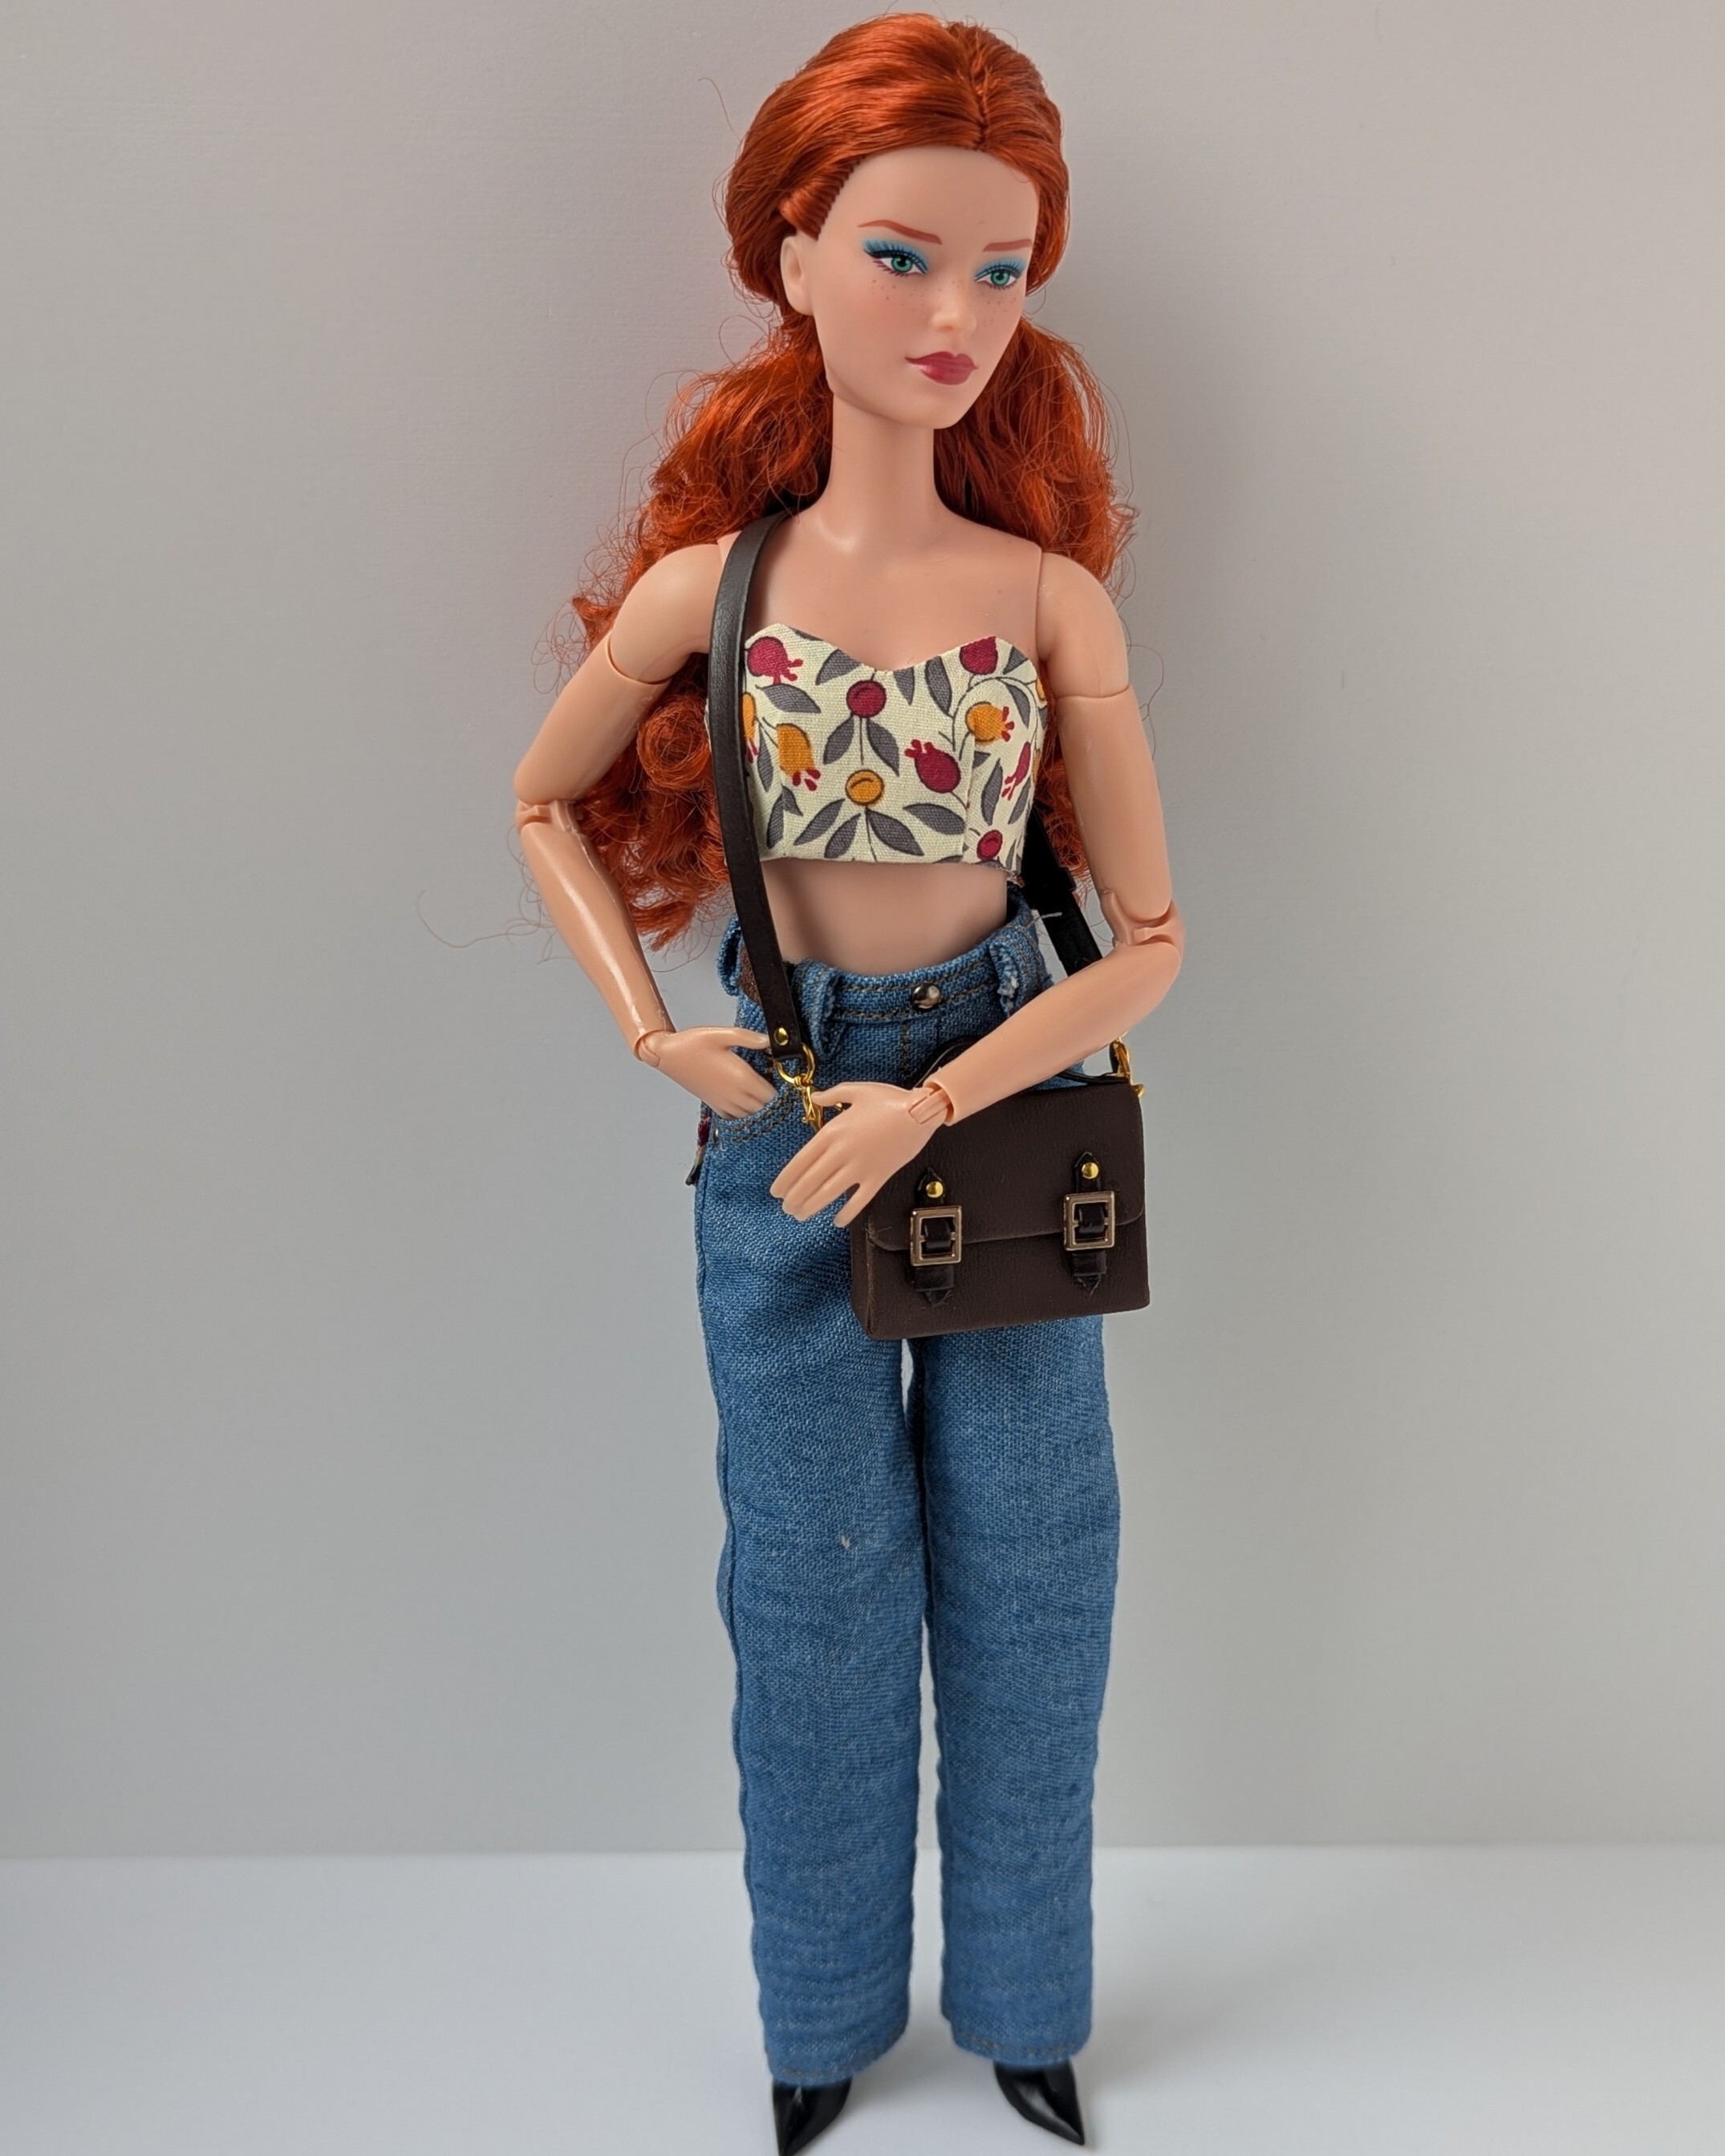
Found her on used marked and couldn’t resist 😅 It’s Barbie Looks #20 which uses Andra sculpt. My wife had a spare MengF White body, so I used it. The skin color is not perfect, will buy Pink White body for her later.

Clothes from a local seamstress.

cross-posted from: discuss.tchncs.de/post/71048204

Found her on used marked and couldn’t resist 😅 It’s Barbie Looks #20 which uses Andra sculpt. My wife had a spare MengF White body, so I used it. The skin color is not perfect, will buy Pink White body for her later.

Clothes from a local seamstress.

0

Student uniform for Odile

preview

cross-posted from: discuss.tchncs.de/post/70574005

Bought from a local doll clothes maker. The buttons on the jacket are decorative - it actually fastens with a larger snap button underneath. 🙂

A few more photos:

cross-posted from: discuss.tchncs.de/post/70574005

Bought from a local doll clothes maker. The buttons on the jacket are decorative - it actually fastens with a larger snap button underneath. 🙂

A few more photos:

0

[Help] What went wrong with the second hem?

Collage of two images, the upper one showing a flat seam, the lower one showing a slightly crumpled seam
preview

Dear sewing community,

I am a beginner when it comes to sewing so I’m not sure what went wrong. I did a simple headscarf, basically a square piece of fabric with narrow rolled hems.

I did all four sides the same way, pressed it, pinned it, sewed and pressed again. The fabric is very slightly stretchy in one direction and the stretchy sides turned out nice and flat, while the non-stretchy sides look slightly crumpled despite ironing.

It doesn’t make sense to me, according to my logic it should be the other way around. But anyways, what does one do to prevent that?

Dear sewing community,

I am a beginner when it comes to sewing so I’m not sure what went wrong. I did a simple headscarf, basically a square piece of fabric with narrow rolled hems.

I did all four sides the same way, pressed it, pinned it, sewed and pressed again. The fabric is very slightly stretchy in one direction and the stretchy sides turned out nice and flat, while the non-stretchy sides look slightly crumpled despite ironing.

It doesn’t make sense to me, according to my logic it should be the other way around. But anyways, what does one do to prevent that?

0

New project from sewing class

preview

It is a little zippered bag. Currently using it to hold stuff from my pants pockets at night when I go to bed.

All of our class projects use scrap material. I had found the inner material while looking for stuff for a different project. I could not find anything that would go well with it, but I think it does well with this bag as a surprise lining.

Edit: I was asked about the pattern, I got this video from the class syllabus. When opening it while not logged into YouTube I got tons of recommendations for other videos making the same bag.

It is a little zippered bag. Currently using it to hold stuff from my pants pockets at night when I go to bed.

All of our class projects use scrap material. I had found the inner material while looking for stuff for a different project. I could not find anything that would go well with it, but I think it does well with this bag as a surprise lining.

Edit: I was asked about the pattern, I got this video from the class syllabus. When opening it while not logged into YouTube I got tons of recommendations for other videos making the same bag.

0

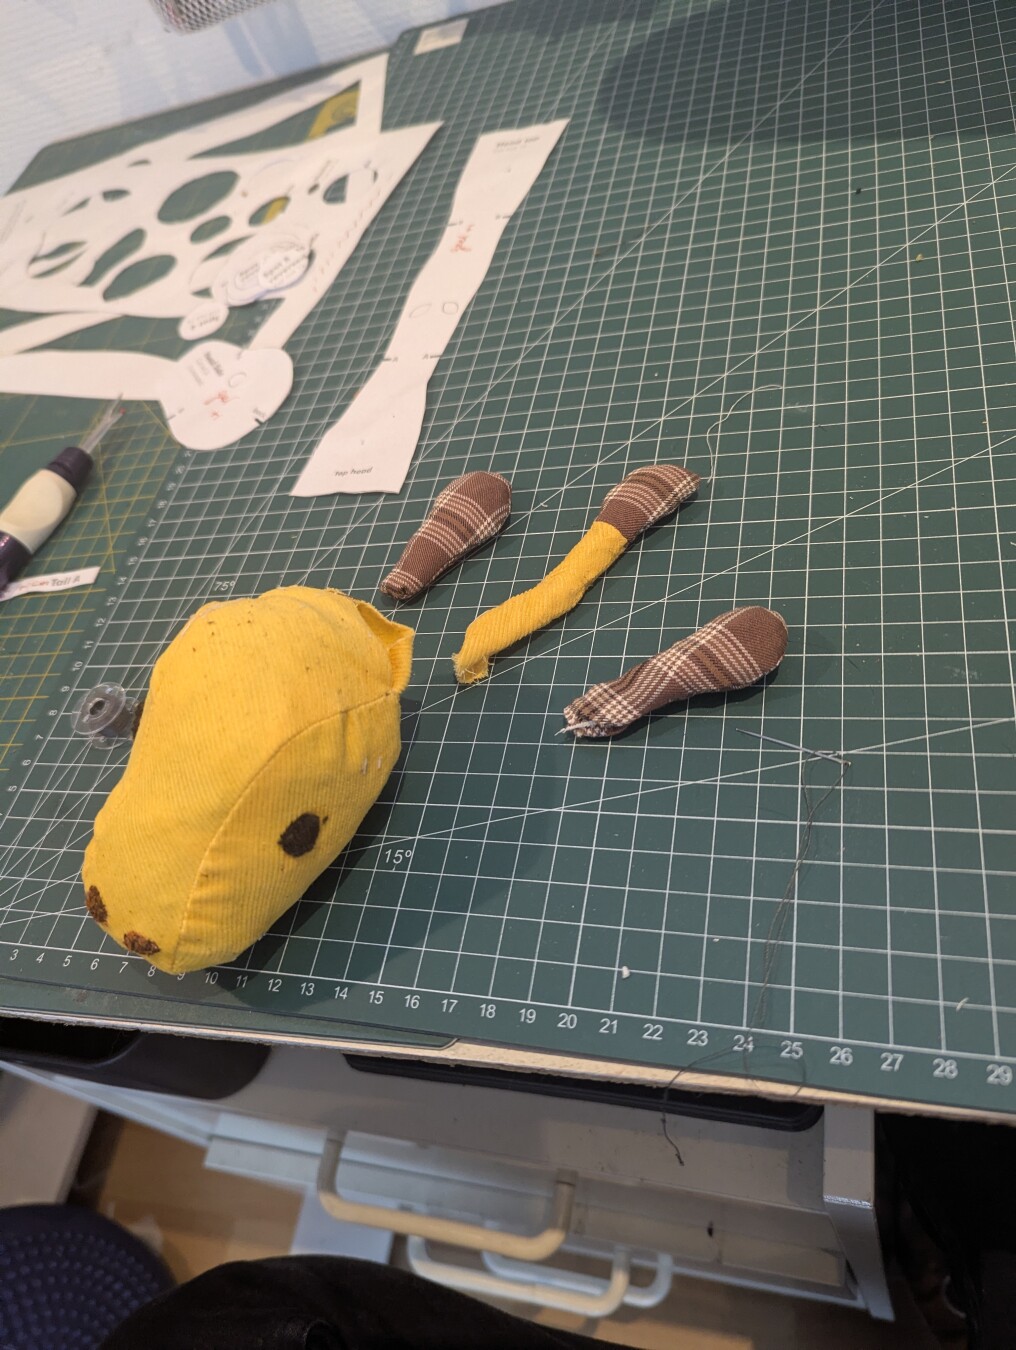
Taking a break from sewing skirts for the seamstress school, and making a new plushie for a good friend with a freshly made baby. The pattern came from a store called "DIYFluffies":

Separate pieces of a Giraffe plushie. It shows a head, a tail and some horns
preview

Taking a break from sewing skirts for the seamstress school, and making a new plushie for a good friend with a freshly made baby. The pattern came from a store called “DIYFluffies”: https://www.etsy.com/listing/185970059/sewing-pattern-giraffe-pdf

The pattern is fine, though the instructions do leave something to be desired in their clarity… And the English version is better than the Dutch one, even though the pattern maker is Dutch. But oh well. The resulting plushie was the best one I found online.

@sewing@lemmy.world @sewingrepairing @sewing@fedigroups.social
#sewing #plushie #giraffe #fiberarts

Taking a break from sewing skirts for the seamstress school, and making a new plushie for a good friend with a freshly made baby. The pattern came from a store called “DIYFluffies”: https://www.etsy.com/listing/185970059/sewing-pattern-giraffe-pdf

The pattern is fine, though the instructions do leave something to be desired in their clarity… And the English version is better than the Dutch one, even though the pattern maker is Dutch. But oh well. The resulting plushie was the best one I found online.

@sewing@lemmy.world @sewingrepairing @sewing@fedigroups.social
#sewing #plushie #giraffe #fiberarts

0

Frog for sewing class

preview

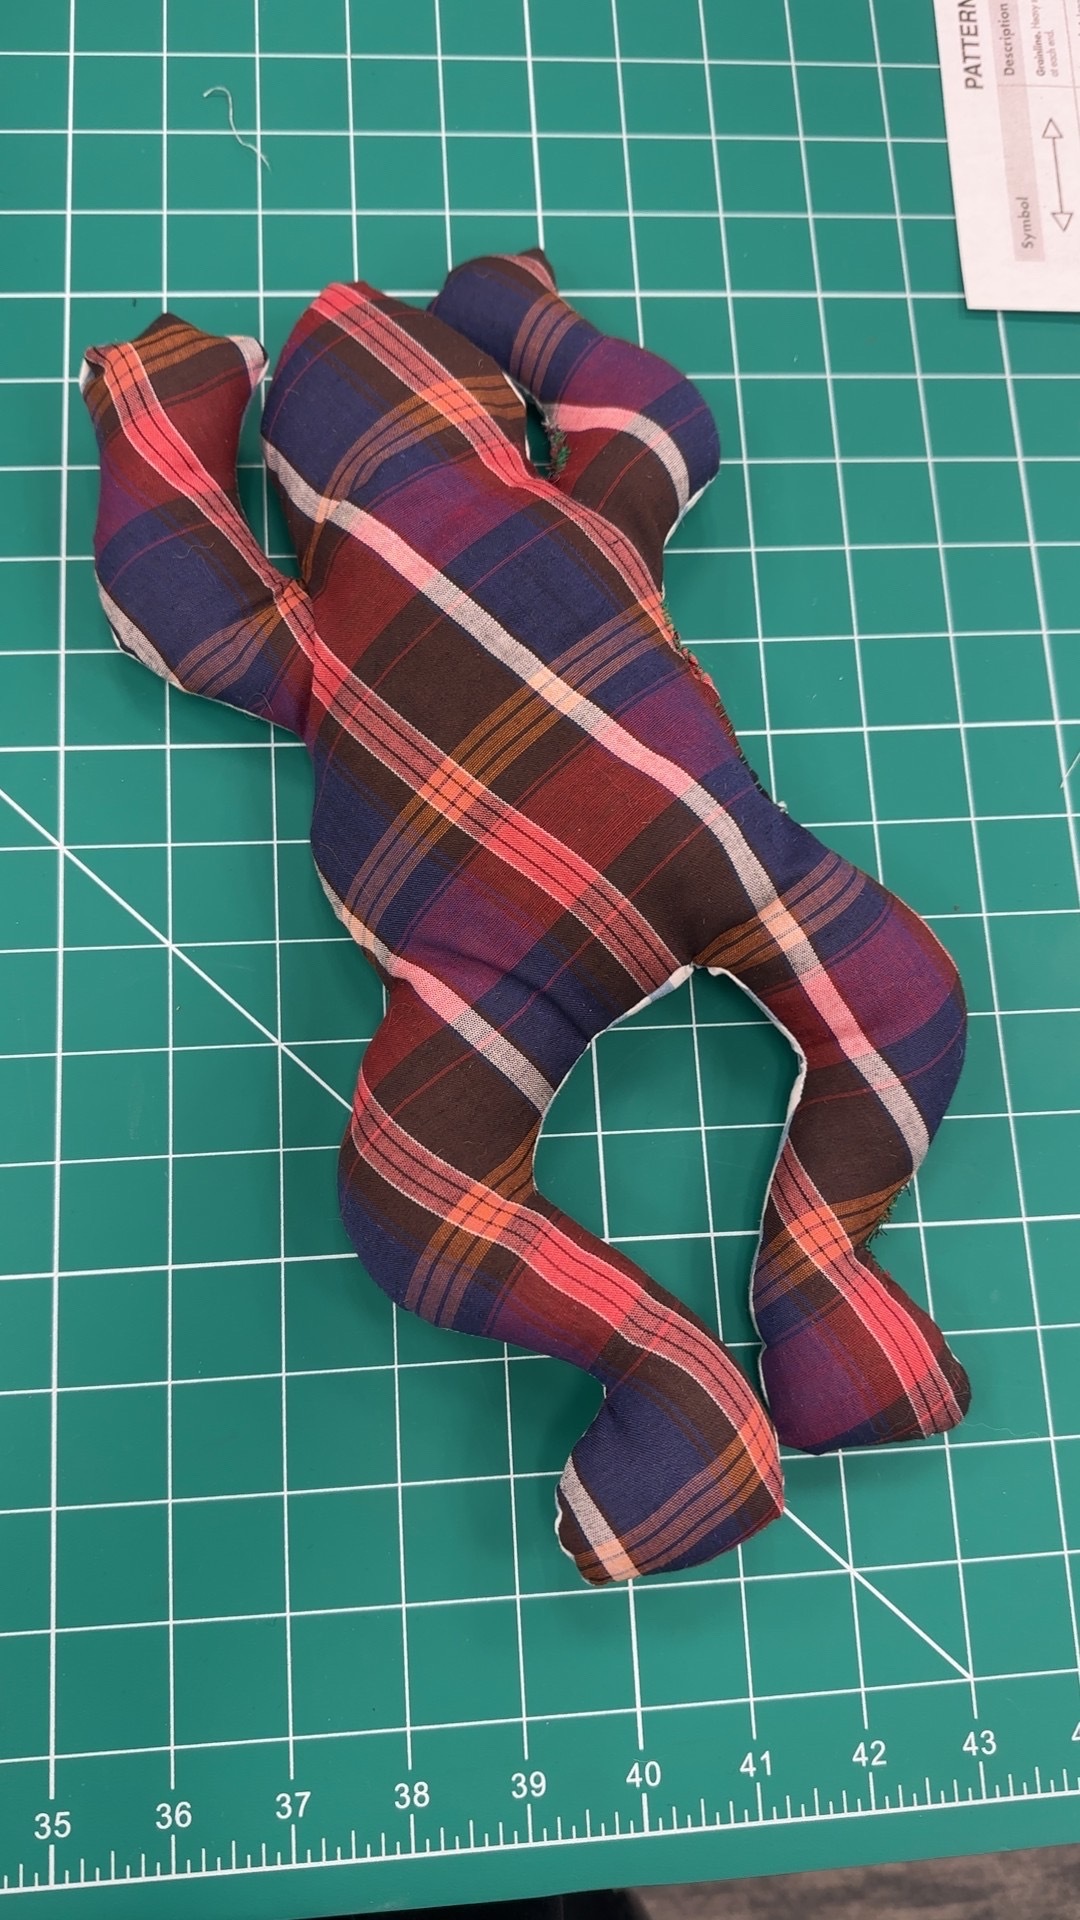
Polyfill limbs, split pea body. Made with scrap material. I did not get a picture of its underside, but it is a blue and white striped pattern.

Polyfill limbs, split pea body. Made with scrap material. I did not get a picture of its underside, but it is a blue and white striped pattern.

0

GODZILLA

preview

Finally finished this cutie! Pattern from CholyKnight. Body is a thrifted fleece blanket, claws are a thrifted pair of pajama pants, and spikes are a thrifted button-down. Eyes and mouth are felt. Body is stuffed with polyfill; eyeridges, feet, arms, and spikes are stuffed with fleece scraps from cutting the body pieces.

Pattern is available free here: cholyknight.com/2025/03/…/godzilla-chonky-t-rex/

Finally finished this cutie! Pattern from CholyKnight. Body is a thrifted fleece blanket, claws are a thrifted pair of pajama pants, and spikes are a thrifted button-down. Eyes and mouth are felt. Body is stuffed with polyfill; eyeridges, feet, arms, and spikes are stuffed with fleece scraps from cutting the body pieces.

Pattern is available free here: cholyknight.com/2025/03/…/godzilla-chonky-t-rex/

0

Barbie Princess of Portuguese

preview

cross-posted from: discuss.tchncs.de/post/66295334

Not very princess-like in this look 😅

Bought these shorts and top from a local maker.

I think she did an excellent job. The shorts have real pockets:

And they have a little snap at the back:

The top closes with Velcro at the back:

A few more photos:

Really like these sneakers from Zuru balls. They’re massive, so she can stand on her own in them:

As for the doll herself: I like her a lot, but her wavy hair require some maintenance. I have to comb them from time to time.

cross-posted from: discuss.tchncs.de/post/66295334

Not very princess-like in this look 😅

Bought these shorts and top from a local maker.

I think she did an excellent job. The shorts have real pockets:

And they have a little snap at the back:

The top closes with Velcro at the back:

A few more photos:

Really like these sneakers from Zuru balls. They’re massive, so she can stand on her own in them:

As for the doll herself: I like her a lot, but her wavy hair require some maintenance. I have to comb them from time to time.

0

Garment Fit and Pattern Grading: Which Body Measurements Matter Most?

Lydia Design Studio How Do Apparel Manufacturers Take Body Measurements? www.lydiadesignstudio.com
preview

Accurate body measurements can make a huge difference when developing or adjusting a garment pattern. Even a small measurement issue can affect fit, proportions, and how well a pattern works across different sizes.

Before moving into pattern grading, it helps to double-check key measurements and make sure they are being taken consistently.

For those who sew or make patterns regularly, which measurements do you find most important—or most difficult—to get right?

Accurate body measurements can make a huge difference when developing or adjusting a garment pattern. Even a small measurement issue can affect fit, proportions, and how well a pattern works across different sizes.

Before moving into pattern grading, it helps to double-check key measurements and make sure they are being taken consistently.

For those who sew or make patterns regularly, which measurements do you find most important—or most difficult—to get right?

0

Finally succeeded in sewing in a proper invisible zipper. These two videos helped: https://youtu.be/dilNiUyuL28 and https://youtu.be/NOJuX6doP2Y ...But also having a proper invisible zipper foot and

A flat-lay view of a textured red practice fabric swatch with the blue invisible zipper fully sewn and closed. The seam below the zipper is also stitched. At the very top, the tiny zipper pull is visible, and the left fabric edge shows a partial L-shaped cut, while the top right edge has a corner cutout. The raw, cut edge of the fabric is visible at the very top.
preview

Finally succeeded in sewing in a proper invisible zipper. These two videos helped: https://youtu.be/dilNiUyuL28 and https://youtu.be/NOJuX6doP2Y …But also having a proper invisible zipper foot and not prematurely trimming my seam allowance before adding the zipper.

Hey, I’m learning! The fourth photo shows the previous and first attempt on a practice skirt I made (with a pattern from #FreeSewing, of course!). The three first photos are just on some practice fabric.

#sewing #Bernina #InvisibleZipper
@sewing@lemmy.world

Finally succeeded in sewing in a proper invisible zipper. These two videos helped: https://youtu.be/dilNiUyuL28 and https://youtu.be/NOJuX6doP2Y …But also having a proper invisible zipper foot and not prematurely trimming my seam allowance before adding the zipper.

Hey, I’m learning! The fourth photo shows the previous and first attempt on a practice skirt I made (with a pattern from #FreeSewing, of course!). The three first photos are just on some practice fabric.

#sewing #Bernina #InvisibleZipper
@sewing@lemmy.world

0

Lengthening sleeves - upcycling

preview

I cut up an old too big shirt to make two new-for-us shirts a better fit.
Tall people have it rough.

I’m a beginner (to machine sewing) - and it’s astonishing how many mistakes can someone make doing a simple project like this.

It is far from perfect, but as my Mom would say: nobody going to tell you to stop and giving you a better one for free.

I cut up an old too big shirt to make two new-for-us shirts a better fit.
Tall people have it rough.

I’m a beginner (to machine sewing) - and it’s astonishing how many mistakes can someone make doing a simple project like this.

It is far from perfect, but as my Mom would say: nobody going to tell you to stop and giving you a better one for free.

0

I Made a Dress for Barbie and MengF

preview

A dress for standard Barbie and MengF bodies.

I used an Etsy pattern for the upper part of the dress and made the skirt myself. The upper section of the skirt is a half-circle, while the lower section is simply a gathered rectangle.

The dress fastens with three metal snaps.

To make the skirt drape more naturally, I wet it and scrunched it to create soft vertical creases. Then I laid it out on a table and left it to dry in that shape.

A dress for standard Barbie and MengF bodies.

I used an Etsy pattern for the upper part of the dress and made the skirt myself. The upper section of the skirt is a half-circle, while the lower section is simply a gathered rectangle.

The dress fastens with three metal snaps.

To make the skirt drape more naturally, I wet it and scrunched it to create soft vertical creases. Then I laid it out on a table and left it to dry in that shape.

0

Advice on waist alteration

preview

Hey guys. I have a pair of jeans on which the waist is 14 cm too large. I was thinking of taking in 4 cm from each side and adding two 3 cm darts at the back. Would this work or is there a better way to go about it?

Hey guys. I have a pair of jeans on which the waist is 14 cm too large. I was thinking of taking in 4 cm from each side and adding two 3 cm darts at the back. Would this work or is there a better way to go about it?

0

Just finished my FreeSewing Crux Climbing pants. I first made a muslin, a first for me, just to see where the problem areas were and to reduce the amount of mistakes on the fancy pink fabric.

Close-up view of the articulated knee section of a pair of tan, avocado-dyed cotton pants laid out on brick paving.
preview

Just finished my FreeSewing Crux Climbing pants. I first made a muslin, a first for me, just to see where the problem areas were and to reduce the amount of mistakes on the fancy pink fabric.

I also tried dying the muslin using saved avocado pits and shells, which worked out pretty well. I also tried out some of my Bernina 930’s decorative stitches on the muslin. I figured just the topstitching was fancy enough for the pink denim.

Both feature these nice articulated knees and a gusset, a very interesting part of these. The fly of the muslin isn’t perfect on the inside, but that’s on the inside so 🤷

#sewing #FreeSewing #FreeSewingCrux #Jeans #Bernina #TopStitching #Climbing #bouldering
@sewing@lemmy.world @freesewing@freesewing.social

Just finished my FreeSewing Crux Climbing pants. I first made a muslin, a first for me, just to see where the problem areas were and to reduce the amount of mistakes on the fancy pink fabric.

I also tried dying the muslin using saved avocado pits and shells, which worked out pretty well. I also tried out some of my Bernina 930’s decorative stitches on the muslin. I figured just the topstitching was fancy enough for the pink denim.

Both feature these nice articulated knees and a gusset, a very interesting part of these. The fly of the muslin isn’t perfect on the inside, but that’s on the inside so 🤷

#sewing #FreeSewing #FreeSewingCrux #Jeans #Bernina #TopStitching #Climbing #bouldering
@sewing@lemmy.world @freesewing@freesewing.social

0

Mighty chuffed with how the topstitching is coming along on my #FreeSewingCrux climbing pants! I figured I could get away with the hot pink stretch denim for sports gear. And if not, I say I can.

A pair of pink climbing pants laid flat on a stone patio in bright sunlight, showing the curved front pocket shapes and center front seams marked with light-colored thread. Strong shadows from a balcony railing fall across the fabric.
preview

Mighty chuffed with how the topstitching is coming along on my #FreeSewingCrux climbing pants! I figured I could get away with the hot pink stretch denim for sports gear. And if not, I say I can.

I’m using my Bernina’s triple stitch for the top stitching (still cheaper than special topstitching thread, so 🤷). The triple stitch started acting up after using the machine’s basting stitch setting though (see photo 4), so I’ve gotten in touch with the company I bought it from. While waiting for them to video call me, though, I used the overlock stitch for a while to finish an edge, and it started working perfectly again.

So that’s nice, I guess… Though I would prefer it to know what caused the issue and how I can solve it without having to overlock two sideseams for pants first.

#sewing #FreeSewing #Jeans #Bernina #TopStitching #Climbing #bouldering
@sewing@lemmy.world @freesewing@freesewing.social

Mighty chuffed with how the topstitching is coming along on my #FreeSewingCrux climbing pants! I figured I could get away with the hot pink stretch denim for sports gear. And if not, I say I can.

I’m using my Bernina’s triple stitch for the top stitching (still cheaper than special topstitching thread, so 🤷). The triple stitch started acting up after using the machine’s basting stitch setting though (see photo 4), so I’ve gotten in touch with the company I bought it from. While waiting for them to video call me, though, I used the overlock stitch for a while to finish an edge, and it started working perfectly again.

So that’s nice, I guess… Though I would prefer it to know what caused the issue and how I can solve it without having to overlock two sideseams for pants first.

#sewing #FreeSewing #Jeans #Bernina #TopStitching #Climbing #bouldering
@sewing@lemmy.world @freesewing@freesewing.social

0

Witchy dresses

preview

Bought from a local master:

Closeups (yes, I have a cat 😅):

I really like the style. A few more photos (my PC on the background ruins the aesthetic a bit, but that’s were they usually stay 🙂):

Bought from a local master:

Closeups (yes, I have a cat 😅):

I really like the style. A few more photos (my PC on the background ruins the aesthetic a bit, but that’s were they usually stay 🙂):

0

Ana Restyle

preview

Bought these three outfits from a local artist. The most impressive part is the pockets:

I love this level of detail. I can even put my pinky inside it:

The shorts close with a button at the back:

The top uses a Velcro fastener:

A few more photos just for fun:

Bought these three outfits from a local artist. The most impressive part is the pockets:

I love this level of detail. I can even put my pinky inside it:

The shorts close with a button at the back:

The top uses a Velcro fastener:

A few more photos just for fun:

0

Evening outfits

preview

Bought these 3 outfits from a local artist:

A few closeups on Mermaid (this doll is not mine):

Dresses have a tiny zipper on the back and a hook which prevents from unzipping:

The one on Lina is probably my favorite. It has an attached cape that fastens at the back with a button:

And finally the one on my alien Barbie:

It’s a two-piece set:

All the outfits are also lined on the inside:

It adds to the realism 🙂

Bought these 3 outfits from a local artist:

A few closeups on Mermaid (this doll is not mine):

Dresses have a tiny zipper on the back and a hook which prevents from unzipping:

The one on Lina is probably my favorite. It has an attached cape that fastens at the back with a button:

And finally the one on my alien Barbie:

It’s a two-piece set:

All the outfits are also lined on the inside:

It adds to the realism 🙂

0

Does anyone know a good reputable source for linen by the yard in the US?

preview

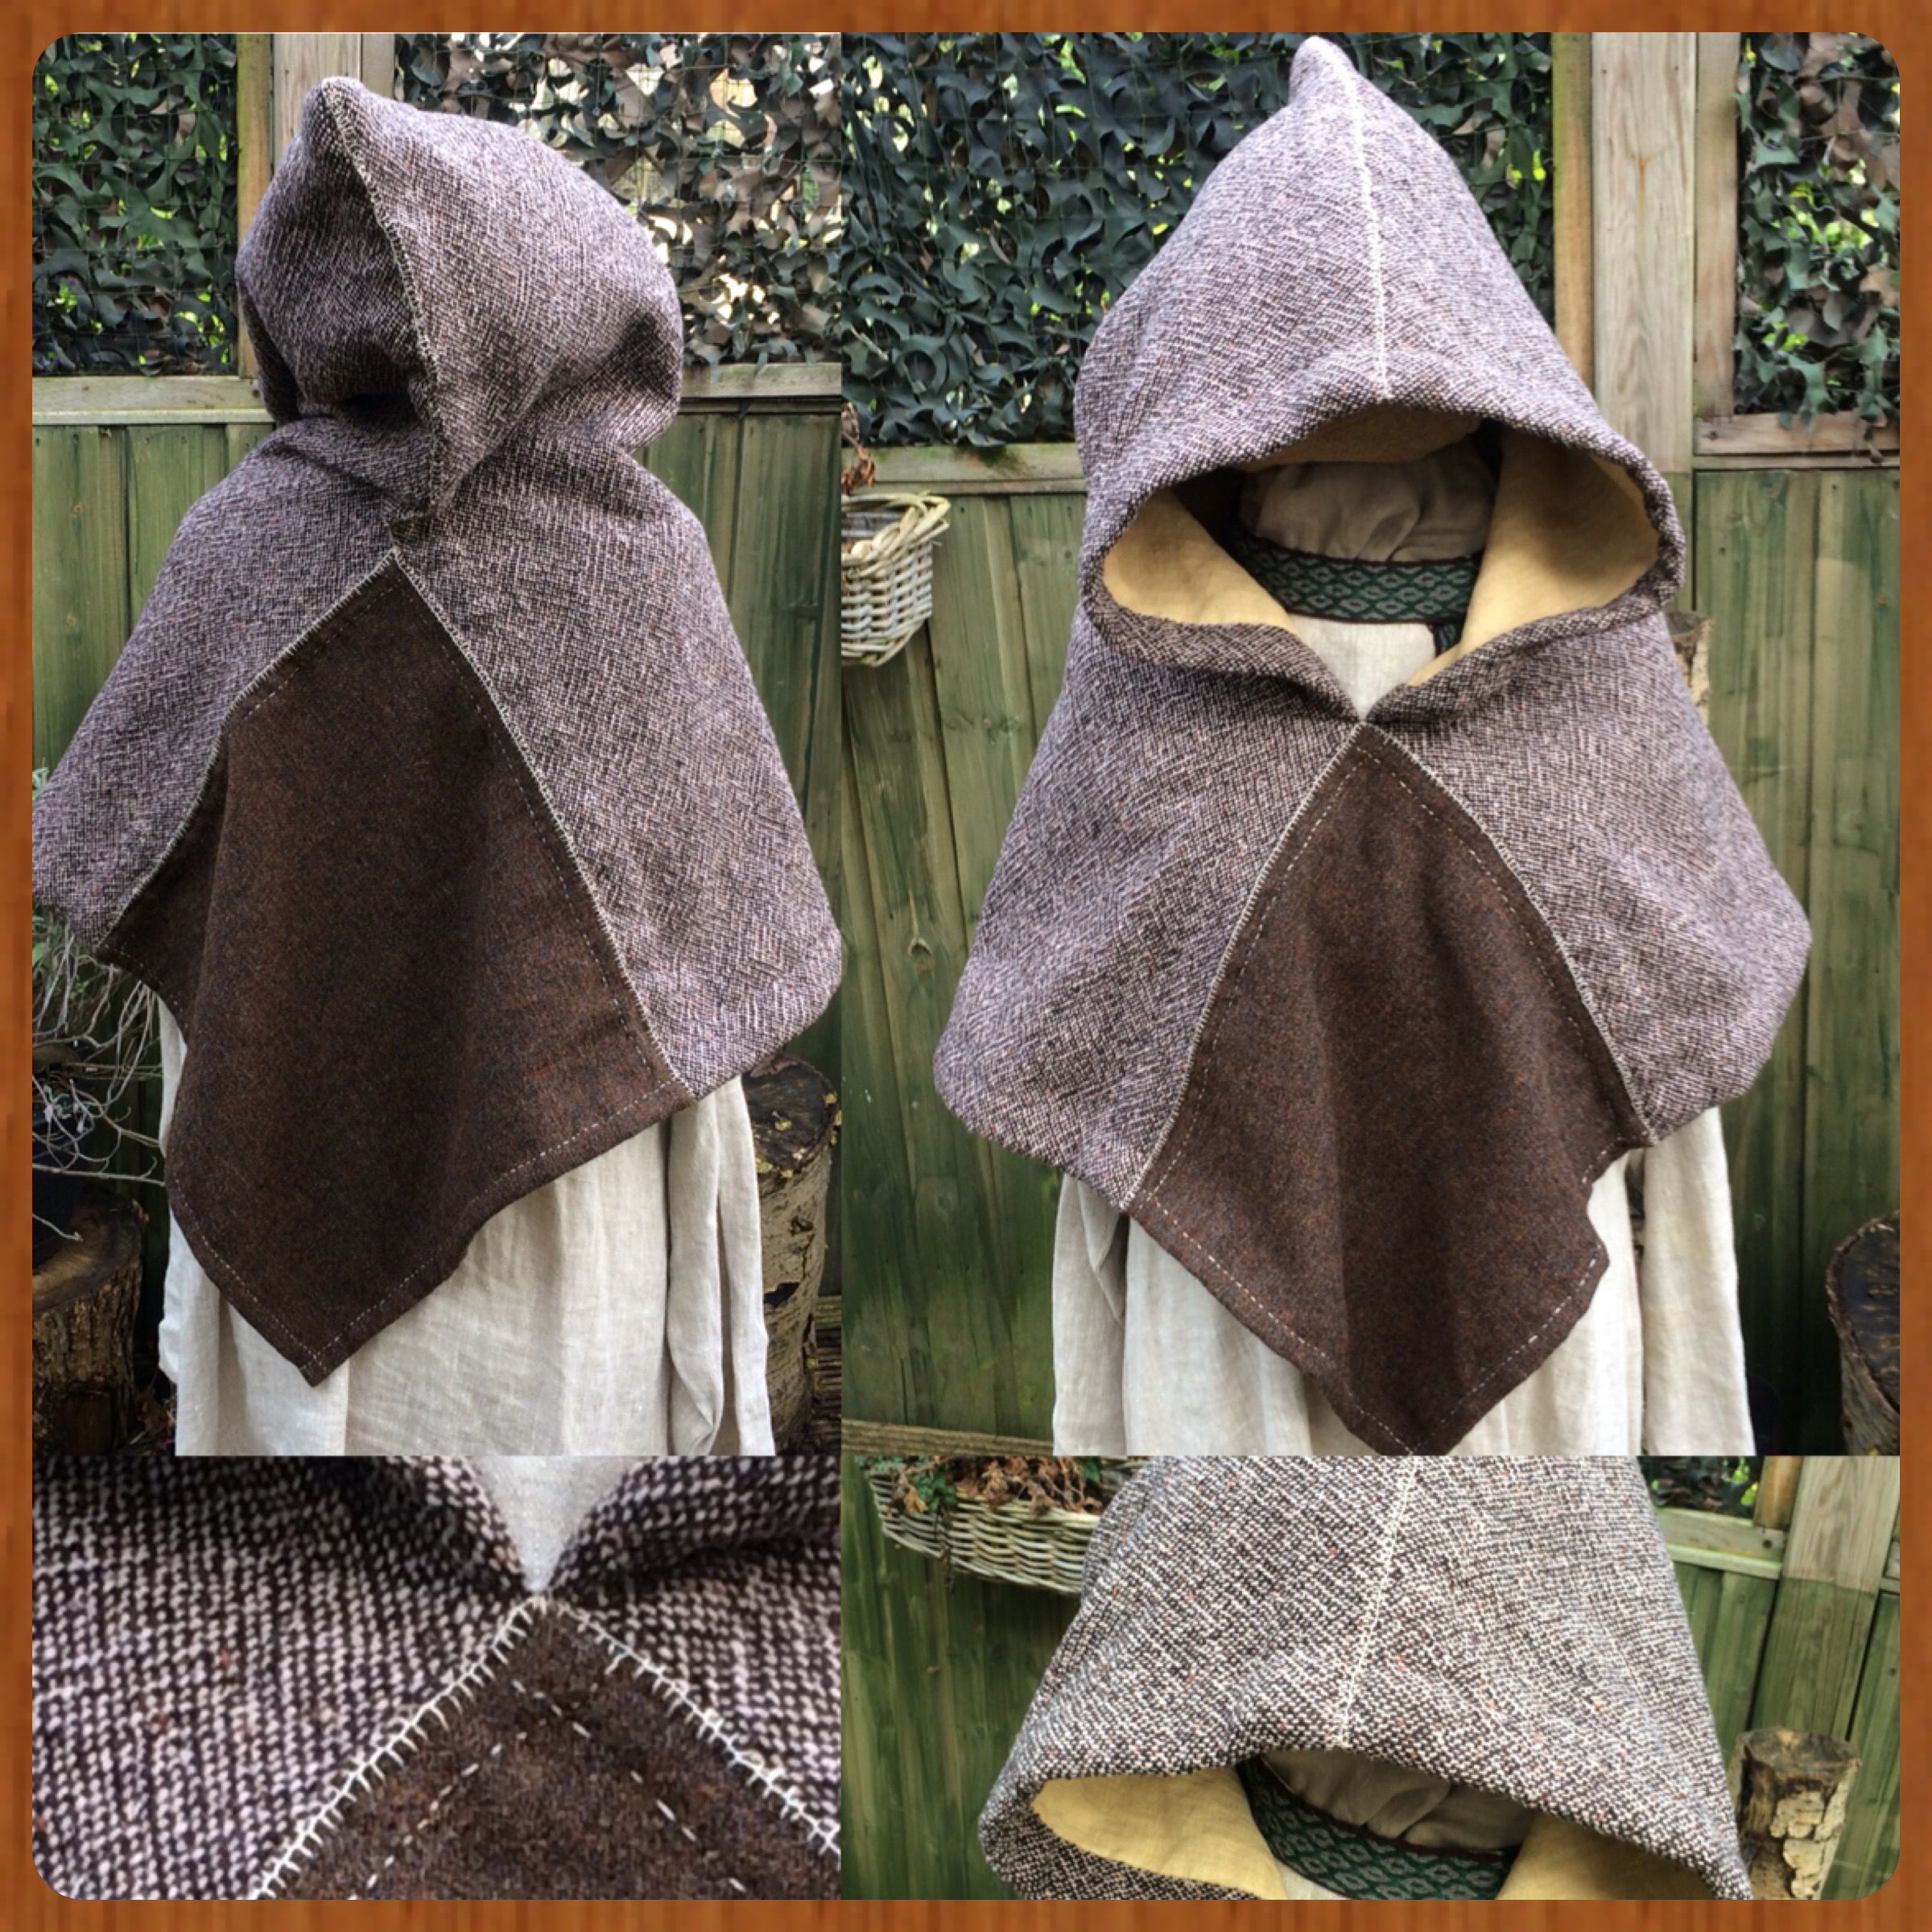
I am going to make a linen Skjoldehamn Hood. I know, they are supposed to be wool, but this is for summer in New Mexico. I am using it for sun shade, not warmth.

I think I need two yards for it. Looking for light earthy tones, but beggars cannot be choosers.

I am going to make a linen Skjoldehamn Hood. I know, they are supposed to be wool, but this is for summer in New Mexico. I am using it for sun shade, not warmth.

I think I need two yards for it. Looking for light earthy tones, but beggars cannot be choosers.

0

Sundresses

preview

Bought these 2 dresses from a local master. Quite happy with stitching and overall quality. I think she repurposed an old fabric based on the smell, but I don’t mind this at all. I think it’s a great use for things like this.

A few closeups:

They close on the back with a little plastic button:

Bought these 2 dresses from a local master. Quite happy with stitching and overall quality. I think she repurposed an old fabric based on the smell, but I don’t mind this at all. I think it’s a great use for things like this.

A few closeups:

They close on the back with a little plastic button:

0

Closes for Lina (Barbie)

preview

cross-posted from: discuss.tchncs.de/post/60447051

Ordered clothes from a local master. Everything is so tiny! For the belt I had to use pliers to get it through. Pockets are also real. But shirt buttons are decorative - under them are real inner buttons:

They’re still tiny, but easy to close.

More photos:

cross-posted from: discuss.tchncs.de/post/60447051

Ordered clothes from a local master. Everything is so tiny! For the belt I had to use pliers to get it through. Pockets are also real. But shirt buttons are decorative - under them are real inner buttons:

They’re still tiny, but easy to close.

More photos:

0

Spring clothes for Odile (Barbie)

preview

cross-posted from: discuss.tchncs.de/post/60443622

I ordered it from a local maker. I really like it when clothes have tiny patterns. They make the miniature look more realistic.

cross-posted from: discuss.tchncs.de/post/60443622

I ordered it from a local maker. I really like it when clothes have tiny patterns. They make the miniature look more realistic.

0

Finished sewing my first dress for Barbie

preview

I finished sewing my first dress for Barbie. Before this, my sewing experience - especially with a sewing machine - was pretty limited, so this feels like a real victory for me.

I used a ready-made pattern from Etsy. For marking the light-colored lining fabric, I used a washable marker, and for the dark fabric - a white pen.

I thought a dress like this would be simple to make. I was wrong. In reality, I had to unpick the seams and redo the stitching many times. The pattern has very difficult curved seams. I could have sewn it by hand quite easily, but doing it on a sewing machine was quite a challenge. It took a lot of time, but eventually I managed to sew all the dress pieces and all the lining pieces together.

After that, only the final steps remained: sewing on the placket for the snaps, sewing everything together, turning it inside out, closing the opening, and attaching the layers at the bottom of the dress. The last two steps were done by hand, which I was very happy about! My first complex sewing project is finished, and I’m really happy with it.

I used two types of snaps: metal (5 mm) in places where the snaps needed stronger support, and plastic (4 mm) where the stress is minimal.

You can see in the photos that the metal snaps stick out quite a lot and create an unattractive gap between the fabric layers. If I had used only plastic snaps, it would have looked much more aesthetically pleasing, but they would have broken frequently and I would have had to repair the dress. You always have to decide what matters more in a particular case: aesthetics or functionality. For this dress, I chose functionality.

Also, looking back at my mistakes, I would probably mention the thickness of the lining fabric. The pattern creator uses thin mesh, and that is definitely the right choice. But this was my first learning project, and I tried to use materials I already had.

I finished sewing my first dress for Barbie. Before this, my sewing experience - especially with a sewing machine - was pretty limited, so this feels like a real victory for me.

I used a ready-made pattern from Etsy. For marking the light-colored lining fabric, I used a washable marker, and for the dark fabric - a white pen.

I thought a dress like this would be simple to make. I was wrong. In reality, I had to unpick the seams and redo the stitching many times. The pattern has very difficult curved seams. I could have sewn it by hand quite easily, but doing it on a sewing machine was quite a challenge. It took a lot of time, but eventually I managed to sew all the dress pieces and all the lining pieces together.

After that, only the final steps remained: sewing on the placket for the snaps, sewing everything together, turning it inside out, closing the opening, and attaching the layers at the bottom of the dress. The last two steps were done by hand, which I was very happy about! My first complex sewing project is finished, and I’m really happy with it.

I used two types of snaps: metal (5 mm) in places where the snaps needed stronger support, and plastic (4 mm) where the stress is minimal.

You can see in the photos that the metal snaps stick out quite a lot and create an unattractive gap between the fabric layers. If I had used only plastic snaps, it would have looked much more aesthetically pleasing, but they would have broken frequently and I would have had to repair the dress. You always have to decide what matters more in a particular case: aesthetics or functionality. For this dress, I chose functionality.

Also, looking back at my mistakes, I would probably mention the thickness of the lining fabric. The pattern creator uses thin mesh, and that is definitely the right choice. But this was my first learning project, and I tried to use materials I already had.

0

Janome 454/554D experiences

preview

Janome released new Sailing Line serger models 454/554/654D last year and they have now been reaching shelves also locally here.

Notable improvements have been more stable rubber feets with less vibration, new design of the feet for less slipping when sewing multiple layers, and less noise when sewing. It has also double the amount of feed dogs but not sure how much they will affect fabric feeding in use unless sewing thin fabrics.

Anyone yet with experiences how they have been? Any tips what to ask and focus on when testing one? I’m considering getting 554D to replace our old basic Singer and going to retail for testing next Tuesday.

Janome released new Sailing Line serger models 454/554/654D last year and they have now been reaching shelves also locally here.

Notable improvements have been more stable rubber feets with less vibration, new design of the feet for less slipping when sewing multiple layers, and less noise when sewing. It has also double the amount of feed dogs but not sure how much they will affect fabric feeding in use unless sewing thin fabrics.

Anyone yet with experiences how they have been? Any tips what to ask and focus on when testing one? I’m considering getting 554D to replace our old basic Singer and going to retail for testing next Tuesday.

0

Basic dolman sleeve T shirt, only a lil wonky

preview

Instead of working on the 6 other projects on the craft table, I started a new one of a comfy basic T shirt. Straight seams on serger, neckline on regular machine. If I had any common sense, I’d just do a fold-over neckline, but no, I had to do the lil collar, with a scrap of bias tape to hide my sins (forgot to turn the collar so the back seam was on the inside). Also need to tack down a few points where my knit fabric wiggled away from under the seam.

Instead of working on the 6 other projects on the craft table, I started a new one of a comfy basic T shirt. Straight seams on serger, neckline on regular machine. If I had any common sense, I’d just do a fold-over neckline, but no, I had to do the lil collar, with a scrap of bias tape to hide my sins (forgot to turn the collar so the back seam was on the inside). Also need to tack down a few points where my knit fabric wiggled away from under the seam.

0

My wife sewed a pullover

preview

I’m not a native English speaker, so I hope I called this piece of clothing correctly. It was her first attempt. The sweater turned out to be a little big, but I think it looks nice 🙂

The skirt was made by a local maker.

The clothes are on a Barbie Dreamtopia Mermaid Odile with a human body from AliExpress called MengF.

I’m not a native English speaker, so I hope I called this piece of clothing correctly. It was her first attempt. The sweater turned out to be a little big, but I think it looks nice 🙂

The skirt was made by a local maker.

The clothes are on a Barbie Dreamtopia Mermaid Odile with a human body from AliExpress called MengF.

0

Finished my second octoplushy! I'm not giving them names, that's up to the recipients. (Hopefully! I hope the parents like them enough, they're perhaps not very cuddly...) These are both for newborn

'A high-angle shot of the second octopus plushie resting on a yellow cushion. The red ribbed fabric of its head and tentacles is prominent. It features distinctive yellow stitched facial features: two round eyes and a wide, grinning mouth. One tentacle is curled to the side, revealing a glimpse of the light-colored lining underneath.'
preview

Finished my second octoplushy! I’m not giving them names, that’s up to the recipients. (Hopefully! I hope the parents like them enough, they’re perhaps not very cuddly…) These are both for newborn babies, one of whom can be born any day now!

This one has some thicker tentacles, as well as a little bit more #sashiko to spice it up. The face is notably different, too. I think I like the embroidered face more, but this one has a certain manic charm.

#octoplushy #freesewing #sewing #plushie #plushies @sewing@lemmy.world @sewing@fedigroups.social @freesewing@freesewing.social

Finished my second octoplushy! I’m not giving them names, that’s up to the recipients. (Hopefully! I hope the parents like them enough, they’re perhaps not very cuddly…) These are both for newborn babies, one of whom can be born any day now!

This one has some thicker tentacles, as well as a little bit more #sashiko to spice it up. The face is notably different, too. I think I like the embroidered face more, but this one has a certain manic charm.

#octoplushy #freesewing #sewing #plushie #plushies @sewing@lemmy.world @sewing@fedigroups.social @freesewing@freesewing.social

0

Working on a second #octoplushie using a pattern from #FreeSewing. The last one I made had skinny and long tentacles, which were hard to stuff. So with this one I altered the pattern's settings a bit,

One half of an octopus plushie. It has a face made from some old fabric scraps.
preview

Working on a second #octoplushie using a pattern from #FreeSewing. The last one I made had skinny and long tentacles, which were hard to stuff. So with this one I altered the pattern’s settings a bit, made the tentacles shorter and fatter. We’ll see how it goes!

The #baby I’m making it for was born a month early, last week… So I feel some time pressure!

#sewing #plushie @sewing@a.gup.pe @sewing@lemmy.world @sewing@fedigroups.social

Working on a second #octoplushie using a pattern from #FreeSewing. The last one I made had skinny and long tentacles, which were hard to stuff. So with this one I altered the pattern’s settings a bit, made the tentacles shorter and fatter. We’ll see how it goes!

The #baby I’m making it for was born a month early, last week… So I feel some time pressure!

#sewing #plushie @sewing@a.gup.pe @sewing@lemmy.world @sewing@fedigroups.social

0

Looking for filling material for a camera bag

preview

Hey, any idea what term I need to search for to get filling material for a camera bag?

Around 5mm thick, too dampen any impacts, still go between outer and inner layer

Hey, any idea what term I need to search for to get filling material for a camera bag?

Around 5mm thick, too dampen any impacts, still go between outer and inner layer

0

slipcase for a tablet

A navy blue denim slipcase folder. It is lined with a blue and green quilting cotton and the edges are bound with bias binding in the same material. It has rows of decorative quilting stitches running down its length and a square of velcro as a fastener. The top of my supernote is just visible.
preview

It’s a bit snug, and I think the next iteration will get a pen pocket, but it was mostly an exercise in using the quilting stitches on my new machine. I made the bias binding. Based off the free padded case pattern from the Assembly Line, theassemblylineshop.com/…/free-padded-case-sewing…

It’s a bit snug, and I think the next iteration will get a pen pocket, but it was mostly an exercise in using the quilting stitches on my new machine. I made the bias binding. Based off the free padded case pattern from the Assembly Line, theassemblylineshop.com/…/free-padded-case-sewing…

0

Can someone tell me what I'm doing wrong?

preview

I recently was given this Singer 401a and I just can’t seem to get it to work. I know absolutely nothing about sewing machines but I’d like to start using it. I opened it up and nothing appears to be damaged. I oiled some of the gears that seemed like they needed it but I’ve had no luck. The big spindle on the right and the gears it connects to run just fine but nothing else moves at all. I’ve tried every switch and lever I could find but nothing seems to work.

I’m hoping there’s something simple I’m missing simply because I don’t know what I’m doing lol

If this is the wrong place for this kind of post please feel free to let me know i just thought I would ask here first before I resort to paying someone to look at it

I recently was given this Singer 401a and I just can’t seem to get it to work. I know absolutely nothing about sewing machines but I’d like to start using it. I opened it up and nothing appears to be damaged. I oiled some of the gears that seemed like they needed it but I’ve had no luck. The big spindle on the right and the gears it connects to run just fine but nothing else moves at all. I’ve tried every switch and lever I could find but nothing seems to work.

I’m hoping there’s something simple I’m missing simply because I don’t know what I’m doing lol

If this is the wrong place for this kind of post please feel free to let me know i just thought I would ask here first before I resort to paying someone to look at it