
0

Emacs core devs says FOSS and Emacs "must" support slavery. What's the fork?

preview

The case is already making some news: in the context of LLM / “AI” contributions to Emacs and to Free Software in general, a core dev of Emacs made the statement that Emacs, and FOSS in general, “must” support code or contributions generated via slavery.

Responses, of course, are ongoing.

What is the fork if Emacs turns out to have been turned into a fascist playground just like so many other projects? The surrounding context suggests one: “Human Emacs”.

[1] flyingpenguin.com/gnu-maintainer-slave-made-code-… [2] mathstodon.xyz/@divyaranjan/117581331940423337

The case is already making some news: in the context of LLM / “AI” contributions to Emacs and to Free Software in general, a core dev of Emacs made the statement that Emacs, and FOSS in general, “must” support code or contributions generated via slavery.

Responses, of course, are ongoing.

What is the fork if Emacs turns out to have been turned into a fascist playground just like so many other projects? The surrounding context suggests one: “Human Emacs”.

[1] flyingpenguin.com/gnu-maintainer-slave-made-code-… [2] mathstodon.xyz/@divyaranjan/117581331940423337

0

markdown-ts-appear: Rendered Markdown, editable in place

preview

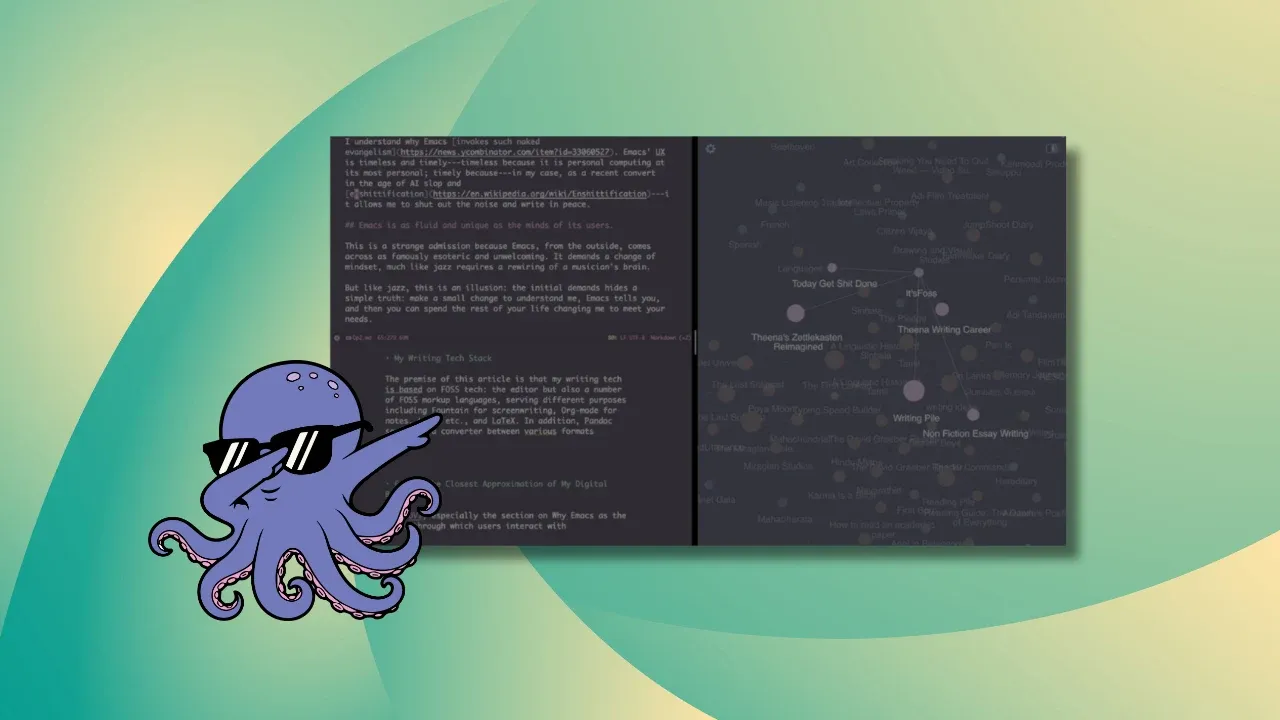
I’ve never been a big fan of the split source/preview workflow for Markdown. I just want to read nicely formatted text and edit it directly, without constantly switching between two views.

So I made markdown-ts-appear.

The idea is similar to org-appear: Markdown looks rendered by default, but when you move the cursor onto an element, its source is revealed for editing. Move away, and it goes back to looking nice. All in the same buffer, without modifying the underlying text.

I also wanted to go a bit beyond just hiding markup, so I ended up adding a bunch of visual improvements: prettier code fences, blockquotes, callouts, link icons, tables that wrap to fit the window, and optional MathJax previews.

It’s built on the new Tree-sitter-based markdown-ts-mode (Emacs 31.1+), so rendering stays fast and responsive. It is available on MELPA.

I’ve been using it for my own Markdown editing, and it’s pretty much the experience I was looking for. Thought I’d share it here in case anyone else has the same itch.

Feedback and bug reports are very welcome!

OC by @thysrael@lemmy.ml

I’ve never been a big fan of the split source/preview workflow for Markdown. I just want to read nicely formatted text and edit it directly, without constantly switching between two views.

So I made markdown-ts-appear.

The idea is similar to org-appear: Markdown looks rendered by default, but when you move the cursor onto an element, its source is revealed for editing. Move away, and it goes back to looking nice. All in the same buffer, without modifying the underlying text.

I also wanted to go a bit beyond just hiding markup, so I ended up adding a bunch of visual improvements: prettier code fences, blockquotes, callouts, link icons, tables that wrap to fit the window, and optional MathJax previews.

It’s built on the new Tree-sitter-based markdown-ts-mode (Emacs 31.1+), so rendering stays fast and responsive. It is available on MELPA.

I’ve been using it for my own Markdown editing, and it’s pretty much the experience I was looking for. Thought I’d share it here in case anyone else has the same itch.

Feedback and bug reports are very welcome!

OC by @thysrael@lemmy.ml

0

Just a reminder that doomemacs.org is the one and only official domain for this project.

Fosstodon Doom Emacs (@doomemacs@fosstodon.org) fosstodon.org
preview

cross-posted from: lemmy.ca/post/70701816

Looks like someone set up a website at doomemacs.com that’s a bunch of LLM generated crap. Stay away!

https://doomemacs.org/ is the official website.

cross-posted from: lemmy.ca/post/70701816

Looks like someone set up a website at doomemacs.com that’s a bunch of LLM generated crap. Stay away!

https://doomemacs.org/ is the official website.

0

Improving the styling of emacs tables with tabularray

preview

So I had the following situation: I am writing my entire software documentation in emacs orgmode, so that I can export it to LaTeX later on. Part of that documentation are quite a lot of tables. The problem is, that by default LaTeX tables (and respectively emacs tables) dont look very good. In this post I will describe my journey of unimaginable pain while going through the process of learning LaTeX in order to gett pretty and uniform tables when exporting orgmode documents to LaTeX. You can find my example files on gitlab. This is primarily meant to be a tutorial and therefore I wont go into every possibility I tried along the way. The technical discussions and tradeoffs (or simply things I could not get to work, even tho they should work) will be discussed the chapter about limitations.

What even does the default look like?

So if we export a table with the default settings, it will look like this:

We can already see the first problem here: Our table is too wide and has no vertical lines. This however can be changed by specifying the columns and the vertical lines:

#+caption: Specifying maximum width and vlines with LaTeX attributes in tabular
#+attr_latex: :align |r|l|p{10cm}|
|-----------+-------------------+----------------------------------------------------------------------------------------|
| Exit code | Type              | Meaning                                                                                |
|-----------+-------------------+----------------------------------------------------------------------------------------|
|         0 | External/Internal | Succesfull operation; logical true                                                     |
|-----------+-------------------+----------------------------------------------------------------------------------------|
|         1 | Internal          | Non successfull operation; logical false                                               |
|-----------+-------------------+----------------------------------------------------------------------------------------|
|         2 | Internal          | A reallly long error message that is long enough to not fit on a single sheet of paper |
|-----------+-------------------+----------------------------------------------------------------------------------------|

Which looks like this when being rendered:

So now our table finally fits on a page and we got vertical lines. There are a number of possible attributes that can be supplied this way, if you want to know more about this, you can find the documentation here. However I think its time to address the obvious: I do not want to paste a bunch of atrributes that I may have to adjust (depending on the table, since we have to specify columns ourselves) for every single table. It is unneccessary work and adds unneccessary lines that could be avoided and dont ever think about changing the way you want your tables to look, because then you can redo the whole process. Its time we find a way to style all of our tables in a way, that they can:

  • Introduce automatic linebreaks if the input gets too long
  • Look the same for all tables of our choice
  • Color individual rows/columns (e.g. make the backgrounf color of the first row grey)
  • Handle tables independendly of their column count
  • Handle tables spanning multiple pages

Creating a global table style in tabularray

Since it seems like that emacs is rather limited in doing anything like a global table style, it became relatively clear, that I would have to go and do this directly in LaTeX. Luckily the tabularray package for LaTeX is able to do exactly this. The tabularray package also makes it much easier to create more complex LaTeX tables, when compared to the regular tabular enviroment. To add the package simply add the following to your file:
#+LATEX_HEADER: \usepackage{tabularray}

Setup

To start we first need to learn some basics about LaTeX and how emacs handles exporting tables to it. And how we have to adjust this behaviour to our needs. Lets take a look at what the second table looks like once emacs has exported it:

 \begin{tabular}{|l|lp{10cm}|r|}
    \hline
    Exit code & Type & Meaning\\
    \hline
    0 & External/Internal & Succesfull operation; logical true\\
    \hline
    1 & Internal & Non successfull operation; logical false\\
    \hline
    2 & Internal & A reallly long error message that is long enough to not fit on a single sheet of paper\\
    \hline
 \end{tabular}

As you can see, the table itself defines each cell using an “&” and adding horizontal lines between them. These lines are being manually added by pressing C-c RET in your table. Emacs also used the tabular enviroment (\begin{tabular}) for the table, which is the default table enviroment for LaTeX. You also see that our latex argument got directly passed to the enviroment as an additional argument (this part is called the inner specification of the enviroment). This will come in handy later, once we replaced the tabular enviroment with our own one.

Our table style

First of all: How do we even insert raw LaTeX into orgmode documents? There is a number of different ways to achieve this. You can add LaTeX headers with #+LATEX_HEADER: or insert a single line by using #+LATEX:. If we want to include multiple lines with #+LATEX:, we can also use the #+BEGIN_EXPORT or #+BEGIN_src syntax. We can even use a seperate orgfile in which we store all of our table styles and include it with #+INCLUDE:, which is what we are going to do here. Dump all the LaTeX into a seperate file, so that we dont have to copy it for all of our documents. The advantage of specifying this on a seperate org file (I will call it table_style.org instead of a plain tex file is, that by doing it this way, you can add all packages that you need for your table style in the table_style.org file itself and don’t have to include them in your main file (you can not use the \usepackage command in the body of a document, which is where the included tex file would be included).

First of all, lets create our new table enviroment:

    \NewTblrEnviron{globaltbl}
    \SetTblrInner[globaltbl]{
    }

What this does is, that it creates a completely new table enviroment called globaltbl and every single table that uses this enviroment will inherit all attributes (which we will set in a second) from it. However we will still be able to override all values for each table.

And now lets add some basic attributes to the inner definition:

  \NewTblrEnviron{globaltbl}
  \SetTblrInner[globaltbl]{
    vlines, 
    hlines,
    width = 0.9\linewidth,
    rowsep = 4pt,
    colsep = 8pt,    
    colspec={X[t,l]X[t,l]X[t,l]X[t,l]},
  }

The hlines and vlines arguments tell tabularray to always draw horizontal and vertical lines between cells, regardless of the appearance of any manually inserted \hline. If the hline option has been given, inserting a \hline into the table will cause tabularray to render a snall gap at the position of the \hline. The width=0.9\linewidth sets the width of the table to 0.9x the width of a single line. The rowsep and colsep attributes control how much space between your text input and your hlines / vlines you have.

If you want a deeper understanding of the colspec attribute please go and look up cell alignemts of the tabularray package. For now all you need to know is, that this defines four columns for our table style and each column will align its text at the top left of the cell (indicated by t and l in the specifications for each column). Since we use the so called X column here, we also get automatic linebreaks in our table. If we dont want this, we would have to use the primitive Q column instead (replace all occurences of X with a Q in the colspec).

Changing behaviour of single rows, columns, cells and even more

So we were able to set the width of our table, but what if I want to e.g. color the first row grey and all following uneven rows too, but in a different shade? Dont worry, all of this is very easy. We simply define these rows in our table style and are good to go:

  row{1} = {
    bg=grey9,
    fg=white,
    font=\bfseries,
    halign=c
  },
  row{odd[3]} = {
    bg=grey5
  }

The same principle can be applied to columns, single cells and even single hlines and vlines:

  row{odd[3]} = {bg=gray9}, %% Change bg color of all odd rows starting with the third row
  column{2} = {halign=r}, %%align the second column to the right
  cell{4}{3} = {bg=red}, %% Change the bg color of the cell in the 4th row and third column
  hline{3}={dotted, red}, %%Change the way the third horizontal line gets rendered

We can also specify ranges of columns (etc).

  column{1-2} = {mode=text} %%changes the mode of the first two columns
  column{Z} = {mode=text} %%Change the mode of the last column
  column{3-Y} = {mode=math} %%changes the mode of each column except the first two and the last column

Using the table style

So now that we know how to create our table style, how do we use it inside our org files? Sadly it seems like there is no way to directly set the enviroment of our tables to our custom enviroment (if you know a better solution please tell me), however there are a few tricks we can use. Using the ~\renewenviroment~ command from LaTeX, we can tell the LaTeX engine to replace the enviroment of all following tables to another enviroment (it can be used for more than tables, but we only care about tables here). Since the command only affects following enviroments, we can also use the command multiple times in a file to cycle between multiple layouts. Lets assume we have defined the table enviroments globaltbl and nonglobaltbl, then we could use the corresponding styles like the following:

#+LATEX: \renewenvironment{tabular}{\begin{globaltbl}}{\end{globaltbl}}
.... table 1 ....

.... table 2 ....

#+LATEX: \renewenvironment{tabular}{\begin{nonglobaltbl}}{\end{nonglobaltbl}}
.... table 3 ....

#+LATEX: \renewenvironment{tabular}{\begin{globaltbl}}{\end{globaltbl}}
.... table 4 ....

Overriding preset values

So now that we have seen how to pre set values, how do we override them for a single table? Well, we just have to pass our table the corresponding arguemnts to the table. So if I as example want to set the color of a single cell in my table (lets say the top left cell) to red. Well, I simply add #+attr_latex: :align cell{1}{1} = {bg=red} to my table and Im good to go. Everything that we can specify in the inner definition of our enviroment, can be overwritten this way. Using this we can go absolutely wild with our tables, without affecting any other tables:

#+attr_latex: :align row{2}={bg=blue,fg=white}, row{1}={fg=green, halign=l}, width=0.5\linewidth, hline{3}={text=<<<<<<<<<<, red}
#+caption: Its always possible to override absolutely anything, while still using nonglobaltbl
|-----------+-------------------+----------------------------------------------------------------------------------------|
| Exit code | Type              | Meaning                                                                                |
|-----------+-------------------+----------------------------------------------------------------------------------------|
|         0 | External/Internal | Succesfull operation; logical true                                                     |
|-----------+-------------------+----------------------------------------------------------------------------------------|
|         1 | Internal          | Non successfull operation; logical false                                               |
|-----------+-------------------+----------------------------------------------------------------------------------------|
|         2 | Internal          | A reallly long error message that is long enough to not fit on a single sheet of paper |
|-----------+-------------------+----------------------------------------------------------------------------------------|

Overriding existing enviroments

Now lets say, what happens if our table suddenly becomes really really big and is longer than it is possible to vertically fit onto a single page? Well, lucky for us, tabularray got us covered by providing the longbtlr enviroment for us to use for this case. We can simply override its specifications:

\SetTblrInner[longtblr]{
  %%specifications as we are used to
}

So whats about multirow/-column cells?

First up: As far as I’m concerned, there is no way to create multicolumn or multirow cells inside emacs, the way it is possible with LaTeX, without having to dig very deep into the latex-export-backend of orgmode. This is 100% out of my skillrange and it is something I dont need (yet). If you really need this, you will have to use LaTeX directly. If you really need the math functionalities, but also multirow&shy;column cells, and have so many of them, that you cant type them by hand anymore, than its probably time to automate the creation of your tables in any other way. The only way it is possible to mimick multirow/-column cells is by controlling where hlines and vlines are being drawn. The easiest way to mimic multirow columns is to turn off hlines and manually insert the lines in the orgmode table by pressing C-C RET inside your table, as it can be seen here:

Using the default specifications for a table

If you want to use an empty enviroment that has no specifications (which means it will look like the default tabularray table), simply define a new enviroment, without setting its inner specification:
\NewTblrEnviron{deftblr}

Limitations

One limitation is, that with the current approach of using the \renewenviroment command, you will no longer be able to use your default export enviroment later in your file. This might not be a problem when working alone, but it might become a problem when collaborating with other people. Sadly I was not able to figure out if there is any other way to reliably change the enviroment of a table (or respectively all tables in the document). However I was also never able to change the enviroment of a single table to tblr (the name used for tabularray in emacs) the way it has been decribed here. It is also not possible to embed tables directly into the text. This can only be achieved by typesetting the table directly in LaTeX and using tabularrays talltblr enviroment.

Conclusion

I would say that jumping through the hoops to create some good looking table style is really worth it. First of all its way better than manually pasting the same 20 arguments for every table. It allows you to use multiple styles in the same document and if you need extended functionality of the tabularray package like multirow/-column cells or the talltblr enviroment to embed tables directly into your text, then it is pretty easy to do this, since new styles can be created on the fly and tabularray is relatively easy to use.

So I had the following situation: I am writing my entire software documentation in emacs orgmode, so that I can export it to LaTeX later on. Part of that documentation are quite a lot of tables. The problem is, that by default LaTeX tables (and respectively emacs tables) dont look very good. In this post I will describe my journey of unimaginable pain while going through the process of learning LaTeX in order to gett pretty and uniform tables when exporting orgmode documents to LaTeX. You can find my example files on gitlab. This is primarily meant to be a tutorial and therefore I wont go into every possibility I tried along the way. The technical discussions and tradeoffs (or simply things I could not get to work, even tho they should work) will be discussed the chapter about limitations.

What even does the default look like?

So if we export a table with the default settings, it will look like this:

We can already see the first problem here: Our table is too wide and has no vertical lines. This however can be changed by specifying the columns and the vertical lines:

#+caption: Specifying maximum width and vlines with LaTeX attributes in tabular
#+attr_latex: :align |r|l|p{10cm}|
|-----------+-------------------+----------------------------------------------------------------------------------------|
| Exit code | Type              | Meaning                                                                                |
|-----------+-------------------+----------------------------------------------------------------------------------------|
|         0 | External/Internal | Succesfull operation; logical true                                                     |
|-----------+-------------------+----------------------------------------------------------------------------------------|
|         1 | Internal          | Non successfull operation; logical false                                               |
|-----------+-------------------+----------------------------------------------------------------------------------------|
|         2 | Internal          | A reallly long error message that is long enough to not fit on a single sheet of paper |
|-----------+-------------------+----------------------------------------------------------------------------------------|

Which looks like this when being rendered:

So now our table finally fits on a page and we got vertical lines. There are a number of possible attributes that can be supplied this way, if you want to know more about this, you can find the documentation here. However I think its time to address the obvious: I do not want to paste a bunch of atrributes that I may have to adjust (depending on the table, since we have to specify columns ourselves) for every single table. It is unneccessary work and adds unneccessary lines that could be avoided and dont ever think about changing the way you want your tables to look, because then you can redo the whole process. Its time we find a way to style all of our tables in a way, that they can:

  • Introduce automatic linebreaks if the input gets too long
  • Look the same for all tables of our choice
  • Color individual rows/columns (e.g. make the backgrounf color of the first row grey)
  • Handle tables independendly of their column count
  • Handle tables spanning multiple pages

Creating a global table style in tabularray

Since it seems like that emacs is rather limited in doing anything like a global table style, it became relatively clear, that I would have to go and do this directly in LaTeX. Luckily the tabularray package for LaTeX is able to do exactly this. The tabularray package also makes it much easier to create more complex LaTeX tables, when compared to the regular tabular enviroment. To add the package simply add the following to your file:
#+LATEX_HEADER: \usepackage{tabularray}

Setup

To start we first need to learn some basics about LaTeX and how emacs handles exporting tables to it. And how we have to adjust this behaviour to our needs. Lets take a look at what the second table looks like once emacs has exported it:

 \begin{tabular}{|l|lp{10cm}|r|}
    \hline
    Exit code & Type & Meaning\\
    \hline
    0 & External/Internal & Succesfull operation; logical true\\
    \hline
    1 & Internal & Non successfull operation; logical false\\
    \hline
    2 & Internal & A reallly long error message that is long enough to not fit on a single sheet of paper\\
    \hline
 \end{tabular}

As you can see, the table itself defines each cell using an “&” and adding horizontal lines between them. These lines are being manually added by pressing C-c RET in your table. Emacs also used the tabular enviroment (\begin{tabular}) for the table, which is the default table enviroment for LaTeX. You also see that our latex argument got directly passed to the enviroment as an additional argument (this part is called the inner specification of the enviroment). This will come in handy later, once we replaced the tabular enviroment with our own one.

Our table style

First of all: How do we even insert raw LaTeX into orgmode documents? There is a number of different ways to achieve this. You can add LaTeX headers with #+LATEX_HEADER: or insert a single line by using #+LATEX:. If we want to include multiple lines with #+LATEX:, we can also use the #+BEGIN_EXPORT or #+BEGIN_src syntax. We can even use a seperate orgfile in which we store all of our table styles and include it with #+INCLUDE:, which is what we are going to do here. Dump all the LaTeX into a seperate file, so that we dont have to copy it for all of our documents. The advantage of specifying this on a seperate org file (I will call it table_style.org instead of a plain tex file is, that by doing it this way, you can add all packages that you need for your table style in the table_style.org file itself and don’t have to include them in your main file (you can not use the \usepackage command in the body of a document, which is where the included tex file would be included).

First of all, lets create our new table enviroment:

    \NewTblrEnviron{globaltbl}
    \SetTblrInner[globaltbl]{
    }

What this does is, that it creates a completely new table enviroment called globaltbl and every single table that uses this enviroment will inherit all attributes (which we will set in a second) from it. However we will still be able to override all values for each table.

And now lets add some basic attributes to the inner definition:

  \NewTblrEnviron{globaltbl}
  \SetTblrInner[globaltbl]{
    vlines, 
    hlines,
    width = 0.9\linewidth,
    rowsep = 4pt,
    colsep = 8pt,    
    colspec={X[t,l]X[t,l]X[t,l]X[t,l]},
  }

The hlines and vlines arguments tell tabularray to always draw horizontal and vertical lines between cells, regardless of the appearance of any manually inserted \hline. If the hline option has been given, inserting a \hline into the table will cause tabularray to render a snall gap at the position of the \hline. The width=0.9\linewidth sets the width of the table to 0.9x the width of a single line. The rowsep and colsep attributes control how much space between your text input and your hlines / vlines you have.

If you want a deeper understanding of the colspec attribute please go and look up cell alignemts of the tabularray package. For now all you need to know is, that this defines four columns for our table style and each column will align its text at the top left of the cell (indicated by t and l in the specifications for each column). Since we use the so called X column here, we also get automatic linebreaks in our table. If we dont want this, we would have to use the primitive Q column instead (replace all occurences of X with a Q in the colspec).

Changing behaviour of single rows, columns, cells and even more

So we were able to set the width of our table, but what if I want to e.g. color the first row grey and all following uneven rows too, but in a different shade? Dont worry, all of this is very easy. We simply define these rows in our table style and are good to go:

  row{1} = {
    bg=grey9,
    fg=white,
    font=\bfseries,
    halign=c
  },
  row{odd[3]} = {
    bg=grey5
  }

The same principle can be applied to columns, single cells and even single hlines and vlines:

  row{odd[3]} = {bg=gray9}, %% Change bg color of all odd rows starting with the third row
  column{2} = {halign=r}, %%align the second column to the right
  cell{4}{3} = {bg=red}, %% Change the bg color of the cell in the 4th row and third column
  hline{3}={dotted, red}, %%Change the way the third horizontal line gets rendered

We can also specify ranges of columns (etc).

  column{1-2} = {mode=text} %%changes the mode of the first two columns
  column{Z} = {mode=text} %%Change the mode of the last column
  column{3-Y} = {mode=math} %%changes the mode of each column except the first two and the last column

Using the table style

So now that we know how to create our table style, how do we use it inside our org files? Sadly it seems like there is no way to directly set the enviroment of our tables to our custom enviroment (if you know a better solution please tell me), however there are a few tricks we can use. Using the ~\renewenviroment~ command from LaTeX, we can tell the LaTeX engine to replace the enviroment of all following tables to another enviroment (it can be used for more than tables, but we only care about tables here). Since the command only affects following enviroments, we can also use the command multiple times in a file to cycle between multiple layouts. Lets assume we have defined the table enviroments globaltbl and nonglobaltbl, then we could use the corresponding styles like the following:

#+LATEX: \renewenvironment{tabular}{\begin{globaltbl}}{\end{globaltbl}}
.... table 1 ....

.... table 2 ....

#+LATEX: \renewenvironment{tabular}{\begin{nonglobaltbl}}{\end{nonglobaltbl}}
.... table 3 ....

#+LATEX: \renewenvironment{tabular}{\begin{globaltbl}}{\end{globaltbl}}
.... table 4 ....

Overriding preset values

So now that we have seen how to pre set values, how do we override them for a single table? Well, we just have to pass our table the corresponding arguemnts to the table. So if I as example want to set the color of a single cell in my table (lets say the top left cell) to red. Well, I simply add #+attr_latex: :align cell{1}{1} = {bg=red} to my table and Im good to go. Everything that we can specify in the inner definition of our enviroment, can be overwritten this way. Using this we can go absolutely wild with our tables, without affecting any other tables:

#+attr_latex: :align row{2}={bg=blue,fg=white}, row{1}={fg=green, halign=l}, width=0.5\linewidth, hline{3}={text=<<<<<<<<<<, red}
#+caption: Its always possible to override absolutely anything, while still using nonglobaltbl
|-----------+-------------------+----------------------------------------------------------------------------------------|
| Exit code | Type              | Meaning                                                                                |
|-----------+-------------------+----------------------------------------------------------------------------------------|
|         0 | External/Internal | Succesfull operation; logical true                                                     |
|-----------+-------------------+----------------------------------------------------------------------------------------|
|         1 | Internal          | Non successfull operation; logical false                                               |
|-----------+-------------------+----------------------------------------------------------------------------------------|
|         2 | Internal          | A reallly long error message that is long enough to not fit on a single sheet of paper |
|-----------+-------------------+----------------------------------------------------------------------------------------|

Overriding existing enviroments

Now lets say, what happens if our table suddenly becomes really really big and is longer than it is possible to vertically fit onto a single page? Well, lucky for us, tabularray got us covered by providing the longbtlr enviroment for us to use for this case. We can simply override its specifications:

\SetTblrInner[longtblr]{
  %%specifications as we are used to
}

So whats about multirow/-column cells?

First up: As far as I’m concerned, there is no way to create multicolumn or multirow cells inside emacs, the way it is possible with LaTeX, without having to dig very deep into the latex-export-backend of orgmode. This is 100% out of my skillrange and it is something I dont need (yet). If you really need this, you will have to use LaTeX directly. If you really need the math functionalities, but also multirow&shy;column cells, and have so many of them, that you cant type them by hand anymore, than its probably time to automate the creation of your tables in any other way. The only way it is possible to mimick multirow/-column cells is by controlling where hlines and vlines are being drawn. The easiest way to mimic multirow columns is to turn off hlines and manually insert the lines in the orgmode table by pressing C-C RET inside your table, as it can be seen here:

Using the default specifications for a table

If you want to use an empty enviroment that has no specifications (which means it will look like the default tabularray table), simply define a new enviroment, without setting its inner specification:
\NewTblrEnviron{deftblr}

Limitations

One limitation is, that with the current approach of using the \renewenviroment command, you will no longer be able to use your default export enviroment later in your file. This might not be a problem when working alone, but it might become a problem when collaborating with other people. Sadly I was not able to figure out if there is any other way to reliably change the enviroment of a table (or respectively all tables in the document). However I was also never able to change the enviroment of a single table to tblr (the name used for tabularray in emacs) the way it has been decribed here. It is also not possible to embed tables directly into the text. This can only be achieved by typesetting the table directly in LaTeX and using tabularrays talltblr enviroment.

Conclusion

I would say that jumping through the hoops to create some good looking table style is really worth it. First of all its way better than manually pasting the same 20 arguments for every table. It allows you to use multiple styles in the same document and if you need extended functionality of the tabularray package like multirow/-column cells or the talltblr enviroment to embed tables directly into your text, then it is pretty easy to do this, since new styles can be created on the fly and tabularray is relatively easy to use.

0

Easy migration from vim?

preview

I’ve been using vim/Neovim since 1999, and the amount of muscle memory that I’ve built up is deeply ingrained. I’m thinking that it may be time to branch out a bit and try my hand at emacs. How would you recommend dipping my toes into the emacs tackle box?

I’ve been using vim/Neovim since 1999, and the amount of muscle memory that I’ve built up is deeply ingrained. I’m thinking that it may be time to branch out a bit and try my hand at emacs. How would you recommend dipping my toes into the emacs tackle box?

0

emacsdocs.org doesn't work with eww?

preview

I really appreciate all of the hard work that went into building the site and all of the documentation, it requires JS and therefore doesn’t work in eww? That seems like a weird decision.

I really appreciate all of the hard work that went into building the site and all of the documentation, it requires JS and therefore doesn’t work in eww? That seems like a weird decision.

0

Global table styles in LaTeX Export for Orgmode

preview

So I have a problem I would bet at least some people know: Styling tables inside Orgmode. The problem is, that you have to copy paste the same configuration that makes sure your table looks good for each single table. Since this is quite tedious and quite a pain if you have lots and lots of tables. After some searching I figured out, that I can use the tabularray LaTeX Package for this. The problem is, that I quite suck with LaTeX, and there is not that much information about global tabular enviroments for this. The only Information I could find was this stackexchange post regarding global table enviroments and some general information about tabularray, which can be found here.

The table style I want is in fact quite simple. I want the top row to be colored grey (which I already implemented myself) and I need the table style to allow for multiline columns and I need automatic line breaks in case theres more text in a single cell than theres space in the line. Additionally the table should always be aligned in the center of the page.

I have the following example orgmode-document (the \renewenviroment command is to switch the default enviroment from tables to my global table style)

#+Options: toc:nil

#+LATEX_CLASS: article
#+LATEX_CLASS_OPTIONS: [a4paper]
#+LATEX_HEADER: \usepackage{booktabs}
#+LATEX_HEADER: \usepackage{tabularray}
#+LATEX_HEADER: \usepackage{xcolor}
#+LATEX_HEADER: \NewTblrEnviron{globaltbl}
#+LATEX_HEADER: \SetTblrInner[globaltbl]{hlines, vlines, row{1} = {bg=gray5, fg=white, font=\bfseries}, rowsep = 4pt, colsep = 8pt, width = \linewidth}
#+LATEX_HEADER: \SetTblrOuter[globaltbl]{baseline = m}
#+LATEX_HEADER: \renewenvironment{tabular}{\begin{globaltbl}}{\end{globaltbl}}

|-----------+-------------------+-----------------------------------------------------------------------------------|
| Exit code | Type              | Meaning                                                                           |
|-----------+-------------------+-----------------------------------------------------------------------------------|
|         0 | Internal/External | Succesfull operation; logical true                                                |
|           | some other        |                                                                                   |
|-----------+-------------------+-----------------------------------------------------------------------------------|
|         1 | Internal          | Non successfull operation; logical false and some other text that is not important |

which generates the following LaTeX file:

% Intended LaTeX compiler: pdflatex
\documentclass[a4paper]{article}
\usepackage[utf8]{inputenc}
\usepackage[T1]{fontenc}
\usepackage{graphicx}
\usepackage{longtable}
\usepackage{wrapfig}
\usepackage{rotating}
\usepackage[normalem]{ulem}
\usepackage{amsmath}
\usepackage{amssymb}
\usepackage{capt-of}
\usepackage{hyperref}
\usepackage{tabularray}
\usepackage{booktabs}
\usepackage{tabularray}
\usepackage{xcolor}
\NewTblrEnviron{globaltbl}
\SetTblrInner[globaltbl]{hlines, vlines, row{1} = {bg=gray5, fg=white, font=\bfseries}, rowsep = 4pt, colsep = 8pt, width = \linewidth}
\SetTblrOuter[globaltbl]{baseline = m}
\renewenvironment{tabular}{\begin{globaltbl}}{\end{globaltbl}}
\author{cow}
\date{\today}
\title{}
\hypersetup{
 pdfauthor={cow},
 pdftitle={},
 pdfkeywords={},
 pdfsubject={},
 pdfcreator={Emacs 30.2 (Org mode 9.7.11)}, 
 pdflang={English}}
\begin{document}

\begin{center}
\begin{tabular}{rll}
\hline
Exit code & Type & Meaning\\
\hline
0 & Internal/External & Succesfull operation; logical true\\
 & some other & \\
\hline
1 & Internal & Non successfull operation; logical false and some other text that is not important\\
\end{tabular}
\end{center}
\end{document}

which renders to the following table:

As you can see in the first column, that tabularray does not insert an hline to create a new coluumn, but still renders this thinner line. Is there a way to turn this off? You can also see, that the rest of the last cell gets cut off.

I would really appreciate if someone could help me with this, since I have zero Idea what else to try.

So I have a problem I would bet at least some people know: Styling tables inside Orgmode. The problem is, that you have to copy paste the same configuration that makes sure your table looks good for each single table. Since this is quite tedious and quite a pain if you have lots and lots of tables. After some searching I figured out, that I can use the tabularray LaTeX Package for this. The problem is, that I quite suck with LaTeX, and there is not that much information about global tabular enviroments for this. The only Information I could find was this stackexchange post regarding global table enviroments and some general information about tabularray, which can be found here.

The table style I want is in fact quite simple. I want the top row to be colored grey (which I already implemented myself) and I need the table style to allow for multiline columns and I need automatic line breaks in case theres more text in a single cell than theres space in the line. Additionally the table should always be aligned in the center of the page.

I have the following example orgmode-document (the \renewenviroment command is to switch the default enviroment from tables to my global table style)

#+Options: toc:nil

#+LATEX_CLASS: article
#+LATEX_CLASS_OPTIONS: [a4paper]
#+LATEX_HEADER: \usepackage{booktabs}
#+LATEX_HEADER: \usepackage{tabularray}
#+LATEX_HEADER: \usepackage{xcolor}
#+LATEX_HEADER: \NewTblrEnviron{globaltbl}
#+LATEX_HEADER: \SetTblrInner[globaltbl]{hlines, vlines, row{1} = {bg=gray5, fg=white, font=\bfseries}, rowsep = 4pt, colsep = 8pt, width = \linewidth}
#+LATEX_HEADER: \SetTblrOuter[globaltbl]{baseline = m}
#+LATEX_HEADER: \renewenvironment{tabular}{\begin{globaltbl}}{\end{globaltbl}}

|-----------+-------------------+-----------------------------------------------------------------------------------|
| Exit code | Type              | Meaning                                                                           |
|-----------+-------------------+-----------------------------------------------------------------------------------|
|         0 | Internal/External | Succesfull operation; logical true                                                |
|           | some other        |                                                                                   |
|-----------+-------------------+-----------------------------------------------------------------------------------|
|         1 | Internal          | Non successfull operation; logical false and some other text that is not important |

which generates the following LaTeX file:

% Intended LaTeX compiler: pdflatex
\documentclass[a4paper]{article}
\usepackage[utf8]{inputenc}
\usepackage[T1]{fontenc}
\usepackage{graphicx}
\usepackage{longtable}
\usepackage{wrapfig}
\usepackage{rotating}
\usepackage[normalem]{ulem}
\usepackage{amsmath}
\usepackage{amssymb}
\usepackage{capt-of}
\usepackage{hyperref}
\usepackage{tabularray}
\usepackage{booktabs}
\usepackage{tabularray}
\usepackage{xcolor}
\NewTblrEnviron{globaltbl}
\SetTblrInner[globaltbl]{hlines, vlines, row{1} = {bg=gray5, fg=white, font=\bfseries}, rowsep = 4pt, colsep = 8pt, width = \linewidth}
\SetTblrOuter[globaltbl]{baseline = m}
\renewenvironment{tabular}{\begin{globaltbl}}{\end{globaltbl}}
\author{cow}
\date{\today}
\title{}
\hypersetup{
 pdfauthor={cow},
 pdftitle={},
 pdfkeywords={},
 pdfsubject={},
 pdfcreator={Emacs 30.2 (Org mode 9.7.11)}, 
 pdflang={English}}
\begin{document}

\begin{center}
\begin{tabular}{rll}
\hline
Exit code & Type & Meaning\\
\hline
0 & Internal/External & Succesfull operation; logical true\\
 & some other & \\
\hline
1 & Internal & Non successfull operation; logical false and some other text that is not important\\
\end{tabular}
\end{center}
\end{document}

which renders to the following table:

As you can see in the first column, that tabularray does not insert an hline to create a new coluumn, but still renders this thinner line. Is there a way to turn this off? You can also see, that the rest of the last cell gets cut off.

I would really appreciate if someone could help me with this, since I have zero Idea what else to try.

0

Canvas patch: we need testers!

preview

The Canvas patch is almost done. Except that we need more testing, specifically for its MS Windows port. (Though testers on other operating systems like GNU/Linux and MacOS are also welcome.)

Since we don’t have any computers running MS Windows, we are not sure if the code is actually correct.

The Canvas patch is almost done. Except that we need more testing, specifically for its MS Windows port. (Though testers on other operating systems like GNU/Linux and MacOS are also welcome.)

Since we don’t have any computers running MS Windows, we are not sure if the code is actually correct.

0

Emacs 31.0.90 pretest is available

preview

Hello everyone,

The first pretest for what will be the 31.1 release of Emacs (the extensible text editor) is now available at:

alpha.gnu.org/gnu/emacs/…/emacs-31.0.90.tar.xz
alpha.gnu.org/gnu/emacs/…/emacs-31.0.90.tar.gz

The tarball is signed; you can get the PGP signature file at:

alpha.gnu.org/gnu/…/emacs-31.0.90.tar.xz.sig
alpha.gnu.org/gnu/…/emacs-31.0.90.tar.gz.sig

Please give it as much testing as you can.

As always, if you encounter problems building or using Emacs, send a report to bug-gnu-emacs@gnu.org with full details (if possible, use M-x report-emacs-bug).

Thanks for helping to test Emacs.

Source: Emacs 31.0.90 pretest is available

Hello everyone,

The first pretest for what will be the 31.1 release of Emacs (the extensible text editor) is now available at:

alpha.gnu.org/gnu/emacs/…/emacs-31.0.90.tar.xz
alpha.gnu.org/gnu/emacs/…/emacs-31.0.90.tar.gz

The tarball is signed; you can get the PGP signature file at:

alpha.gnu.org/gnu/…/emacs-31.0.90.tar.xz.sig
alpha.gnu.org/gnu/…/emacs-31.0.90.tar.gz.sig

Please give it as much testing as you can.

As always, if you encounter problems building or using Emacs, send a report to bug-gnu-emacs@gnu.org with full details (if possible, use M-x report-emacs-bug).

Thanks for helping to test Emacs.

Source: Emacs 31.0.90 pretest is available

0

Batteries included with Emacs

Batteries included with Emacs karthinks.com
preview

Guidelines used to populate this list:

  • No packages, stock Emacs only.

  • No steep learning curves. Learn each feature in under two minutes or bust.

  • No gimmicks. No doctor, tetris, snake, dunnet, zone or butterfly.

  • Just the deltas. No commonly mentioned packages like flymake, doc-view, outline-minor-mode or eww/w3m. Nothing that Emacs brings up automatically or a nonspecific Google search gets you.

  • Assume a modern Emacs, 26.3+.

Guidelines used to populate this list:

  • No packages, stock Emacs only.

  • No steep learning curves. Learn each feature in under two minutes or bust.

  • No gimmicks. No doctor, tetris, snake, dunnet, zone or butterfly.

  • Just the deltas. No commonly mentioned packages like flymake, doc-view, outline-minor-mode or eww/w3m. Nothing that Emacs brings up automatically or a nonspecific Google search gets you.

  • Assume a modern Emacs, 26.3+.

0

Exporting from orgmode

preview

So, I started to use orgmode for writing the documentation for my latest software project. This means, that I have code blocks and lots of special characters in my document. I will have to export this whole file to LaTex/pdf, so my colleague can bind it into his project documentation and this is exactly where my problems are. First of all: how can I turn of the need to manually stop the code execution for code blocks when exporting? I have the single line src_bash{} blocks but also the multiline versions:

#+begin_src bash :
#code
#+ends_src

The next thing is, that my function names include underscores, which in orgmode translates to making the following text lowercase. I tried using \ to escape it, but that only breaks it in a new way and I seriously cant comprehend how this so called zero width space is supposed to be used.

So, I started to use orgmode for writing the documentation for my latest software project. This means, that I have code blocks and lots of special characters in my document. I will have to export this whole file to LaTex/pdf, so my colleague can bind it into his project documentation and this is exactly where my problems are. First of all: how can I turn of the need to manually stop the code execution for code blocks when exporting? I have the single line src_bash{} blocks but also the multiline versions:

#+begin_src bash :
#code
#+ends_src

The next thing is, that my function names include underscores, which in orgmode translates to making the following text lowercase. I tried using \ to escape it, but that only breaks it in a new way and I seriously cant comprehend how this so called zero width space is supposed to be used.

0

Automatic line breaks in emacs

preview

So I have the following problem. I use emacs (specifically orgmode, but my problem applies to emacs in general) quite a lot for writing longer texts (In the long term I even plan on writing scientific papers with emacs). However, one of the problems I have is line formatting. As you probably all know, emacs does not really have default “automatic line breaks” as you know them from rich text editors like LibreOffice. Instead emacs then just moves the entire window you see to the right, if a single line gets too long. Since this is awful for editing I started to add line breaks manually, however the problem is, that you then have to manually re-do the entire formatting if you decide to change the structure of one ore more sentences/lines, which is kind of annoying. The next problem is, that it may look good on your screen with the manual linebreaks, but the formatting then often looks bad when viewed on smaller screens.

One solution I saw is, that if a line gets to long, that emacs then just puts the rest of the line into a new line on the screen, without inserting a line break. How can I enable this behaviour in my emacs config?

I also found out about Auto Fill mode, however I kind of dont like, that it inserts a new linebreak relatively fast (my screen is wide, so I want to use it) and the problem with exporting still stands.

Anyone got any good workarounds that might be helpful?

So I have the following problem. I use emacs (specifically orgmode, but my problem applies to emacs in general) quite a lot for writing longer texts (In the long term I even plan on writing scientific papers with emacs). However, one of the problems I have is line formatting. As you probably all know, emacs does not really have default “automatic line breaks” as you know them from rich text editors like LibreOffice. Instead emacs then just moves the entire window you see to the right, if a single line gets too long. Since this is awful for editing I started to add line breaks manually, however the problem is, that you then have to manually re-do the entire formatting if you decide to change the structure of one ore more sentences/lines, which is kind of annoying. The next problem is, that it may look good on your screen with the manual linebreaks, but the formatting then often looks bad when viewed on smaller screens.

One solution I saw is, that if a line gets to long, that emacs then just puts the rest of the line into a new line on the screen, without inserting a line break. How can I enable this behaviour in my emacs config?

I also found out about Auto Fill mode, however I kind of dont like, that it inserts a new linebreak relatively fast (my screen is wide, so I want to use it) and the problem with exporting still stands.

Anyone got any good workarounds that might be helpful?

0

ghostel — a modern terminal emulator for Emacs, powered by Ghostty's VT engine

GitHub GitHub - dakra/ghostel: Terminal emulator powered by libghostty github.com
preview

I’d like to announce ghostel, a terminal emulator for Emacs that uses libghostty-vt - the same VT parsing engine behind the Ghostty terminal - as a native Zig module.

It’s inspired by vterm and follows the same general approach (native module does terminal emulation, Elisp handles the Emacs integration), but uses a more modern engine that supports newer terminal protocols. Ghostel is a superset of vterm’s feature set - everything vterm can do, ghostel can too, plus a lot more on top.

Feature comparison with vterm

Feature ghostel vterm
True color (24-bit) Yes Yes
OSC 4/10/11 color queries Yes No
Bold / italic / faint Yes Yes
Underline styles (5 types) Yes No
Underline color Yes No
Strikethrough Yes Yes
Cursor styles 4 types 3 types
OSC 8 hyperlinks Yes No
Plain-text URL/file detection Yes No
Kitty keyboard protocol Yes No
Mouse passthrough (SGR) Yes No
Bracketed paste Yes Yes
Alternate screen Yes Yes
Shell integration auto-inject Yes No
Prompt navigation (OSC 133) Yes Yes
Elisp eval from shell Yes Yes
TRAMP remote terminals Yes Yes
OSC 52 clipboard Yes Yes
Copy mode Yes Yes
Drag-and-drop Yes No
Auto module download Yes No
Scrollback default ~5,000 1,000
PTY throughput (plain ASCII) 65 MB/s 29 MB/s
Default redraw rate ~30 fps ~10 fps

Key differences

Terminal engine. libghostty-vt comes from Ghostty, a modern GPU-accelerated terminal, and supports Kitty keyboard/mouse protocols, rich underline styles, and OSC 8 hyperlinks. libvterm targets VT220/xterm emulation and is more conservative in protocol support.

Mouse handling. Ghostel encodes mouse events (press, release, drag) and passes them through to the terminal via SGR mouse protocol. TUI apps like htop or lazygit receive full mouse input. vterm intercepts mouse clicks for Emacs point movement and does not forward them to the terminal.

Rendering. Both use text properties (not overlays) and batch consecutive cells with identical styles. Ghostel’s engine provides three-level dirty tracking (none / partial / full) with per-row granularity. vterm uses damage-rectangle callbacks and redraws entire invalidated rows. Ghostel defaults to ~30 fps redraw; vterm defaults to ~10 fps.

Shell integration. Ghostel auto-injects shell integration scripts for bash, zsh, and fish - no shell RC changes needed. vterm requires manually sourcing scripts in your shell configuration. Both support Elisp eval from the shell and TRAMP-aware remote directory tracking.

Performance. In PTY throughput benchmarks (5 MB streamed through cat, both backends configured with ~1,000 lines of scrollback), ghostel is roughly 2x faster than vterm on plain ASCII data (65 vs 29 MB/s). On URL-heavy output ghostel still comes out ahead (42 vs 24 MB/s); with link detection disabled ghostel reaches 65 MB/s regardless of input.

Color auto-detection. Thanks to OSC 4/10/11 support, TUI programs like duf, btop, and delta can query Emacs for its foreground/background colors and automatically adapt to your light or dark theme - no COLORFGBG hacks needed.

Installation. Ghostel can automatically download a pre-built native module or compile from source with Zig. vterm uses CMake with a single C dependency (libvterm) and can auto-compile on first load from Elisp.

Installation

ghostel is available on MELPA:

(use-package ghostel :ensure t)

Or with Emacs 30+ built-in vc-use-package:

(use-package ghostel :vc (:url "https://github.com/dakra/ghostel" :rev :newest))

The native module is downloaded automatically on first use. If you prefer to build from source, you’ll need Zig 0.15.2+.

Requires Emacs 27.1+ with dynamic module support on macOS or Linux.

Feedback, bug reports, and contributions very welcome.

I’d like to announce ghostel, a terminal emulator for Emacs that uses libghostty-vt - the same VT parsing engine behind the Ghostty terminal - as a native Zig module.

It’s inspired by vterm and follows the same general approach (native module does terminal emulation, Elisp handles the Emacs integration), but uses a more modern engine that supports newer terminal protocols. Ghostel is a superset of vterm’s feature set - everything vterm can do, ghostel can too, plus a lot more on top.

Feature comparison with vterm

Feature ghostel vterm
True color (24-bit) Yes Yes
OSC 4/10/11 color queries Yes No
Bold / italic / faint Yes Yes
Underline styles (5 types) Yes No
Underline color Yes No
Strikethrough Yes Yes
Cursor styles 4 types 3 types
OSC 8 hyperlinks Yes No
Plain-text URL/file detection Yes No
Kitty keyboard protocol Yes No
Mouse passthrough (SGR) Yes No
Bracketed paste Yes Yes
Alternate screen Yes Yes
Shell integration auto-inject Yes No
Prompt navigation (OSC 133) Yes Yes
Elisp eval from shell Yes Yes
TRAMP remote terminals Yes Yes
OSC 52 clipboard Yes Yes
Copy mode Yes Yes
Drag-and-drop Yes No
Auto module download Yes No
Scrollback default ~5,000 1,000
PTY throughput (plain ASCII) 65 MB/s 29 MB/s
Default redraw rate ~30 fps ~10 fps

Key differences

Terminal engine. libghostty-vt comes from Ghostty, a modern GPU-accelerated terminal, and supports Kitty keyboard/mouse protocols, rich underline styles, and OSC 8 hyperlinks. libvterm targets VT220/xterm emulation and is more conservative in protocol support.

Mouse handling. Ghostel encodes mouse events (press, release, drag) and passes them through to the terminal via SGR mouse protocol. TUI apps like htop or lazygit receive full mouse input. vterm intercepts mouse clicks for Emacs point movement and does not forward them to the terminal.

Rendering. Both use text properties (not overlays) and batch consecutive cells with identical styles. Ghostel’s engine provides three-level dirty tracking (none / partial / full) with per-row granularity. vterm uses damage-rectangle callbacks and redraws entire invalidated rows. Ghostel defaults to ~30 fps redraw; vterm defaults to ~10 fps.

Shell integration. Ghostel auto-injects shell integration scripts for bash, zsh, and fish - no shell RC changes needed. vterm requires manually sourcing scripts in your shell configuration. Both support Elisp eval from the shell and TRAMP-aware remote directory tracking.

Performance. In PTY throughput benchmarks (5 MB streamed through cat, both backends configured with ~1,000 lines of scrollback), ghostel is roughly 2x faster than vterm on plain ASCII data (65 vs 29 MB/s). On URL-heavy output ghostel still comes out ahead (42 vs 24 MB/s); with link detection disabled ghostel reaches 65 MB/s regardless of input.

Color auto-detection. Thanks to OSC 4/10/11 support, TUI programs like duf, btop, and delta can query Emacs for its foreground/background colors and automatically adapt to your light or dark theme - no COLORFGBG hacks needed.

Installation. Ghostel can automatically download a pre-built native module or compile from source with Zig. vterm uses CMake with a single C dependency (libvterm) and can auto-compile on first load from Elisp.

Installation

ghostel is available on MELPA:

(use-package ghostel :ensure t)

Or with Emacs 30+ built-in vc-use-package:

(use-package ghostel :vc (:url "https://github.com/dakra/ghostel" :rev :newest))

The native module is downloaded automatically on first use. If you prefer to build from source, you’ll need Zig 0.15.2+.

Requires Emacs 27.1+ with dynamic module support on macOS or Linux.

Feedback, bug reports, and contributions very welcome.

0

What is the policy/attitude towards LLM contributions in GNU Emacs?

preview

We are awaiting the decision by the GNU Project on these matters, which will define the policy for all the GNU packages, and in the meantime we don’t accept LLM-generated code, as a precaution.

www.fsf.org/blogs/…/2026-anthropic-settlement

We are awaiting the decision by the GNU Project on these matters, which will define the policy for all the GNU packages, and in the meantime we don’t accept LLM-generated code, as a precaution.

www.fsf.org/blogs/…/2026-anthropic-settlement

0

In the Age of AI Writing Tools, I Picked Emacs for My Sci-Fi Novel

It&#x27;s FOSS In the Age of AI Writing Tools, I Picked Emacs for My Sci-Fi Novel itsfoss.com
preview

My next novel, a science fiction story set 500 years in the future, features a sentient artificial being—imagine a HAL 9000 with a functioning moral compass, or Skynet without the genocidal nihilism.

Users interact with this sentient AI being in a variety of ways: non-tech users interact via voice commands and touch, but more tech-savvy users interact through a Brain-computer Interface (BCI) that enables tactile and vision control. A smaller portion of users still use keyboards, but they are viewed in the same way our current age views typewriters: a quaint artifact of a bygone era.

My next novel, a science fiction story set 500 years in the future, features a sentient artificial being—imagine a HAL 9000 with a functioning moral compass, or Skynet without the genocidal nihilism.

Users interact with this sentient AI being in a variety of ways: non-tech users interact via voice commands and touch, but more tech-savvy users interact through a Brain-computer Interface (BCI) that enables tactile and vision control. A smaller portion of users still use keyboards, but they are viewed in the same way our current age views typewriters: a quaint artifact of a bygone era.

0

Who is the youngest emacs user?

Emacs just for old brain, wat
preview

The idea for this post started today when I saw in #emacs-til on libera.chat:

  • [2026-01-17 22:30:19] <quelt> TIL emacs is just not for old boomers lol
  • [2026-01-17 22:31:53] <bremner> also for younger boomers
  • [2026-01-17 22:33:10] <quelt> haha that’s me!
  • [2026-01-17 22:33:17] <quelt> lil baby baby boomer
  • [2026-01-17 23:25:18] <hodapp> the Youth of Today love Emacs
  • [2026-01-17 23:25:29] <hodapp> I asked one of them back in… uh…
  • [2026-01-17 23:25:31] <hodapp> 1991?

So I did a websearch for the youngest emacs user, and, the websearch results couldn’t help but all be about how old emacs users are.

So I ask Lemmy…

Who is the youngest emacs user?

[And no, before anyone thinks otherwise, that image is not real. I just put that together for whimsical illustration, from an image search or 3, with a relevant comment, an image from an article about a 2 year old who self-taught the alphabet, and an image of an emacs welcome screen pasted together with the help of the GIMP.]

Who is the youngest emacs user?

Anyone younger than 40? In 20s? Teens?? Younger??!

The idea for this post started today when I saw in #emacs-til on libera.chat:

  • [2026-01-17 22:30:19] <quelt> TIL emacs is just not for old boomers lol
  • [2026-01-17 22:31:53] <bremner> also for younger boomers
  • [2026-01-17 22:33:10] <quelt> haha that’s me!
  • [2026-01-17 22:33:17] <quelt> lil baby baby boomer
  • [2026-01-17 23:25:18] <hodapp> the Youth of Today love Emacs
  • [2026-01-17 23:25:29] <hodapp> I asked one of them back in… uh…
  • [2026-01-17 23:25:31] <hodapp> 1991?

So I did a websearch for the youngest emacs user, and, the websearch results couldn’t help but all be about how old emacs users are.

So I ask Lemmy…

Who is the youngest emacs user?

[And no, before anyone thinks otherwise, that image is not real. I just put that together for whimsical illustration, from an image search or 3, with a relevant comment, an image from an article about a 2 year old who self-taught the alphabet, and an image of an emacs welcome screen pasted together with the help of the GIMP.]

Who is the youngest emacs user?

Anyone younger than 40? In 20s? Teens?? Younger??!

0

Emacs For Writers (Video Series)

preview

If you write for a living, for studies, or even as a hobby, you should consider Emacs. It could be just what you need in an environment of enshittifying word processors and AI garbage.

If you write for a living, for studies, or even as a hobby, you should consider Emacs. It could be just what you need in an environment of enshittifying word processors and AI garbage.

0

My two favorite talks so far from Emacsconf

preview

Emacs Reader, talk, code, emacsconf page This talk described a fast new document reader that leverages dynamic modules. This made it work faster than docview or pdftools.

LLM & Emacs talk, talk, emacsconf page This talk explores what is “editing” and how different classes of emacs LLM tools goes with, or against editing. A quick tour of many tools + an easy going philosophical discussion.

Emacs Reader, talk, code, emacsconf page This talk described a fast new document reader that leverages dynamic modules. This made it work faster than docview or pdftools.

LLM & Emacs talk, talk, emacsconf page This talk explores what is “editing” and how different classes of emacs LLM tools goes with, or against editing. A quick tour of many tools + an easy going philosophical discussion.

0

Emacs For Writers (Video Series)

preview

If you write for a living, for studies, or even as a hobby, you should consider Emacs. It could be just what you need in an environment of enshittifying word processors and AI garbage.

If you write for a living, for studies, or even as a hobby, you should consider Emacs. It could be just what you need in an environment of enshittifying word processors and AI garbage.

0

Simple Rust Guix Emacs development environment

preview

A minimal, declarative setup for productive Rust hacking on Emacs + Guix

I noticed there was a blatant lack of resources and documentation on this particular setup. So I rolled up my sleeves and wrote this article, which hopefully you find useful.

jointhefreeworld.org/blog/articles/…/index.html

See image here of my Emacs with rust-analyzer and clippy working: ibb.co/whxq8dX1

A minimal, declarative setup for productive Rust hacking on Emacs + Guix

I noticed there was a blatant lack of resources and documentation on this particular setup. So I rolled up my sleeves and wrote this article, which hopefully you find useful.

jointhefreeworld.org/blog/articles/…/index.html

See image here of my Emacs with rust-analyzer and clippy working: ibb.co/whxq8dX1