
0
preview
Premade Sim, family, house, lot, anything. What’s your favorite?
Premade Sim, family, house, lot, anything. What’s your favorite?
posts tagged #sims2

Free on Mod The Sims. I just enjoyed making it honestly. Probably going to eventually do some flooring too.
Free on Mod The Sims. I just enjoyed making it honestly. Probably going to eventually do some flooring too.
Premade Sim, family, house, lot, anything. What’s your favorite?
Premade Sim, family, house, lot, anything. What’s your favorite?
Hello everyone! I’m (OP not me personally) building NeoTS2, a new 64-bit engine for The Sims 2 that runs the game from your own install’s original files (no EA files included, so you need your own copy). The goal is the game you know on modern PCs, without the old memory limits, and open to deeper mods.
It’s early and not playable yet, but you can already browse your neighborhoods, enter lots and see your Sims in their own outfits.
Progress, details and source: NeoTS2 on GitHub Once a Sim can walk around and do something, I’ll open a playtest. 😊
Notes from the comments: OP mentions using AI to work on this. They also mention writing it “from scratch in C++” it very well could be just vibe coded slop, I don’t have enough technical knowledge myself to say. Just wanted to share this since the concept itself is interesting.
Hello everyone! I’m (OP not me personally) building NeoTS2, a new 64-bit engine for The Sims 2 that runs the game from your own install’s original files (no EA files included, so you need your own copy). The goal is the game you know on modern PCs, without the old memory limits, and open to deeper mods.
It’s early and not playable yet, but you can already browse your neighborhoods, enter lots and see your Sims in their own outfits.
Progress, details and source: NeoTS2 on GitHub Once a Sim can walk around and do something, I’ll open a playtest. 😊
Notes from the comments: OP mentions using AI to work on this. They also mention writing it “from scratch in C++” it very well could be just vibe coded slop, I don’t have enough technical knowledge myself to say. Just wanted to share this since the concept itself is interesting.


cross-posted from: discuss.tchncs.de/post/68731420
Found on reddit, decided to post it here. Link to the original post.
cross-posted from: discuss.tchncs.de/post/68731420
Found on reddit, decided to post it here. Link to the original post.
This is not my post it was posted by reddit u/blacksalamander here I just thought it was cool so I wanted to share. I copied the whole post here so you don’t need to go there if you don’t want.

I was looking at some unused Sims 2 stuff at the Cutting Room Floor, when I found this quote by Will Wright that I find pretty interesting. This is part of bigger quote where he is talking about the Idea of Story Recognition Mode for Sims 2, basically how the game would recognize how you are playing the game, and change its “vibe” accordingly (E.g., if you bought creepy things, it would turn more towards horror, if you Sims kissed a lot, it would go towards romance, etc. You can read the full thing here).
What I find more interesting is the point about how he avoided the idea of a interactive story for the first game, and how he prefers the game just being a “simulation”. Because I was watching a video about Sims 1 recently where the creator mentioned how Sims 1 feels like a different genre of game than the rest of the series, and I have to agree. To me, Sims 1 feels almost like a strategy game, more than a life sim, since (at least when I play) I have to spend every second trying to just keep my Sim alive, instead of making some sort of story for them. And I think that’s one of the reasons I find it hard to get attached to them like I do with my Sims in other games.
So, that got me wondering, how was Sims 1 “meant” to be played originally? Since apparently a focus on story was not intended and only happened for the sequels because the fans were playing in a different way then “intended”? Are the people who wreak havoc on their Sims technically playing more accurately to Will’s vision than the ones trying to make a story? I know it’s a sandbox game so you can play whatever way you want, but I’m just going with what he says here.
Moreover, it’s also interesting to think about how Sims 2 would be if it was more similar to Sims 1, since Sims 2 is obviously waaay more story focused than the original game. But going back to the Story Recognition Mode, I’m glad they scrapped that idea. It sounds cool on paper, but personally, I think it would get annoying really quickly.
This is not my post it was posted by reddit u/blacksalamander here I just thought it was cool so I wanted to share. I copied the whole post here so you don’t need to go there if you don’t want.
I was looking at some unused Sims 2 stuff at the Cutting Room Floor, when I found this quote by Will Wright that I find pretty interesting. This is part of bigger quote where he is talking about the Idea of Story Recognition Mode for Sims 2, basically how the game would recognize how you are playing the game, and change its “vibe” accordingly (E.g., if you bought creepy things, it would turn more towards horror, if you Sims kissed a lot, it would go towards romance, etc. You can read the full thing here).
What I find more interesting is the point about how he avoided the idea of a interactive story for the first game, and how he prefers the game just being a “simulation”. Because I was watching a video about Sims 1 recently where the creator mentioned how Sims 1 feels like a different genre of game than the rest of the series, and I have to agree. To me, Sims 1 feels almost like a strategy game, more than a life sim, since (at least when I play) I have to spend every second trying to just keep my Sim alive, instead of making some sort of story for them. And I think that’s one of the reasons I find it hard to get attached to them like I do with my Sims in other games.
So, that got me wondering, how was Sims 1 “meant” to be played originally? Since apparently a focus on story was not intended and only happened for the sequels because the fans were playing in a different way then “intended”? Are the people who wreak havoc on their Sims technically playing more accurately to Will’s vision than the ones trying to make a story? I know it’s a sandbox game so you can play whatever way you want, but I’m just going with what he says here.
Moreover, it’s also interesting to think about how Sims 2 would be if it was more similar to Sims 1, since Sims 2 is obviously waaay more story focused than the original game. But going back to the Story Recognition Mode, I’m glad they scrapped that idea. It sounds cool on paper, but personally, I think it would get annoying really quickly.
So I like to make walls and floors for my game. I’m primarily a builder but I’m not very good at making meshes and recolors are cool but, time consuming for me. Plus Home Crafter makes floors and walls so freaking easy.
Well I had made 8 colors of stucco walls, then each one got a maxis match trim, the one where it looks like bricks on the corner. Then I did that trim in a light, maxis match/identical color, and I did it in a darker brown. So each color had a base stucco with no trim and 4 trim options.
I was play testing each color and doing screenshots so I could upload it to MTS later and realized my gray with the right side trim was darker than the rest of the gray. No big deal, I’ll close the game, open home crafter, fix it and done. I launch home crafter and “this application has crashed.”
Well shit. I was running linux updates in the background, let’s restart the computer and try again. Same thing. Fine, I’ll try different proton comparability layers. Nope. Fine, uninstall and reinstall. Nope. 😡😡😭
I found on MTS someone made a “portable home crafter” so I used that. Opens right up! Ok cool back in business. Ohh but the portable part is, it doesn’t sync your files. Crap. At that point my brain was fried and I couldn’t think straight and I gave up.
I’m sure today I’ll get it all figured out but, last night I was big mad! Anyways, thanks for reading my rant lol.
So I like to make walls and floors for my game. I’m primarily a builder but I’m not very good at making meshes and recolors are cool but, time consuming for me. Plus Home Crafter makes floors and walls so freaking easy.
Well I had made 8 colors of stucco walls, then each one got a maxis match trim, the one where it looks like bricks on the corner. Then I did that trim in a light, maxis match/identical color, and I did it in a darker brown. So each color had a base stucco with no trim and 4 trim options.
I was play testing each color and doing screenshots so I could upload it to MTS later and realized my gray with the right side trim was darker than the rest of the gray. No big deal, I’ll close the game, open home crafter, fix it and done. I launch home crafter and “this application has crashed.”
Well shit. I was running linux updates in the background, let’s restart the computer and try again. Same thing. Fine, I’ll try different proton comparability layers. Nope. Fine, uninstall and reinstall. Nope. 😡😡😭
I found on MTS someone made a “portable home crafter” so I used that. Opens right up! Ok cool back in business. Ohh but the portable part is, it doesn’t sync your files. Crap. At that point my brain was fried and I couldn’t think straight and I gave up.
I’m sure today I’ll get it all figured out but, last night I was big mad! Anyways, thanks for reading my rant lol.

And if you do, are they happy or, does the marriage keep getting worse? What’s your favorite way to play the Pleasant’s?
And if you do, are they happy or, does the marriage keep getting worse? What’s your favorite way to play the Pleasant’s?

And why is it Darren Dreamer? Lol jk but that is mine. I find him annoying.
And why is it Darren Dreamer? Lol jk but that is mine. I find him annoying.
I can’t play with out the Stay Things Shrub that makes all items left in the house stay behind at move out. I like to build and furnish things.
I also like the homework placer/finder I don’t remember the name. It gives you an item that is a picture frame you can put on a desk or on a shelf above a desk and the child/teen Sims can click it and set a theirs and they’ll place their homework there every time unless they can’t reach it. With that, the mod that speeds up their homework time.
I can’t play with out the Stay Things Shrub that makes all items left in the house stay behind at move out. I like to build and furnish things.
I also like the homework placer/finder I don’t remember the name. It gives you an item that is a picture frame you can put on a desk or on a shelf above a desk and the child/teen Sims can click it and set a theirs and they’ll place their homework there every time unless they can’t reach it. With that, the mod that speeds up their homework time.

I just stumbled upon this community looking for Sims related communities and TS2 is my favorite! This is just a random screenshot I grabbed but what’s your favorite household and why?
I just stumbled upon this community looking for Sims related communities and TS2 is my favorite! This is just a random screenshot I grabbed but what’s your favorite household and why?

September 14th 2004 The Sims 2 was released! What’s your favorite thing about the game or your favorite memory of playing?
September 14th 2004 The Sims 2 was released! What’s your favorite thing about the game or your favorite memory of playing?

I had to recently reinstall The Sims 2 due to moving from Windows to Linux. The only thing I couldn’t remember was how the hell I changed the camera so I could view the whole neighborhood instead of being stuck to EA’s constraints. I found this Fandom Guide and that’s totally what I did.
Happy I found it again because I like being able to move all the way to the town edges. Just thought I’d share in case anyone was looking for a way to change it without mods.
I had to recently reinstall The Sims 2 due to moving from Windows to Linux. The only thing I couldn’t remember was how the hell I changed the camera so I could view the whole neighborhood instead of being stuck to EA’s constraints. I found this Fandom Guide and that’s totally what I did.
Happy I found it again because I like being able to move all the way to the town edges. Just thought I’d share in case anyone was looking for a way to change it without mods.
Hey all! Sincere apologies for blocking up your feed with a bunch of wiki posts. To my knowledge Lemmy.World doesn’t have a wiki (unless I missed it please let me know!) so I copied most of the Reddit wiki into different posts and organized the posts here.
I have most of it copied over now so I shouldn’t be spamming up your feed with guides anymore. Hopefully anyway. I know most of us prefer not to go back to Reddit so having that info somewhere else is a must!
I’ve also included some of the more likely to be needed wiki posts in the sidebar as well. Let me know if there’s anything else you’d like to see for easy access in the sidebar.
Alright, lets go back to discussing and sharing game play instead of all this technical stuff lol.
Hey all! Sincere apologies for blocking up your feed with a bunch of wiki posts. To my knowledge Lemmy.World doesn’t have a wiki (unless I missed it please let me know!) so I copied most of the Reddit wiki into different posts and organized the posts here.
I have most of it copied over now so I shouldn’t be spamming up your feed with guides anymore. Hopefully anyway. I know most of us prefer not to go back to Reddit so having that info somewhere else is a must!
I’ve also included some of the more likely to be needed wiki posts in the sidebar as well. Let me know if there’s anything else you’d like to see for easy access in the sidebar.
Alright, lets go back to discussing and sharing game play instead of all this technical stuff lol.
Please Note: This is copied from Reddit’s r/TheSims2Help’s External Programs Wiki page. Any linked headings will be linked back to the Reddit Wiki. In line links should denote where they go (reddit, lemmy, tumbler) anything not mentioned is probably another off reddit guide or .exe file. Most if not all content contained below was created by the Reddit r/Sims2Help team and all credit for this guide goes to them.
None of these go in your Downloads folder - they are external programs, which you only run and use when the game is closed.
The Sims Package Editor, or SimPE, is an external program created to modify .package files in The Sims 2. It’s possible to edit Sims, neighbourhoods, and make and edit custom content with it. It’s a very powerful tool, but it’s not intuitive to use and requires a lot of practice.
SimPE used to be available on Sims Ambertation, a German website, but the site has been gone for years now. You can see most recent versions on Mod The Sims here and the latest version (SimPE 0.77.69), which is still being maintained by Chris Hatch, is available here. Make sure you don’t download the file with T&A in the name unless you have Chris’s custom (NSFW) pack! SourceForge also hosts older versions of SimPE which is helpful if you can’t get the newer version to work or need a particular version.
There are many tutorials about the various things you can do with it, such as these custom content creation tutorials and this guide about adding memories and this one about changing names. Please backup your files before making any changes. If you’re unsure how to do that, please refer back to the very first section on this post.
If you’re not using any custom content and don’t want to edit your neighbourhood or Sim files, you most likely won’t need SimPE.
Unfortunately, SimPE is only available on Windows so if you’re running The Sims 2 in Bootcamp or Parallels, you will be able to install and use SimPE but you can’t use it on MacOS itself.
The BodyShop does not come with the Legacy Edition though you can use this installer to install BodyShop for Legacy.
The BodyShop is a program that comes with your game, and can be used to create Sims and custom content without opening the game itself. For Windows on disc, digital repacks and the UC, it’s automatically shipped with the game, but for the Super Collection on MacOS, you need to download the Extras file here or here (alt Google Drive link).
On Windows, your BodyShop application is found in the installation folder of your latest EP (or SP as is the case with Mansion & Garden Stuff). Once you find the application, you can make a shortcut to your desktop to make it easier to start.
For a physical disc game, the path is C:/Program Files (x86)/EA GAMES/(your latest EP or SP)/CSBin.
For the Origin Ultimate Collection, the path is C:\Program Files (x86)\Origin Games\The Sims 2 Ultimate Collection\Fun with Pets\SP9\CSBin.
For the EA App Ultimate Collection, the path is C:\Program Files\EA Games\The Sims 2 Ultimate Collection\Fun with Pets\SP9\CSBin.
For the Games4theworld Ultimate Collection, the path is C:\Program Files\The Sims 2 Ultimate Collection\Fun with Pets\SP9\CSBin
For osab’s Starter Pack/web installer Ultimate Collection, the path is C:\Program Files (x86)\The Sims 2 Starter Pack\Fun with Pets\SP9\CSBin
For MagiPack Ultimate Collection, the path is C:\MagiPacks\The Sims 2\Fun with Pets\SP9\CSBin
For MrDJ’s/Oldgamesdownload version, the path is C:/Program Files (x86)/Mr DJ/The Sims 2 Ultimate Collection/The Sims 2 Mansion and Garden Stuff/CSBin.
Don’t be alarmed if BodyShop takes forever to load. It’s even slower than the game!
You can learn more about the BodyShop here including how to modernise it and make it look similar to the Clean UI as well as how to get it running a little more smoothly.
The Hack Conflict Detection Utility will check your Downloads folder for potential conflicting mods in your Downloads folder. It works by scanning every mod and checking which game file the mod edits. If two mods edit the same file, they will be flagged.
Please be advised that this may not necessarily cause a conflict, as some mods can be used together by making sure they load in the correct order.
Please always read mod descriptions before downloading mods.
You can use Mootilda’s HoodChecker to check on your neighbourhoods for potential issues and fix faulty memories, wants, and fears. However, please be aware that The Sims 2 has a tendency to create temporary “relationships” with inanimate objects such as books, cars and so on. It does this to help the game remember which car the sim used to go to work, for example. They’re safe to delete, but it’s also okay not to. Most things that show up in Hoodchecker (eg. “Invalid relationship with self”) are nothing to worry about.
You can run Hoodchecker occasionally with the Remove button to remove any invalid references it detects, and the game will recreate the ones it needs. Make sure to create a backup before using the Hoodchecker “remove” option because it is modifying the neighbourhood package file and thus could also corrupt it if something goes wrong while it’s writing to the file.
If you have a “Missing Character File” line (or lines), it’s most likely due to an NPC(s) that you have added to the game. People often don’t realise that they have done this because they can be added as objects (eg. the surf mod has an NPC) and not just as sims. Here is an incomplete list of the CC which creates NPCs - it has their GUIDs listed so if you see that in Hoodchecker it’s nothing to worry about.
Even if it’s not listed there, you can simply create a new hood and run the Hoodchecker on it. If the “Missing Character file” error shows with the same number, it’s caused by a custom NPC and not a deleted sim. If you want to remove one of these custom NPCs, you need to copy the character file from the mod to the Characters folder of every hood that you’ve loaded since placing the mod in your game - even if you never used the mod in that hood.
A lot of custom content requires you to install CEP (included in MagiPack and osab’s Starter Pack) as well as Smarter EP Check. Please download and install the Smarter EP Check before downloading any mods, and get the CEP if you’re planning to download CC.
You can use the Sims 2 Clean Pack Installer to organize your Sims 2 custom content. You should also use the Clean Installer to install any Sims2Pack files - it’s especially important when downloading lots as mods will often tag along with downloads and you need to uncheck these in the clean installer and only install the lot. You don’t need the Clean Installer to install regular package files.
Whoward has created tons of the most useful modern programs, from WhatCausedThis to HCDU+ to Outfit Organiser to BHAV Finder, check them all out on his site!
Compresses custom content and makes file sizes smaller.
Useful for people who want to reorganise or modify their CC. You can choose which ages and categories CC will show up for.
Useful for people who want to organise their CC and delete broken ones. It can tell you what type of file something is - very useful if you’ve got old files or ones with gibberish names.
Compresses lots by deleting and compressing junk data. Makes your neighbourhood files smaller.
Adds informational text to Body Shop content - useful for players with lots of Body Shop CC, especially old files.
Gives you randomised Sim ideas. Useful for players who get stuck deciding what kind of Sims to make.
Merges files and shortens loading time. Useful for players with lots of CC and long loading times.
Makes installation of custom modular stairs, fireplaces and lighting mods easier.
For creating walls and floors.
For creators who want to test their CC in a different game environment, or for those who want to build lots and share them.
Removes useless duplicate textures from Body Shop recolour files. Most new Body Shop recolours these days have already been run through the programme, so if you’re creating your recolour in SimPE, you won’t need this. If you’re creating your recolour through Body Shop only, this should be used.
Sorts hair (and facial hair) recolours into the correct categories: black, brown, blond/e, red, grey. Handy if you’re making your own hair retextures/recolours or have CC hair that is in the Custom colour category.
For making your own animations in Blender. Previous versions were buggy and extremely hard and tedious to use.
The Sims 2 was released at a time when the Internet and programming in general were much more scattered. Lots of creators made their own sites and ran their own forums instead of everyone being in the same few places. Tumblr, TSR, MTS and Reddit were all in their infancy. So because of that scattered nature, there haven’t been a lot of grand projects to make one singular programme like the TSR Workshop or S3PE for TS3, or Sims4Studio for TS4. A lot of famous and knowledgeable creators have also retired over the years, so the programming scene is quite small.
Please Note: This is copied from Reddit’s r/TheSims2Help’s External Programs Wiki page. Any linked headings will be linked back to the Reddit Wiki. In line links should denote where they go (reddit, lemmy, tumbler) anything not mentioned is probably another off reddit guide or .exe file. Most if not all content contained below was created by the Reddit r/Sims2Help team and all credit for this guide goes to them.
None of these go in your Downloads folder - they are external programs, which you only run and use when the game is closed.
The Sims Package Editor, or SimPE, is an external program created to modify .package files in The Sims 2. It’s possible to edit Sims, neighbourhoods, and make and edit custom content with it. It’s a very powerful tool, but it’s not intuitive to use and requires a lot of practice.
SimPE used to be available on Sims Ambertation, a German website, but the site has been gone for years now. You can see most recent versions on Mod The Sims here and the latest version (SimPE 0.77.69), which is still being maintained by Chris Hatch, is available here. Make sure you don’t download the file with T&A in the name unless you have Chris’s custom (NSFW) pack! SourceForge also hosts older versions of SimPE which is helpful if you can’t get the newer version to work or need a particular version.
There are many tutorials about the various things you can do with it, such as these custom content creation tutorials and this guide about adding memories and this one about changing names. Please backup your files before making any changes. If you’re unsure how to do that, please refer back to the very first section on this post.
If you’re not using any custom content and don’t want to edit your neighbourhood or Sim files, you most likely won’t need SimPE.
Unfortunately, SimPE is only available on Windows so if you’re running The Sims 2 in Bootcamp or Parallels, you will be able to install and use SimPE but you can’t use it on MacOS itself.
The BodyShop does not come with the Legacy Edition though you can use this installer to install BodyShop for Legacy.
The BodyShop is a program that comes with your game, and can be used to create Sims and custom content without opening the game itself. For Windows on disc, digital repacks and the UC, it’s automatically shipped with the game, but for the Super Collection on MacOS, you need to download the Extras file here or here (alt Google Drive link).
On Windows, your BodyShop application is found in the installation folder of your latest EP (or SP as is the case with Mansion & Garden Stuff). Once you find the application, you can make a shortcut to your desktop to make it easier to start.
For a physical disc game, the path is C:/Program Files (x86)/EA GAMES/(your latest EP or SP)/CSBin.
For the Origin Ultimate Collection, the path is C:\Program Files (x86)\Origin Games\The Sims 2 Ultimate Collection\Fun with Pets\SP9\CSBin.
For the EA App Ultimate Collection, the path is C:\Program Files\EA Games\The Sims 2 Ultimate Collection\Fun with Pets\SP9\CSBin.
For the Games4theworld Ultimate Collection, the path is C:\Program Files\The Sims 2 Ultimate Collection\Fun with Pets\SP9\CSBin
For osab’s Starter Pack/web installer Ultimate Collection, the path is C:\Program Files (x86)\The Sims 2 Starter Pack\Fun with Pets\SP9\CSBin
For MagiPack Ultimate Collection, the path is C:\MagiPacks\The Sims 2\Fun with Pets\SP9\CSBin
For MrDJ’s/Oldgamesdownload version, the path is C:/Program Files (x86)/Mr DJ/The Sims 2 Ultimate Collection/The Sims 2 Mansion and Garden Stuff/CSBin.
Don’t be alarmed if BodyShop takes forever to load. It’s even slower than the game!
You can learn more about the BodyShop here including how to modernise it and make it look similar to the Clean UI as well as how to get it running a little more smoothly.
The Hack Conflict Detection Utility will check your Downloads folder for potential conflicting mods in your Downloads folder. It works by scanning every mod and checking which game file the mod edits. If two mods edit the same file, they will be flagged.
Please be advised that this may not necessarily cause a conflict, as some mods can be used together by making sure they load in the correct order.
Please always read mod descriptions before downloading mods.
You can use Mootilda’s HoodChecker to check on your neighbourhoods for potential issues and fix faulty memories, wants, and fears. However, please be aware that The Sims 2 has a tendency to create temporary “relationships” with inanimate objects such as books, cars and so on. It does this to help the game remember which car the sim used to go to work, for example. They’re safe to delete, but it’s also okay not to. Most things that show up in Hoodchecker (eg. “Invalid relationship with self”) are nothing to worry about.
You can run Hoodchecker occasionally with the Remove button to remove any invalid references it detects, and the game will recreate the ones it needs. Make sure to create a backup before using the Hoodchecker “remove” option because it is modifying the neighbourhood package file and thus could also corrupt it if something goes wrong while it’s writing to the file.
If you have a “Missing Character File” line (or lines), it’s most likely due to an NPC(s) that you have added to the game. People often don’t realise that they have done this because they can be added as objects (eg. the surf mod has an NPC) and not just as sims. Here is an incomplete list of the CC which creates NPCs - it has their GUIDs listed so if you see that in Hoodchecker it’s nothing to worry about.
Even if it’s not listed there, you can simply create a new hood and run the Hoodchecker on it. If the “Missing Character file” error shows with the same number, it’s caused by a custom NPC and not a deleted sim. If you want to remove one of these custom NPCs, you need to copy the character file from the mod to the Characters folder of every hood that you’ve loaded since placing the mod in your game - even if you never used the mod in that hood.
A lot of custom content requires you to install CEP (included in MagiPack and osab’s Starter Pack) as well as Smarter EP Check. Please download and install the Smarter EP Check before downloading any mods, and get the CEP if you’re planning to download CC.
You can use the Sims 2 Clean Pack Installer to organize your Sims 2 custom content. You should also use the Clean Installer to install any Sims2Pack files - it’s especially important when downloading lots as mods will often tag along with downloads and you need to uncheck these in the clean installer and only install the lot. You don’t need the Clean Installer to install regular package files.
Whoward has created tons of the most useful modern programs, from WhatCausedThis to HCDU+ to Outfit Organiser to BHAV Finder, check them all out on his site!
Compresses custom content and makes file sizes smaller.
Useful for people who want to reorganise or modify their CC. You can choose which ages and categories CC will show up for.
Useful for people who want to organise their CC and delete broken ones. It can tell you what type of file something is - very useful if you’ve got old files or ones with gibberish names.
Compresses lots by deleting and compressing junk data. Makes your neighbourhood files smaller.
Adds informational text to Body Shop content - useful for players with lots of Body Shop CC, especially old files.
Gives you randomised Sim ideas. Useful for players who get stuck deciding what kind of Sims to make.
Merges files and shortens loading time. Useful for players with lots of CC and long loading times.
Makes installation of custom modular stairs, fireplaces and lighting mods easier.
For creating walls and floors.
For creators who want to test their CC in a different game environment, or for those who want to build lots and share them.
Removes useless duplicate textures from Body Shop recolour files. Most new Body Shop recolours these days have already been run through the programme, so if you’re creating your recolour in SimPE, you won’t need this. If you’re creating your recolour through Body Shop only, this should be used.
Sorts hair (and facial hair) recolours into the correct categories: black, brown, blond/e, red, grey. Handy if you’re making your own hair retextures/recolours or have CC hair that is in the Custom colour category.
For making your own animations in Blender. Previous versions were buggy and extremely hard and tedious to use.
The Sims 2 was released at a time when the Internet and programming in general were much more scattered. Lots of creators made their own sites and ran their own forums instead of everyone being in the same few places. Tumblr, TSR, MTS and Reddit were all in their infancy. So because of that scattered nature, there haven’t been a lot of grand projects to make one singular programme like the TSR Workshop or S3PE for TS3, or Sims4Studio for TS4. A lot of famous and knowledgeable creators have also retired over the years, so the programming scene is quite small.
Please Note: This is copied from Reddit’s r/TheSims2Help’s General Info Wiki page. Any linked headings will be linked back to the Reddit Wiki. In line links should denote where they go (reddit, lemmy, tumbler) anything not mentioned is probably another off reddit guide or .exe file. Most if not all content contained below was created by the Reddit r/Sims2Help team and all credit for this guide goes to them.
If you’re just looking to download the game, you can see the Lemmy Download Guide or the, Reddit Download Guide.*
Please regularly backup your saves, your mods, and your EA Games folder in general - it’s the best way to protect things that are important to you in case anything goes wrong! In Windows, the important folder to back up is located in Documents/EA Games (or possibly C:\Users\Public\Documents\EA Games\, if the normal Documents/EA Games folder is empty). If your game is within OneDrive/Documents, you should ensure OneDrive is not actively syncing the game’s files while you play as syncing programs like this can corrupt your hoods - you need to disable OneDrive or stop it from syncing the Documents folder. On MacOS, your save folder is located in ~Library/Containers/com.aspyr.sims2.appstore/Data/Library/Application Support/Aspyr/The Sims 2/ if you have the 64 bit version (which you have if on MacOS Catalina or above) or ~/Library/Application Support/Aspyr/The Sims 2 if you have the 32 bit version - please note this is the hidden Library folder (visible with Cmd + shift + .) not the System Library folder. To back up your folder, right click on it and choose copy. Then navigate to a separate, safe place on your computer (or an external drive, Google Drive, USB stick, etc.) where your backups can live in safety, away from the rest of the game. Right click in the new place and select paste. Your folder will be copied over to the new location.
Downloading The Sims 2 Guide Section: Will it Run?
Oldgamesdownload / MrDJ / archive.org repack If you have downloaded your copy of the game from OldGamesDownload/archive.org/Mr DJ’s repack, it is not the Ultimate Collection, despite the name, it’s the discs bundled together. This version is safe and works the same as any other version of the game - it’s just missing the IKEA stuff pack and has a different file structure to the Ultimate Collection. The IKEA Stuff Pack can be downloaded here. Once the IKEA pack is downloaded, you will need to extract the folder by right clicking and choosing “Extract Here” or similar, and once extracted you will see there is a TSData folder inside. Then go to your install directory, which is C:/Program Files (x86)/Mr DJ/ by default. There is a “The Sims 2 IKEA Home Stuff” folder in here, go into this folder and you will see there are currently two folders - TSData and TSBin. Delete the TSData folder and then from your extracted SP8 folder, move/copy the TSData folder and paste it into this location. You will now have Ikea Stuff correctly installed. However, some people have reported that this doesn’t work for them or it causes issues such as crashing. Clearing your cache files (go to Documents/EA Games/The Sims 2 and delete accessory.cache and groups.cache at the end of the folder) may make the IKEA pack work for you. If you’re unable to install the IKEA Stuff Pack and you really want to have all the packs, you should uninstall the game and install it again using one of the versions we have linked which is the proper Ultimate Collection.
Download the IKEA pack linked above and follow the instructions here.
The Sims 2 was previously considered abandonware on Windows, but this is not a legally recognised term. As per Wikipedia “Abandonware is a product, typically software, ignored by its owner and manufacturer, and for which no official support is available. Although such software is usually still under copyright, the owner may not be tracking copyright violations”. The Sims 2 is still, and always has been, under copyright, and thus downloading it is piracy - people who say otherwise are incorrect, though it is a commonly held belief in the Sims community that downloading abandonware is not piracy. This was the case even before EA started selling the Sims 2 Legacy Edition. Although it is piracy, we do recommend doing it anyway and link to downloads for the Ultimate Collection because this is still not available for sale anywhere.
The Sims 2: The Ultimate Collection was only available for free on Origin for a few years. It is not possible to buy The Sims 2 Ultimate Collection, and it never has been. If a seller is advertising The Ultimate Collection for sale, please be advised that it is not a legal copy. To receive this version, they would be selling you an Origin account. This is against EA’s Terms of Service and these accounts are often stolen. The original owners of the account can reclaim it at any time or if EA realizes you bought the account, they could terminate it. If they are not trying to sell you an account, but are instead going to send you a download link for the files, you would be buying pirated files if you pay them - you may as well just download the game by yourself! It is possible to buy the Sims 2 Legacy Edition on the EA App, Steam and Epic Games and you are welcome to do that if you wish, but it is not the Ultimate Collection.
There are about 20 discs in total for the entire collection. You will need to use a program to update the base game files (e.g. Grumpyloader) in order to install the expansions, because you cannot install the expansions without the base game trying to update which will now always fail and cancel the pack install. You will then have to patch the base game and every expansion you install before you move onto the next one. The Sims 2 server was taken down in 2011 which means the disks can no longer patch themselves. You’ll also have to deal with SecuROM (included with the later discs, from either Seasons or Bon Voyage onwards) which is known to cause a whole host of issues, such as disabling disk trays. It also stays on your computer, even when you uninstall Sims 2, and you have to get a special tool to remove it that SecuROM released once they lost a lawsuit. However, you can only remove it once The Sims 2 is uninstalled or by using a NoCD exe as every time you load the game, it will re-install itself (if you don’t ever run the game from the original exe, and always use a cracked one, SecuRom won’t be installed in the first place). If you are determined to use the disks to install, you can follow this guide. However, we do not provide support with getting the discs to install and recommend you use the Ultimate Collection linked above to save yourself from this tedious process, unless you are comfortable with troubleshooting issues yourself.
These problems are due to the fact that the game is 20+ years old. It is unable to recognise new hardware and operating systems. These are incredibly common issues that arise on all versions. It doesn’t matter if you got your game on disc, Origin/EA, or if it was an illegal copy. Time is always cruel to old, outdated games.
If you have a previous version of The Sims 2 installed on your computer, such as a copy from the disks, but you would like the Ultimate Collection there are a couple of steps to follow. First, if you want to back-up your saves, custom content, and mods, you’ll want to go to Documents/EA Games and right click on The Sims 2 folder. Choose “Copy” and go elsewhere on your computer (or a cloud service like Google Drive or a USB stick), somewhere safe to keep the files. When you’re in the new location, right click and choose “Paste”. Your saves, mods, and custom content will copy over to this new location. Now that you have a back up, you are free to uninstall using this guide. Please follow all of the steps, otherwise you may be unable to reinstall the game. Once you’ve completely uninstalled, follow the directions in the download TS2 section to download our recommended version of the Ultimate Collection. To replace your files, go to Documents/EA Games/The Sims 2 (or The Sims 2 UC/Legacy, depending on what you’ve got). Delete all of the folders inside and then paste in all the folders that you backed up elsewhere.
All of the digital downloads for the Sims 2 (from games4theworld, Origin/EA, MrDJ/oldgamesdownload, archive.org, osab’s repacks) are patched already so you do not need to apply the patches. If you have installed from the discs then you should apply the patches as they contain important fixes. You can download them here - you may get a security error from your browser, this is just a precaution and these files are safe to download.
In short: it’s a false positive. Special thanks to Reddit u/Reblyn for this section. Windows flags every program as a virus that isn’t officially “signed”. How do you “sign” a program? You go to Microsoft and ask (i.e. pay) them to do it. Naturally, fan-made mods and arr’d copies of games aren’t signed. This is reserved for official programs and games, which were usually created and published by big corporations, who had the money to go and ask Microsoft to sign their product. That’s all there is to it. This is how false positives happen. Third-party virus scanners such as Virustotal are, quite honestly, complete and utter garbage and shouldn’t be used. Fan-made programs are simply not in their database and will therefore be flagged as potential malware. As you can imagine, their databases are probably also quite lacking. They’ll have most well-known programs in them which don’t need to be checked anyway, for everything else they’re pretty much useless. Programs that have been used by the community for over 10 years are not suddenly going to have viruses in them, otherwise someone would have caught that a long time ago. Viruses don’t float around the internet and attach themselves to files that have been uploaded years ago.
If you get a low disk space notification when starting the game, and your disk space isn’t actually low, or if you have no neighbourhoods to choose from on the neighbourhood selection screen, the issue is the TM in the name of “The Sims™ 2 Ultimate Collection” which is only present with the actual Ultimate Collection from Origin/EA App or Games4theworld (osab’s installer removes the TM and the MagiPack UC uses “The Sims 2” as the folder name). The reason it is only an issue for some people and not everyone is to do with the region/locale of the computer you are using; many Japanese simmers have the issue, for example. You can read about the issue and solutions to it here, here, and here - your options are to either remove the TM symbol from the game in the registry or to change your region/locale on your computer.
If you’re having issues with the game not saving, for example when new sims are created during birth or adoption and then disappear when you reload the game or when you change a setting and it reverts the next time you start the game, you should look at your antivirus and OneDrive. Both of these can interfere with the game’s files. For OneDrive, read this thread (it is about sims 3 but applies to 2 also) about how to disable it to prevent further issues. For your antivirus, you need to add an exception for the game’s files - this is the case even if you only have the generic Windows’ Defender/Security installed. You will need to Google how to add an exception for your particular antivirus as it varies based on the program - just Google “your antivirus name + add exception” and you should find the info. Make sure to add your installation location (e.g. C:/Program Files/The Sims 2 UC or wherever you installed it - see Where Are My Installation Files), your save location (Documents/EA Games) and the game application itself (Sims2EP9.exe, Sims2RPC.exe, Sims2RPCSettings.exe, and Sims2EP9RPC.exe), if that’s an option on your antivirus. Some antivirus software will have an additional setting “Data Protection” (e.g. Norton 360) - make sure to add the game as an exception here too as not doing so may stop the game from saving any progress you make.
Please follow this Fandom guide to reset the premade neighbourhoods to their original state.
First, you’ll need SimPE. You can get it here and you can read about it here. So, once you have SimPE downloaded and extracted, do the following: Go to the hood folder - for these instructions, I will use E001 (Belladonna Cove) as the example. Open E001 and right-click on E001_Neighbourhood.package. Click open with… and then click Choose Another App. Check the box which says, “Always use this app to open .package files” at the bottom and then click More Apps. Scroll down, click “Look for another app on this PC,” and locate the SimPe.exe in the 0.75.69 folder you extracted. SimPE will open, note that it takes a while to load - the bottom left will show what’s loading, don’t click anything until there is nothing there. Make sure you click Plugin view along the bottom tabs list, it may be on Details when you first start. In the Resource Tree on the top left, click the ID Number (IDNO) resource. You will now see one resource (ID Number) in the resource list on the top right. Click on it. In the plugin view in the bottom pane, you’ll now see a bunch of info. Look at the required EP and change the dropdown from StoreEdition to MansionGarden. Click commit in the bottom right, then press save (floppy disk in the top left or press Ctrl + s). Close the file and repeat steps 1-5 for all E001_Suburb###.package, E001_Downtown###.package, E001_Vacation###.package and E001_University###.package files for that hood. Repeat for the other hoods.
As mentioned in this thread, there is a bug with the Main Street Mobile Homes apartment lot that ships with Apartment Life where it causes crashing. You can delete the original and use this remake if you want to play the lot without crashes.
If you’re having issues with the game that are not technical issues (flickering, black shadow boxes, pink flashing, etc. are covered in the tech support section of the wiki), then you probably have an issue with broken or conflicting custom content. This is a relatively normal thing and it’s nothing to worry about. Sometimes you download custom content that doesn’t work. While it might sometimes look scary, usually it’s a simple fix. If you know which piece of custom content it is, we advise you to take it out! However, if the custom content causing issues is geneticised/townified skins or eyes then you will need to use SimPE to fix each Sim that had the custom content in their DNA before loading the game again, otherwise you will mess up the DNA of the sims. Here is a tutorial. If the custom content is custom food, see the note on custom foods in the mods info section. If it’s a career or a major, you should make all sims using that career or major quit the job/change major before removing the package - but if you don’t, you’ll just need to reset those sims using testing cheats afterwards. If you don’t know what piece of custom content is causing the issue, we recommend the 50/50 method. It’s simple: you remove 50% of the custom content in your folder, boot the game, and see if the issue is gone. If it’s not, you repeat the process with the other half of your custom content. Once you know which half the error is coming from, you can start to narrow down your search and repeat the process until you get down to just one file! This is the quickest way to find problem content, and is far faster than doing it one file at a time.
Yes! If you always want your game to start with certain cheats on, you can create a UserStartup.cheat file. It’s a special file that not only automatically enables cheats when you load up the game, but it can also create shorter codes for your cheats. For example, it can change MoveObjects On so all you have to type in the cheat bear is moo! First of all, some mods create a UserStartup.cheat file for you. It’s best to check that you don’t already have one. So head on over to Documents/EA Games/The Sims 2/Config and have a look for a file called UserStartup.cheat. If you’re on Mac, you’ll need to go to ~/library/Containers/com.aspyr.sims2.appstore/Data/Library/Application Support/Aspyr/The Sims 2/Config. If you have one, great! If you don’t, simply open up Notepad and immediately save the empty file to your desktop. Where it says the name for the file, type “UserStartup.cheat” without the quotes. On the file extension just below it, choose “All Files” from the drop down box. It should look like this. Once it’s saved to your desktop, all you have to do is write in the cheats that you would always like to be enabled. Please remember to write the cheats correctly and only have one cheat per line, like this: boolProp constrainFloorElevation false boolProp ControlPets on boolProp testingCheatsEnabled true boolProp allow45DegreeAngleofRotation true intProp MaxNumOfVisitingSims [number] uintProp LotSkirtSizeIncrease [number] These will be applied every time you start the game, so you won’t have to type them in. One-time cheats, such as kaching and motherlode, will not work in this file. The only cheats that work are ones that can be turned on and off. If you don’t know what the cheat does, please do not apply it! For aliases, it gets a little more tricky. The layout must be as follows: alias TheTextYouWishToUse “CheatCommand” “ShortDescription” “LongDescription” So, if you wanted to shorten MoveObjects On to moo, it would be as follows: alias moo “MoveObjects On” “Move Objects” “Allows the player to place objects anywhere” Some examples: alias test “boolProp testingCheatsEnabled true” alias mon “moveObjects on” alias mof “moveObjects on” alias mot “motiveDecay off” alias m “maxmotives” As you saw above, you do not have to write out either of the descriptions for the file to work. When you type “help” into the cheat bar, the descriptions will be listed next to the cheats to help you remember what they’re associated with. If you don’t think you’ll need them, don’t add them! If you don’t write cheats correctly, the game will stop reading the file and none of the cheats beneath the broken cheat will be read. Also, be aware that the quarter tile placement cheat (setQuarterTilePlacement on/off) must be typed in this format to work in file: boolProp quarterTilePlacementEnabled true You can still create an alias for the regular version of the cheat though. Eg: alias qtileon “setquartertileplacement on” “setquartertileplacement on” “setquartertileplacement on” alias qtileoff “setquartertileplacement off” “setquartertileplacement off” “setquartertileplacement off” Note that this cheat still needs to be toggled in game - use Ctrl + F to turn it on or off. Please also note that the cheat “boolprop AllObjectLightsOn true” will cause crashing on launch if you put it in your userstartup.cheat file as mentioned in this thread. If the above section doesn’t make much sense to you, there is a more in-depth guide here.
There are so many places out there to get custom content, it can be a little overwhelming to start shopping. ModTheSims is an oldie but a goodie, the Pleasant Sims blog has a lot of great resources, and we also have a mods list which links to many other great places! You can find a lot of custom content elsewhere on the internet. Many people upload their creations to Tumblr but you have to be wary when searching through obscure sites. A great way to ensure you don’t click on any misleading links or pictures is to use an adblocker. We recommend Ublock Origin. It is an extension for your browser that will protect you from misleading download buttons and harmful ads. While it is recommended to have an adblocker on at all times for your own safety, Ublock Origin is easy to turn off when you want to support your favourite creators by watching their adverts. Just click on the extension and press the big power off button. Job done!
Greatcheesecakepersona spent two years working on improving and updating the UI of The Sims 2. The Starship UI mod is the dark UI version of the clean UI and is available here. The pink version of the UI is also available at this link, as well as the dark UI for BodyShop. The “Random UI Experiments [Alpha]” folder contains unfinished experimental UIs in several other colours, however, these are likely to have bugs such as parts of the UI being the wrong colour as they are not final release versions.
The config log is a file located in Documents/EA Games/The Sims 2/Logs/<your-pc-name>-config-log.txt which is updated every time you run the game or BodyShop and tells you what configuration the game is using in terms of RAM, graphics card, settings, etc. For Legacy, it is normal for: * the version to be 1.18.0.114 * the OS version to be Windows NT 0.0 * the graphics card to be <<NOT FOUND IN DATABASE!>> * the memory and free memory to be listed as 0MB * the texture memory not to be listed at all For non-Legacy, it is normal for: * the version to be 1.17.0.66 provided you have Mansion & Garden (i.e. all UC + other digital repacks; if you have discs without M&G expect a different version) * the OS version to be Windows NT 6.0 * if you are using the Legacy graphics rules (included in MagiPack + osab’s Starter Pack), it’s okay for the graphics card to have <<NOT FOUND IN DATABASE!>> and not to list the texture memory * if not using Legacy graphics rules, the graphics card should NOT have <<NOT FOUND IN DATABASE!>> and if it does, you need to fix your graphics rules * texture memory should not be 32MB, if it is you need to fix your graphics rules * memory should be 4096 if you have the 4GB patch or 2048 or 1024 if you don’t. The free memory line should ideally match the memory line - if it doesn’t, try closing some programs and restarting your computer before running the game to keep more memory available If you use DXVK, note that your graphics card will be listed as a Nvidia GeForce 7800 GTX regardless of what GPU you actually have. This is intentional and is part of how DXVK works.
If you’re playing on MacOS, the supported languages are English, French, Italian, German, Spanish, and Japanese. The language that the game is in will be based on the language of your OS - e.g. if you have your Mac set to use French but want to play in English, you’d have to change your MacOS language to do so. If your Mac is using an unsupported language, the game will default to English. The supported languages are listed in Aspyr’s Super Collection FAQ though the list is unlikely to change at this point. If you’re playing on Windows (or Linux via Proton, Bottles, etc. or Mac via Parallels, Crossover etc.) and you are not using the Legacy Collection via Steam (and possibly Epic), then you can follow this guide to change languages, which also lists all available languages. Ensure you do not mix up decimal and hex values or you will end up with an unexpected language! If you are using the Legacy Collection via Steam (and possibly Epic), then the registry method above will not work for you. Instead, you need to use a launch command. To do this, right click on the game in your library (or click the Settings button if you have the game page selected) and click Properties. In the Launch Options box at the bottom, add the language you want in this format: -l:“English UK” or -l:French Note that languages with spaces must be enclosed in quotation marks. The game does not use standardised language codes for this, it’s based on the game’s locale folder names (if you open the game’s install folder and go to EP9/TSData/Res/Locale you can see all possible options). See this thread discussing this topic.
Please Note: This is copied from Reddit’s r/TheSims2Help’s General Info Wiki page. Any linked headings will be linked back to the Reddit Wiki. In line links should denote where they go (reddit, lemmy, tumbler) anything not mentioned is probably another off reddit guide or .exe file. Most if not all content contained below was created by the Reddit r/Sims2Help team and all credit for this guide goes to them.
If you’re just looking to download the game, you can see the Lemmy Download Guide or the, Reddit Download Guide.*
Please regularly backup your saves, your mods, and your EA Games folder in general - it’s the best way to protect things that are important to you in case anything goes wrong! In Windows, the important folder to back up is located in Documents/EA Games (or possibly C:\Users\Public\Documents\EA Games\, if the normal Documents/EA Games folder is empty). If your game is within OneDrive/Documents, you should ensure OneDrive is not actively syncing the game’s files while you play as syncing programs like this can corrupt your hoods - you need to disable OneDrive or stop it from syncing the Documents folder. On MacOS, your save folder is located in ~Library/Containers/com.aspyr.sims2.appstore/Data/Library/Application Support/Aspyr/The Sims 2/ if you have the 64 bit version (which you have if on MacOS Catalina or above) or ~/Library/Application Support/Aspyr/The Sims 2 if you have the 32 bit version - please note this is the hidden Library folder (visible with Cmd + shift + .) not the System Library folder. To back up your folder, right click on it and choose copy. Then navigate to a separate, safe place on your computer (or an external drive, Google Drive, USB stick, etc.) where your backups can live in safety, away from the rest of the game. Right click in the new place and select paste. Your folder will be copied over to the new location.
Downloading The Sims 2 Guide Section: Will it Run?
Oldgamesdownload / MrDJ / archive.org repack If you have downloaded your copy of the game from OldGamesDownload/archive.org/Mr DJ’s repack, it is not the Ultimate Collection, despite the name, it’s the discs bundled together. This version is safe and works the same as any other version of the game - it’s just missing the IKEA stuff pack and has a different file structure to the Ultimate Collection. The IKEA Stuff Pack can be downloaded here. Once the IKEA pack is downloaded, you will need to extract the folder by right clicking and choosing “Extract Here” or similar, and once extracted you will see there is a TSData folder inside. Then go to your install directory, which is C:/Program Files (x86)/Mr DJ/ by default. There is a “The Sims 2 IKEA Home Stuff” folder in here, go into this folder and you will see there are currently two folders - TSData and TSBin. Delete the TSData folder and then from your extracted SP8 folder, move/copy the TSData folder and paste it into this location. You will now have Ikea Stuff correctly installed. However, some people have reported that this doesn’t work for them or it causes issues such as crashing. Clearing your cache files (go to Documents/EA Games/The Sims 2 and delete accessory.cache and groups.cache at the end of the folder) may make the IKEA pack work for you. If you’re unable to install the IKEA Stuff Pack and you really want to have all the packs, you should uninstall the game and install it again using one of the versions we have linked which is the proper Ultimate Collection.
Download the IKEA pack linked above and follow the instructions here.
The Sims 2 was previously considered abandonware on Windows, but this is not a legally recognised term. As per Wikipedia “Abandonware is a product, typically software, ignored by its owner and manufacturer, and for which no official support is available. Although such software is usually still under copyright, the owner may not be tracking copyright violations”. The Sims 2 is still, and always has been, under copyright, and thus downloading it is piracy - people who say otherwise are incorrect, though it is a commonly held belief in the Sims community that downloading abandonware is not piracy. This was the case even before EA started selling the Sims 2 Legacy Edition. Although it is piracy, we do recommend doing it anyway and link to downloads for the Ultimate Collection because this is still not available for sale anywhere.
The Sims 2: The Ultimate Collection was only available for free on Origin for a few years. It is not possible to buy The Sims 2 Ultimate Collection, and it never has been. If a seller is advertising The Ultimate Collection for sale, please be advised that it is not a legal copy. To receive this version, they would be selling you an Origin account. This is against EA’s Terms of Service and these accounts are often stolen. The original owners of the account can reclaim it at any time or if EA realizes you bought the account, they could terminate it. If they are not trying to sell you an account, but are instead going to send you a download link for the files, you would be buying pirated files if you pay them - you may as well just download the game by yourself! It is possible to buy the Sims 2 Legacy Edition on the EA App, Steam and Epic Games and you are welcome to do that if you wish, but it is not the Ultimate Collection.
There are about 20 discs in total for the entire collection. You will need to use a program to update the base game files (e.g. Grumpyloader) in order to install the expansions, because you cannot install the expansions without the base game trying to update which will now always fail and cancel the pack install. You will then have to patch the base game and every expansion you install before you move onto the next one. The Sims 2 server was taken down in 2011 which means the disks can no longer patch themselves. You’ll also have to deal with SecuROM (included with the later discs, from either Seasons or Bon Voyage onwards) which is known to cause a whole host of issues, such as disabling disk trays. It also stays on your computer, even when you uninstall Sims 2, and you have to get a special tool to remove it that SecuROM released once they lost a lawsuit. However, you can only remove it once The Sims 2 is uninstalled or by using a NoCD exe as every time you load the game, it will re-install itself (if you don’t ever run the game from the original exe, and always use a cracked one, SecuRom won’t be installed in the first place). If you are determined to use the disks to install, you can follow this guide. However, we do not provide support with getting the discs to install and recommend you use the Ultimate Collection linked above to save yourself from this tedious process, unless you are comfortable with troubleshooting issues yourself.
These problems are due to the fact that the game is 20+ years old. It is unable to recognise new hardware and operating systems. These are incredibly common issues that arise on all versions. It doesn’t matter if you got your game on disc, Origin/EA, or if it was an illegal copy. Time is always cruel to old, outdated games.
If you have a previous version of The Sims 2 installed on your computer, such as a copy from the disks, but you would like the Ultimate Collection there are a couple of steps to follow. First, if you want to back-up your saves, custom content, and mods, you’ll want to go to Documents/EA Games and right click on The Sims 2 folder. Choose “Copy” and go elsewhere on your computer (or a cloud service like Google Drive or a USB stick), somewhere safe to keep the files. When you’re in the new location, right click and choose “Paste”. Your saves, mods, and custom content will copy over to this new location. Now that you have a back up, you are free to uninstall using this guide. Please follow all of the steps, otherwise you may be unable to reinstall the game. Once you’ve completely uninstalled, follow the directions in the download TS2 section to download our recommended version of the Ultimate Collection. To replace your files, go to Documents/EA Games/The Sims 2 (or The Sims 2 UC/Legacy, depending on what you’ve got). Delete all of the folders inside and then paste in all the folders that you backed up elsewhere.
All of the digital downloads for the Sims 2 (from games4theworld, Origin/EA, MrDJ/oldgamesdownload, archive.org, osab’s repacks) are patched already so you do not need to apply the patches. If you have installed from the discs then you should apply the patches as they contain important fixes. You can download them here - you may get a security error from your browser, this is just a precaution and these files are safe to download.
In short: it’s a false positive. Special thanks to Reddit u/Reblyn for this section. Windows flags every program as a virus that isn’t officially “signed”. How do you “sign” a program? You go to Microsoft and ask (i.e. pay) them to do it. Naturally, fan-made mods and arr’d copies of games aren’t signed. This is reserved for official programs and games, which were usually created and published by big corporations, who had the money to go and ask Microsoft to sign their product. That’s all there is to it. This is how false positives happen. Third-party virus scanners such as Virustotal are, quite honestly, complete and utter garbage and shouldn’t be used. Fan-made programs are simply not in their database and will therefore be flagged as potential malware. As you can imagine, their databases are probably also quite lacking. They’ll have most well-known programs in them which don’t need to be checked anyway, for everything else they’re pretty much useless. Programs that have been used by the community for over 10 years are not suddenly going to have viruses in them, otherwise someone would have caught that a long time ago. Viruses don’t float around the internet and attach themselves to files that have been uploaded years ago.
If you get a low disk space notification when starting the game, and your disk space isn’t actually low, or if you have no neighbourhoods to choose from on the neighbourhood selection screen, the issue is the TM in the name of “The Sims™ 2 Ultimate Collection” which is only present with the actual Ultimate Collection from Origin/EA App or Games4theworld (osab’s installer removes the TM and the MagiPack UC uses “The Sims 2” as the folder name). The reason it is only an issue for some people and not everyone is to do with the region/locale of the computer you are using; many Japanese simmers have the issue, for example. You can read about the issue and solutions to it here, here, and here - your options are to either remove the TM symbol from the game in the registry or to change your region/locale on your computer.
If you’re having issues with the game not saving, for example when new sims are created during birth or adoption and then disappear when you reload the game or when you change a setting and it reverts the next time you start the game, you should look at your antivirus and OneDrive. Both of these can interfere with the game’s files. For OneDrive, read this thread (it is about sims 3 but applies to 2 also) about how to disable it to prevent further issues. For your antivirus, you need to add an exception for the game’s files - this is the case even if you only have the generic Windows’ Defender/Security installed. You will need to Google how to add an exception for your particular antivirus as it varies based on the program - just Google “your antivirus name + add exception” and you should find the info. Make sure to add your installation location (e.g. C:/Program Files/The Sims 2 UC or wherever you installed it - see Where Are My Installation Files), your save location (Documents/EA Games) and the game application itself (Sims2EP9.exe, Sims2RPC.exe, Sims2RPCSettings.exe, and Sims2EP9RPC.exe), if that’s an option on your antivirus. Some antivirus software will have an additional setting “Data Protection” (e.g. Norton 360) - make sure to add the game as an exception here too as not doing so may stop the game from saving any progress you make.
Please follow this Fandom guide to reset the premade neighbourhoods to their original state.
First, you’ll need SimPE. You can get it here and you can read about it here. So, once you have SimPE downloaded and extracted, do the following: Go to the hood folder - for these instructions, I will use E001 (Belladonna Cove) as the example. Open E001 and right-click on E001_Neighbourhood.package. Click open with… and then click Choose Another App. Check the box which says, “Always use this app to open .package files” at the bottom and then click More Apps. Scroll down, click “Look for another app on this PC,” and locate the SimPe.exe in the 0.75.69 folder you extracted. SimPE will open, note that it takes a while to load - the bottom left will show what’s loading, don’t click anything until there is nothing there. Make sure you click Plugin view along the bottom tabs list, it may be on Details when you first start. In the Resource Tree on the top left, click the ID Number (IDNO) resource. You will now see one resource (ID Number) in the resource list on the top right. Click on it. In the plugin view in the bottom pane, you’ll now see a bunch of info. Look at the required EP and change the dropdown from StoreEdition to MansionGarden. Click commit in the bottom right, then press save (floppy disk in the top left or press Ctrl + s). Close the file and repeat steps 1-5 for all E001_Suburb###.package, E001_Downtown###.package, E001_Vacation###.package and E001_University###.package files for that hood. Repeat for the other hoods.
As mentioned in this thread, there is a bug with the Main Street Mobile Homes apartment lot that ships with Apartment Life where it causes crashing. You can delete the original and use this remake if you want to play the lot without crashes.
If you’re having issues with the game that are not technical issues (flickering, black shadow boxes, pink flashing, etc. are covered in the tech support section of the wiki), then you probably have an issue with broken or conflicting custom content. This is a relatively normal thing and it’s nothing to worry about. Sometimes you download custom content that doesn’t work. While it might sometimes look scary, usually it’s a simple fix. If you know which piece of custom content it is, we advise you to take it out! However, if the custom content causing issues is geneticised/townified skins or eyes then you will need to use SimPE to fix each Sim that had the custom content in their DNA before loading the game again, otherwise you will mess up the DNA of the sims. Here is a tutorial. If the custom content is custom food, see the note on custom foods in the mods info section. If it’s a career or a major, you should make all sims using that career or major quit the job/change major before removing the package - but if you don’t, you’ll just need to reset those sims using testing cheats afterwards. If you don’t know what piece of custom content is causing the issue, we recommend the 50/50 method. It’s simple: you remove 50% of the custom content in your folder, boot the game, and see if the issue is gone. If it’s not, you repeat the process with the other half of your custom content. Once you know which half the error is coming from, you can start to narrow down your search and repeat the process until you get down to just one file! This is the quickest way to find problem content, and is far faster than doing it one file at a time.
Yes! If you always want your game to start with certain cheats on, you can create a UserStartup.cheat file. It’s a special file that not only automatically enables cheats when you load up the game, but it can also create shorter codes for your cheats. For example, it can change MoveObjects On so all you have to type in the cheat bear is moo! First of all, some mods create a UserStartup.cheat file for you. It’s best to check that you don’t already have one. So head on over to Documents/EA Games/The Sims 2/Config and have a look for a file called UserStartup.cheat. If you’re on Mac, you’ll need to go to ~/library/Containers/com.aspyr.sims2.appstore/Data/Library/Application Support/Aspyr/The Sims 2/Config. If you have one, great! If you don’t, simply open up Notepad and immediately save the empty file to your desktop. Where it says the name for the file, type “UserStartup.cheat” without the quotes. On the file extension just below it, choose “All Files” from the drop down box. It should look like this. Once it’s saved to your desktop, all you have to do is write in the cheats that you would always like to be enabled. Please remember to write the cheats correctly and only have one cheat per line, like this: boolProp constrainFloorElevation false boolProp ControlPets on boolProp testingCheatsEnabled true boolProp allow45DegreeAngleofRotation true intProp MaxNumOfVisitingSims [number] uintProp LotSkirtSizeIncrease [number] These will be applied every time you start the game, so you won’t have to type them in. One-time cheats, such as kaching and motherlode, will not work in this file. The only cheats that work are ones that can be turned on and off. If you don’t know what the cheat does, please do not apply it! For aliases, it gets a little more tricky. The layout must be as follows: alias TheTextYouWishToUse “CheatCommand” “ShortDescription” “LongDescription” So, if you wanted to shorten MoveObjects On to moo, it would be as follows: alias moo “MoveObjects On” “Move Objects” “Allows the player to place objects anywhere” Some examples: alias test “boolProp testingCheatsEnabled true” alias mon “moveObjects on” alias mof “moveObjects on” alias mot “motiveDecay off” alias m “maxmotives” As you saw above, you do not have to write out either of the descriptions for the file to work. When you type “help” into the cheat bar, the descriptions will be listed next to the cheats to help you remember what they’re associated with. If you don’t think you’ll need them, don’t add them! If you don’t write cheats correctly, the game will stop reading the file and none of the cheats beneath the broken cheat will be read. Also, be aware that the quarter tile placement cheat (setQuarterTilePlacement on/off) must be typed in this format to work in file: boolProp quarterTilePlacementEnabled true You can still create an alias for the regular version of the cheat though. Eg: alias qtileon “setquartertileplacement on” “setquartertileplacement on” “setquartertileplacement on” alias qtileoff “setquartertileplacement off” “setquartertileplacement off” “setquartertileplacement off” Note that this cheat still needs to be toggled in game - use Ctrl + F to turn it on or off. Please also note that the cheat “boolprop AllObjectLightsOn true” will cause crashing on launch if you put it in your userstartup.cheat file as mentioned in this thread. If the above section doesn’t make much sense to you, there is a more in-depth guide here.
There are so many places out there to get custom content, it can be a little overwhelming to start shopping. ModTheSims is an oldie but a goodie, the Pleasant Sims blog has a lot of great resources, and we also have a mods list which links to many other great places! You can find a lot of custom content elsewhere on the internet. Many people upload their creations to Tumblr but you have to be wary when searching through obscure sites. A great way to ensure you don’t click on any misleading links or pictures is to use an adblocker. We recommend Ublock Origin. It is an extension for your browser that will protect you from misleading download buttons and harmful ads. While it is recommended to have an adblocker on at all times for your own safety, Ublock Origin is easy to turn off when you want to support your favourite creators by watching their adverts. Just click on the extension and press the big power off button. Job done!
Greatcheesecakepersona spent two years working on improving and updating the UI of The Sims 2. The Starship UI mod is the dark UI version of the clean UI and is available here. The pink version of the UI is also available at this link, as well as the dark UI for BodyShop. The “Random UI Experiments [Alpha]” folder contains unfinished experimental UIs in several other colours, however, these are likely to have bugs such as parts of the UI being the wrong colour as they are not final release versions.
The config log is a file located in Documents/EA Games/The Sims 2/Logs/<your-pc-name>-config-log.txt which is updated every time you run the game or BodyShop and tells you what configuration the game is using in terms of RAM, graphics card, settings, etc. For Legacy, it is normal for: * the version to be 1.18.0.114 * the OS version to be Windows NT 0.0 * the graphics card to be <<NOT FOUND IN DATABASE!>> * the memory and free memory to be listed as 0MB * the texture memory not to be listed at all For non-Legacy, it is normal for: * the version to be 1.17.0.66 provided you have Mansion & Garden (i.e. all UC + other digital repacks; if you have discs without M&G expect a different version) * the OS version to be Windows NT 6.0 * if you are using the Legacy graphics rules (included in MagiPack + osab’s Starter Pack), it’s okay for the graphics card to have <<NOT FOUND IN DATABASE!>> and not to list the texture memory * if not using Legacy graphics rules, the graphics card should NOT have <<NOT FOUND IN DATABASE!>> and if it does, you need to fix your graphics rules * texture memory should not be 32MB, if it is you need to fix your graphics rules * memory should be 4096 if you have the 4GB patch or 2048 or 1024 if you don’t. The free memory line should ideally match the memory line - if it doesn’t, try closing some programs and restarting your computer before running the game to keep more memory available If you use DXVK, note that your graphics card will be listed as a Nvidia GeForce 7800 GTX regardless of what GPU you actually have. This is intentional and is part of how DXVK works.
If you’re playing on MacOS, the supported languages are English, French, Italian, German, Spanish, and Japanese. The language that the game is in will be based on the language of your OS - e.g. if you have your Mac set to use French but want to play in English, you’d have to change your MacOS language to do so. If your Mac is using an unsupported language, the game will default to English. The supported languages are listed in Aspyr’s Super Collection FAQ though the list is unlikely to change at this point. If you’re playing on Windows (or Linux via Proton, Bottles, etc. or Mac via Parallels, Crossover etc.) and you are not using the Legacy Collection via Steam (and possibly Epic), then you can follow this guide to change languages, which also lists all available languages. Ensure you do not mix up decimal and hex values or you will end up with an unexpected language! If you are using the Legacy Collection via Steam (and possibly Epic), then the registry method above will not work for you. Instead, you need to use a launch command. To do this, right click on the game in your library (or click the Settings button if you have the game page selected) and click Properties. In the Launch Options box at the bottom, add the language you want in this format: -l:“English UK” or -l:French Note that languages with spaces must be enclosed in quotation marks. The game does not use standardised language codes for this, it’s based on the game’s locale folder names (if you open the game’s install folder and go to EP9/TSData/Res/Locale you can see all possible options). See this thread discussing this topic.
<-- Back to How to Install on Linux: Intro, Steam & Bottles
Please Note: This is copied from Reddit’s r/TheSims2Help’s Playing on Linux Wiki page. Any linked headings will be linked back to the Reddit Wiki. In line links should denote where they go (reddit, lemmy, tumbler) anything not mentioned is probably another off reddit guide or .exe file. Most if not all content contained below was created by the Reddit r/Sims2Help team and all credit for this guide goes to them.
1. Download + install Lutris here.
2. Open Lutris + allow it to finish installing any dependencies (bottom left corner)
3. Press the plus button in the top left and select install a Windows game from an executable. Give the game a name and keep installer preset on Windows 10 64-bit.
4. Click install Wine.
5. Select the setup file and click install; it will load for a minute or so. The Sims 2 installer will then pop up.
6. Go through the installer, you can leave everything on the default unless there is something you specifically want to change. Do not select DXVK in the Sims 2 installer (as this is handled by Lutris instead).
7. Once installed, right click on the game in Lutris and click configure
- Game options tab
- if not using RPC/running from Sims2EP9.exe, you can run in windowed mode by adding -w to arguments in this tab
- for executable, click 3 dots button beside it to change it
- To launch via RPC: /home/<user-name>/Games/<prefix>/drive_c/MagiPacks/The Sims 2/Fun with Pets/SP9/TSBin/Sims2RPC.exe
- To launch RPC settings: /home/<user-name>/Games/<prefix>/drive_c/MagiPacks/The Sims 2/Fun with Pets/SP9/TSBin/Sims2RPCSettings.exe you can change settings (e.g. set to windowed mode, adjust lot imposters, etc.) and then revert to using the RPC executable, the settings will still apply if you pressed save.
- you can also edit RPC settings manually in ~/Documents/Sims2RPC/settings.txt or /home/<user-name>/Games/<prefix>/drive_c/users/<user-name>/My Documents/Sims2RPC
- System Options tab
- select which GPU to use if you have multiple
- ‘Prefer system libraries’ in this tab should be enabled.
- ‘Disable lutris runtime’ should be disabled (can cause issues).
- Runner options tab
- Enable DXVK and D3D extras should be enabled.
- I kept Wine version on GE-Proton (Latest) (default) though some people use Experimental versions (the screenshot shows Wine-GE-8-26 as I took this screenshot later and had to change versions for the EA App to work) - I recommend leaving it on the default unless you have an issue then try changing it
The game did freeze on launch once for me occasionally but quitting via lutris and rerunning, it ran fine.
You can use the Lutris install script to install if you prefer. It’s available here though all this script really seems to automate is selecting the right exe for the prefix for you. When you click the yellow install button that site, click “Open Link” in the dialog (it may take a few seconds for the button to become clickable). This will open Lutris where you click the green Install button to proceed and then select the setup file and click install. When the installer window is finished, it takes a few seconds to complete on the main window - don’t click abort, just wait and then it will show the final complete window. Click launch to launch the game immediately or close if you don’t want to run it yet. The other things this script does include installing the arial font, which may be required on some machines due to different distros or locales, etc. - I had no issues with fonts in game without using this script/installing the font, though I used Ubuntu for these tests, which may include it already. It also modifies the graphics rules file to increase max res width and height but this shouldn’t be required anymore (if you’re using our downloaded UC or the Legacy Collection) as the repack is using the Legacy Collection graphics rules file.
You can either follow the same steps for installing without script outlined above but using the EA App executable instead of the Sims 2 installer executable, you can use the EA App Lutris Script or you can follow the steps below to use the Lutris ‘sources’ options, though this option was the least stable for me as it kept freezing and failing to actually launch the EA App.
1. In Lutris, under Sources click the person/connect icon beside EA App. 2. Click okay on the popup and click install Wine. 3. Select install directory (default is fine) and select options if you want shortcut. 4. Either click install with the download version or change source from the dropdown on the right to select file and point at your ea app installer file (Windows executable from EA). 5. Login when prompted then close EA app. 6. Wait for lutris install to finish. 7. Click connect icon again beside EA App in Lutris sources + sign in if prompted 8. On EA App tab, once games load, find The Sims 2, click it and click Install and continue through the install. 9. It may fail to launch ea app, or it may launch it but fail to find Sims 2/say you don’t own it. You can just go to Sims 2 in your ea app library and click install instead 10. Once installed, click play from within the app. It will launch as normal Note that I had to change Wine runner to Wine-GE-8-26 under Runner Options for the EA App to work as it was having issues with the default runner.
The prefix name for Lutris depends on the name you entered when you installed the Sims 2 - if you install via the EA App, you must look within the EA App prefix.
Save folder path: /home/<user-name>/Games/<prefix-name>/drive_c/users/<user-name>/My Documents/EA Games/The Sims 2
e.g. /home/<user-name>/Games/the-sims-2/drive_c/users/<user-name>/My Documents/EA Games/The Sims 2
Install path: /home/<user-name>/Games/the-sims-2/drive_c/MagiPacks/The Sims 2/Fun with Pets/SP9/TSBin
To get the files location, click the up arrow beside the play button in Lutris (or just right click on the game) and click browse files. This brings up a Files window at path /home/<user-name>/Games/<prefix> -> from here drive_c is basically a Windows C drive which will contain your install and save folders. Navigate into drive_c -> users -> steamuser -> Documents -> EA Games -> The Sims 2. this is your save folder and this is where your Downloads folder will go as well.
Troubleshooting Lutris Reddit Wiki
## gamemodeauto: dlopen failed - libgamemode.so
If you get error gamemodeauto: dlopen failed - libgamemode.so: cannot open shared object file: No such file or directory
Go to Lutris > Preferences > Global Options > CPU > Enable Feral GameMode and toggle to off.
## libGL error: MESA-LOADER: failed to open iris
If you get errors like this
libGL error: MESA-LOADER: failed to open iris: /usr/lib/pressure-vessel/overrides/lib/i386-linux-gnu/dri/iris_dri.so: cannot open shared object file: No such file or directory (search paths /usr/lib/pressure-vessel/overrides/lib/x86_64-linux-gnu/dri:/usr/lib/pressure-vessel/overrides/lib/i386-linux-gnu/dri) libGL error: failed to load driver: iris libGL error: MESA-LOADER: failed to open iris: /usr/lib/pressure-vessel/overrides/lib/i386-linux-gnu/dri/iris_dri.so: cannot open shared object file: No such file or directory (search paths /usr/lib/pressure-vessel/overrides/lib/x86_64-linux-gnu/dri:/usr/lib/pressure-vessel/overrides/lib/i386-linux-gnu/dri) libGL error: failed to load driver: iris libGL error: MESA-LOADER: failed to open swrast: /usr/lib/pressure-vessel/overrides/lib/i386-linux-gnu/dri/swrast_dri.so: cannot open shared object file: No such file or directory (search paths /usr/lib/pressure-vessel/overrides/lib/x86_64-linux-gnu/dri:/usr/lib/pressure-vessel/overrides/lib/i386-linux-gnu/dri) libGL error: failed to load driver: swrast X Error of failed request: GLXBadContext
Running these commands in terminal should fix it
sudo dpkg --add-architecture i386 sudo apt update sudo apt install \ libgl1-mesa-dri:i386 \ libgl1:i386 \ libvulkan1:i386 \ mesa-vulkan-drivers:i386
## NVidia GPU Get Driver Version
if you have a Nvidia GPU, check driver version using the command nvidia-smi which gives output like
±----------------------------------------------------------------------------+ | NVIDIA-SMI 535.154.05 Driver Version: 535.154.05 CUDA Version: 12.2 | ±----------------------------------------------------------------------------+
Run command to get the graphics library package for your driver (make sure to use your driver version, the command below uses 535 matching the driver version from the output of nvidia-smi).
sudo apt install libnvidia-gl-535:i386
## Check vulkan support
Use the command vulkaninfo | grep deviceName
which gives output like
WARNING: [Loader Message] Code 0 : terminator_CreateInstance: Received return code -9 from call to vkCreateInstance in ICD libvulkan_dzn.so. Skipping this driver. deviceName = Intel® UHD Graphics 630 (CFL GT2) deviceName = Quadro RTX 3000 deviceName = llvmpipe (LLVM 20.1.8, 256 bits) # software renderer
## EA App Issues (games CTD, EA App black screen, unresponsive, etc.)
For some more information on options you can change in Lutris to increase EA App stability, see this Reddit thread.
## “steam_app_######” is not responding message
Please see this Reddit thread for more info if you are getting this message frequently. The command ``gsettings set org.gnome.mutter check-alive-timeout XXXX` can reduce the message frequency by setting the value higher than the default of 5000 (5s), for example change it to 15000 (15s) or 20000 (20s).
To run any Sims 2 related program with the game installed via Lutris, you have to run the program inside the same prefix. In Lutris, click The Sims 2 image and then select the up arrow to the left of the Platform text. Click run EXE inside Wine prefix, navigate to the program you want to run and select the executable. The program will launch much like on Windows. There are some more detailed instructions for several common programs below, but these instructions are generally applicable to running any Sims 2 related program. Note that some other programs may require you to install additional dependencies in the prefix.
In Lutris, click The Sims 2 image and then select the up arrow to the left of the Platform text. Click run EXE inside Wine prefix, navigate to the TS2BodyShop.exe (or BodyShopLauncher.exe if using the BodyShop widescreen UI or if you got the game from our wiki/MagiPacks, as it includes this launcher), and it’ll open the same as on Windows.
Download the Hoodchecker and extract it from the zip archive, which will result in a folder containing the HoodChecker.exe. In Lutris, click The Sims 2 image and then select the up arrow to the left of the Platform text. Click run EXE inside Wine prefix, navigate to the Hoodchecker.exe, and it’ll open the same as on Windows.
Download SimPE - I recommend using the no-install version, i.e. the download without Installer in the name, in this case SimPe_0_77_69.zip. Unzip it and you’ll see the SimPE.exe file inside the folder. In Lutris, click The Sims 2 image and then select the up arrow to the left of the Platform text. Click run EXE inside Wine prefix, navigate to the SimPE.exe and it’ll open the same as on Windows. Note that you need to right click instead of left click on resources in the top right tree in order to see them in the plugin view below.
Download the Sims2Pack Clean Installer - I recommend using the no-install version, i.e. the download called Sims2PackInstaller_NoInstall.zip. Unzip it and you’ll see the Sims2Pack Clean Installer.exe inside the folder.
Update the save game path for the program by opening the S2PCI.ini file in this folder and modifying the SaveGamePath like so:
SaveGamePath=“/home/<user-name>/Games/<prefix>/drive_c/users/steamuser/Documents/EA Games/The Sims 2”
Make sure to actually put in your user name and the prefix! In my case, the prefix was called the-sims-2 because I chose the name The Sims 2 when installing via Lutris.
Click run EXE inside Wine prefix, navigate to the Sims2Pack Clean Installer.exe and it’ll open the same as on Windows.
Note that this not how you install sims2pack files, the program does not function this way on any OS which many players find confusing. To install a sims2pack file, you have to “open with” the Clean Installer. On Windows that’s done via the ‘open with’ context menu option or by setting up a file association so you can double click the sims2pack file to install with the Clean Pack installer automatically.
How to do this on Linux is detailed below.
In terminal, run the commands
cd /home/<user-name>/.local/share/applications/ nano CleanInstaller.desktop
Copy and paste the following into the file - make sure that you enter your actual user name wherever <user-name> is used, and make sure to change the wine runner used if yours is not wine-ge-8-26-x86_64.
[Desktop Entry] Type=Application Name=CleanInstaller Exec=env WINEPREFIX=/home/<user-name>/Games/<prefix>/ /home/<user-name>/.local/share/lutris/runners/wine/wine-ge-8-26-x86_64/bin/wine “/home/<user-name>/Downloads/Sims2Tools/MTS_Mootilda_1164470_Sims2PackInstaller_NoInstall/Sims2Pack Clean Installer/Sims2Pack Clean Installer.exe” %U Terminal=false Categories=Game; MimeType=application/x-sims2pack;
You may need to make the file executable for it to show up in the context menu
chmod +x /home/<user-name>/.local/share/applications/CleanInstaller.desktop
You can now right click on a .sims2pack, choose “Open with” and select “CleanInstaller” in the window that pops up (note that my example image has a bunch of these because I created one for each Linux install method! You only need one) - make sure to click the toggle at the bottom to “always use for this file type” which will then allow you to double click to install sims2pack files in future.
You will find a similar tutorial for doing this in this Tumblr post note that it uses the command
Exec=WINEPREFIX=“/home/[insert PC name]/Games/the-sims-2/” “/home/[insert PC name]/.local/share/lutris/runners/wine/wine-ge-8-26-x86_64/bin/wine” “[insert path to CleanInstaller.exe]” %U
Note that WINEPREFIX alone does not work here on GNOME, it simply won’t show the entry in the ‘open with’ menu. This is why we add env in front of it in the example above. If you are on Fedora, the linked Tumblr version will work for you as it handles mapping the paths differently.
If you installed the game via the EA app (i.e. your Lutris prefix is for the EA app not the Sims 2), the contents of your Desktop file need to be slightly different. Copy and paste this instead - make sure to put swap in your user name, prefix (ea-app is used here) and wine runner if using a different version.
[Desktop Entry] Type=Application Name=CleanInstaller Exec=sh -c ‘WINEPREFIX=/home/<user-name>/Games/ea-app /home/<user-name>/.local/share/lutris/runners/wine/wine-ge-8-26-x86_64/bin/wine “/home/<user-name>/Downloads/Sims2Tools/MTS_Mootilda_1164470_Sims2PackInstaller_NoInstall/Sims2Pack Clean Installer/Sims2Pack Clean Installer.exe” “$(/home/<user-name>/.local/share/lutris/runners/wine/wine-ge-8-26-x86_64/bin/winepath -w “$1”)”’ – %u Terminal=false Categories=Game; MimeType=application/x-sims2pack;
You can technically run it without the additional arguments however it requires both the Clean Installer and the sims2pack files you want to install to be located in the prefix or to use a bash script to ensure the correct paths are mapped, so the above method is best as it allows you to install sims2pack files from anywhere and it doesn’t matter where Clean Installer is located.
Note: you don’t have to repeat commands like export WINEPREFIX=$HOME/.sims2 if you’re using the same terminal session. I added them in a few places just to be sure anyone following alongs executes commands in the right prefix if they accidentally closed the terminal in between commands.
Create a 32-bit prefix
export WINEPREFIX=$HOME/.sims2
export WINEARCH=win32
wineboot -u
winetricks d3dx9 corefonts wininet
wine /path/to/your/setup.exe
For that last step, the path looks like wine “/home/<user-name>/Downloads/The_Sims_2_Repack_v5/The Sims 2_Repack_v5_Setup.exe”. Make sure to include quotation marks when the path includes spaces. Running this command will launch the installer - step through it to install game.
Download DXVK from the latest release - it’s the tar.gz archive you need to download.
Run the commands
cd ~/Downloads # or wherever you downloaded DXVK to
tar -xzf dxvk-2.7.1.tar.gz # change version if using a newer one
cd dxvk-2.7.1
export WINEPREFIX=$HOME/.sims2
cp x32/*.dll $WINEPREFIX/drive_c/windows/system32
To avoid D3DERR_INVALID_CALL on launch, run command winecfg to see the wine config and click the libraries tab. In the dropdown at the top search for and add:
d3d9
d3dx9_36
d3dx9_30
Click Apply and close window.
Run the game:
export WINEPREFIX=$HOME/.sims2
wine “$WINEPREFIX/drive_c/MagiPacks/The Sims 2/Fun with Pets/SP9/TSBin/Sims2EP9.exe”
or just wine “$HOME/.sims2/drive_c/MagiPacks/The Sims 2/Fun with Pets/SP9/TSBin/Sims2EP9.exe”
To run in windowed mode use wine “$WINEPREFIX/drive_c/MagiPacks/The Sims 2/Fun with Pets/SP9/TSBin/Sims2EP9.exe” -w
Note these commands are using Sims2EP9.exe - you can of course swap this out for Sims2RPC.exe to use RPC, though you need to use a different runner. See the section on RPC below for more details.
If you have a Nvidia GPU and want to be sure the game uses it, use these commands to run the game
export WINEPREFIX=$HOME/.sims2
__NV_PRIME_RENDER_OFFLOAD=1
__GLX_VENDOR_LIBRARY_NAME=nvidia
__VK_LAYER_NV_optimus=NVIDIA_only
wine “C:\MagiPacks\The Sims 2\Fun with Pets\SP9\TSBin\Sims2EP9.exe”
You can also make a bash script to run the game, this allows you to run the game using just one command but will execute all the commands in the script for you each time. For example, create the script using nano run-sims2.sh and copy contents:
#!/bin/bash
export WINEPREFIX=$HOME/.sims2
export __GL_THREADED_OPTIMIZATIONS=1 # only useful for nvidia gpu
wine “$WINEPREFIX/drive_c/MagiPacks/The Sims 2/Fun with Pets/SP9/TSBin/Sims2EP9.exe”
And then simply using ./run-sims2.sh to run the game in future (as long as you’re in the same folder as script).
If you want to install RPC or if you are using a repack such as MagiPack which includes RPC, you need to download the latest version of GE-Proton, which is 10-34 at the time of writing, and extract it. This is necessary because trying to run with the default wine leads to errors: wine “$WINEPREFIX/drive_c/MagiPacks/The Sims 2/Fun with Pets/SP9/TSBin/Sims2RPC.exe” will give “wine: Unhandled page fault on read access to 78995600 at address 78995600 (thread 011c), starting debugger…” wine “$WINEPREFIX/drive_c/MagiPacks/The Sims 2/Fun with Pets/SP9/TSBin/Sims2RPCSettings.exe” will give 0024:err:mscoree:CLRRuntimeInfo_GetRuntimeHost Wine Mono is not installed And while you can resolve some of these errors by installing dependencies winetricks dotnet48 vcrun2015, this will only resolve the issues with Sims2RPCSettings.exe and will not allow the actual game to run. Likely there is some other dependency missing which is already included in GE-Proton so it is easier to just use that version of wine. You can then use ~/Downloads/GE-Proton10-34/files/bin/wine “/home/<your-name>/.sims2/drive_c/MagiPacks/The Sims 2/Fun with Pets/SP9/TSBin/Sims2RPC.exe” to run via RPC. To run RPC Settings, you need to change to the TSBin directory or you will get a “Can’t find Sims2RPC executable” error when you click “Save and Play”. cd “$WINEPREFIX/drive_c/MagiPacks/The Sims 2/Fun with Pets/SP9/TSBin” ~/Downloads/GE-Proton10-34/files/bin/wine Sims2RPCSettings.exe
D3DERR_INVALID_CALL on launch See step 4 of the install instructions above for how to resolve this error. Installing via the EA App with wine This does not currently work at the moment, or at least not on this distro (Ubuntu) - I tried many solutions and the EA App simply would not install and run currently solely using Wine. The installer will open and run until about 95% completion and then the bar will not proceed any further. Likely there is some dependency issue here as there are similar issues reported with the EA App on WineHQ. If you really want to use the EA App, I recommend picking another method (Steam, Bottles, or Lutris) for installing on Linux. Some useful links if you are attempting to install the EA App with Wine: Gecko Mono-Gecko Install Wine dependecies required for Origin For the EA App, you would need a 64-bit prefix with some additional dependencies export WINEPREFIX=$HOME/.sims2-ea-app export WINEARCH=win64 wineboot -u WINEPREFIX=$HOME/.sims2-ea-app winetricks -q dxvk d3dx9 corefonts wininet d3dcompiler_47 WINEPREFIX=$HOME/.sims2-ea-app winetricks vcrun2022 tahoma arial WINEPREFIX=$HOME/.sims2-ea-app winetricks dotnet48 wget dl.winehq.org/wine/…/wine-gecko-2.47.4-x86.msi # download 32-bit gecko wget dl.winehq.org/…/wine-gecko-2.47.4-x86_64.msi # download 64-bit gecko WINEPREFIX=$HOME/.sims2-ea-app wine msiexec /i wine-gecko-2.47.4-x86.msi # install 32-bit gecko WINEPREFIX=$HOME/.sims2-ea-app wine msiexec /i wine-gecko-2.47.4-x86_64.msi # install 64-bit gecko winetricks -q htmlhelp winhttp webview2 # may not all be required
Use one of the following commands depending on which version of BodyShop you have
wine “C:\\MagiPacks\\The Sims 2\\Fun with Pets\\SP9\\CSBin\\TS2BodyShop.exe”
wine start /d “C:\\MagiPacks\\The Sims 2\\Fun with Pets\\SP9\\CSBin” BodyShopLauncher.exe
wine “$WINEPREFIX/drive_c/MagiPacks/The Sims 2/Fun with Pets/SP9/CSBin/BodyShopLauncher.exe” // only within the prefix in CSBin folder
wine “C:\\MagiPacks\\The Sims 2\\Fun with Pets\\SP9\\CSBin\\BodyShopLauncher.exe” // works only within the prefix in CSBin folder
Install the required dotnet dependency winetricks -q dotnet20
Then use this command to run Hoodchecker - note this assumes you’re in the same folder as the exe. If not, cd into the folder or else provide the full path to it.
wine HoodChecker.exe
::: spoiler 9.3) SimPE
Use this command to run SimPE - note this assumes you’re in the same folder as the exe. If not, cd into the folder or else provide the full path to it.
wine SimPE.exe
I ran this after Hoodchecker, so I’m not sure if it requires dotnet20 too but if it fails to launch, try install dotnet20.
Use this command to run CleanInstaller- note this assumes you’re in the same folder as the exe. If not, cd into the folder or else provide the full path to it.
wine ‘Sims2Pack Clean Installer.exe’
Clean installer also accepts a folder argument which it uses to install all sims2pack files in the folder. For example
wine ‘Sims2Pack Clean Installer.exe’ -f …/…/lots
The above command passes a relative path to a lots folder which contains sims2pack files. Sims2Pack Clean Installer installs all files in the folder (it will prompt for confirmation for each one though the prompt can be disabled in the ini file). You can also use an absolute rather than a relative path.
In terminal, run the commands
cd /home/<user-name>/.local/share/applications/ nano CleanInstaller.desktop
Copy and paste the following into the file - make sure that you enter your actual user name wherever <user-name> is used, and make sure to change the wine prefix name if yours is not .sim2.
[Desktop Entry] Type=Application Name=CleanInstaller Exec=env WINEPREFIX=/home/<user-name>/.sims2 /usr/bin/wine “/home/<user-name>/Downloads/MTS_Mootilda_1164470_Sims2PackInstaller_NoInstall/Sims2Pack Clean Installer/Sims2Pack Clean Installer.exe” %U Terminal=false Categories=Game; MimeType=application/x-sims2pack;
This works with Clean Installer and Sims2pack files both inside and outside the prefix. You can now right click on a .sims2pack, choose “Open with” and select “CleanInstaller” in the window that pops up (note that my example image has a bunch of these because I created one for each Linux install method! You only need one) - make sure to click the toggle at the bottom to “always use for this file type” which will then allow you to double click to install sims2pack files in future. Neither the Clean Installer itself nor the .sims2pack files need to be located within the prefix itself with this method.
<-- Back to How to Install on Linux: Intro, Steam & Bottles
Please Note: This is copied from Reddit’s r/TheSims2Help’s Playing on Linux Wiki page. Any linked headings will be linked back to the Reddit Wiki. In line links should denote where they go (reddit, lemmy, tumbler) anything not mentioned is probably another off reddit guide or .exe file. Most if not all content contained below was created by the Reddit r/Sims2Help team and all credit for this guide goes to them.
1. Download + install Lutris here.
2. Open Lutris + allow it to finish installing any dependencies (bottom left corner)
3. Press the plus button in the top left and select install a Windows game from an executable. Give the game a name and keep installer preset on Windows 10 64-bit.
4. Click install Wine.
5. Select the setup file and click install; it will load for a minute or so. The Sims 2 installer will then pop up.
6. Go through the installer, you can leave everything on the default unless there is something you specifically want to change. Do not select DXVK in the Sims 2 installer (as this is handled by Lutris instead).
7. Once installed, right click on the game in Lutris and click configure
- Game options tab
- if not using RPC/running from Sims2EP9.exe, you can run in windowed mode by adding -w to arguments in this tab
- for executable, click 3 dots button beside it to change it
- To launch via RPC: /home/<user-name>/Games/<prefix>/drive_c/MagiPacks/The Sims 2/Fun with Pets/SP9/TSBin/Sims2RPC.exe
- To launch RPC settings: /home/<user-name>/Games/<prefix>/drive_c/MagiPacks/The Sims 2/Fun with Pets/SP9/TSBin/Sims2RPCSettings.exe you can change settings (e.g. set to windowed mode, adjust lot imposters, etc.) and then revert to using the RPC executable, the settings will still apply if you pressed save.
- you can also edit RPC settings manually in ~/Documents/Sims2RPC/settings.txt or /home/<user-name>/Games/<prefix>/drive_c/users/<user-name>/My Documents/Sims2RPC
- System Options tab
- select which GPU to use if you have multiple
- ‘Prefer system libraries’ in this tab should be enabled.
- ‘Disable lutris runtime’ should be disabled (can cause issues).
- Runner options tab
- Enable DXVK and D3D extras should be enabled.
- I kept Wine version on GE-Proton (Latest) (default) though some people use Experimental versions (the screenshot shows Wine-GE-8-26 as I took this screenshot later and had to change versions for the EA App to work) - I recommend leaving it on the default unless you have an issue then try changing it
The game did freeze on launch once for me occasionally but quitting via lutris and rerunning, it ran fine.
You can use the Lutris install script to install if you prefer. It’s available here though all this script really seems to automate is selecting the right exe for the prefix for you. When you click the yellow install button that site, click “Open Link” in the dialog (it may take a few seconds for the button to become clickable). This will open Lutris where you click the green Install button to proceed and then select the setup file and click install. When the installer window is finished, it takes a few seconds to complete on the main window - don’t click abort, just wait and then it will show the final complete window. Click launch to launch the game immediately or close if you don’t want to run it yet. The other things this script does include installing the arial font, which may be required on some machines due to different distros or locales, etc. - I had no issues with fonts in game without using this script/installing the font, though I used Ubuntu for these tests, which may include it already. It also modifies the graphics rules file to increase max res width and height but this shouldn’t be required anymore (if you’re using our downloaded UC or the Legacy Collection) as the repack is using the Legacy Collection graphics rules file.
You can either follow the same steps for installing without script outlined above but using the EA App executable instead of the Sims 2 installer executable, you can use the EA App Lutris Script or you can follow the steps below to use the Lutris ‘sources’ options, though this option was the least stable for me as it kept freezing and failing to actually launch the EA App.
1. In Lutris, under Sources click the person/connect icon beside EA App. 2. Click okay on the popup and click install Wine. 3. Select install directory (default is fine) and select options if you want shortcut. 4. Either click install with the download version or change source from the dropdown on the right to select file and point at your ea app installer file (Windows executable from EA). 5. Login when prompted then close EA app. 6. Wait for lutris install to finish. 7. Click connect icon again beside EA App in Lutris sources + sign in if prompted 8. On EA App tab, once games load, find The Sims 2, click it and click Install and continue through the install. 9. It may fail to launch ea app, or it may launch it but fail to find Sims 2/say you don’t own it. You can just go to Sims 2 in your ea app library and click install instead 10. Once installed, click play from within the app. It will launch as normal Note that I had to change Wine runner to Wine-GE-8-26 under Runner Options for the EA App to work as it was having issues with the default runner.
The prefix name for Lutris depends on the name you entered when you installed the Sims 2 - if you install via the EA App, you must look within the EA App prefix.
Save folder path: /home/<user-name>/Games/<prefix-name>/drive_c/users/<user-name>/My Documents/EA Games/The Sims 2
e.g. /home/<user-name>/Games/the-sims-2/drive_c/users/<user-name>/My Documents/EA Games/The Sims 2
Install path: /home/<user-name>/Games/the-sims-2/drive_c/MagiPacks/The Sims 2/Fun with Pets/SP9/TSBin
To get the files location, click the up arrow beside the play button in Lutris (or just right click on the game) and click browse files. This brings up a Files window at path /home/<user-name>/Games/<prefix> -> from here drive_c is basically a Windows C drive which will contain your install and save folders. Navigate into drive_c -> users -> steamuser -> Documents -> EA Games -> The Sims 2. this is your save folder and this is where your Downloads folder will go as well.
Troubleshooting Lutris Reddit Wiki
## gamemodeauto: dlopen failed - libgamemode.so
If you get error gamemodeauto: dlopen failed - libgamemode.so: cannot open shared object file: No such file or directory
Go to Lutris > Preferences > Global Options > CPU > Enable Feral GameMode and toggle to off.
## libGL error: MESA-LOADER: failed to open iris
If you get errors like this
libGL error: MESA-LOADER: failed to open iris: /usr/lib/pressure-vessel/overrides/lib/i386-linux-gnu/dri/iris_dri.so: cannot open shared object file: No such file or directory (search paths /usr/lib/pressure-vessel/overrides/lib/x86_64-linux-gnu/dri:/usr/lib/pressure-vessel/overrides/lib/i386-linux-gnu/dri) libGL error: failed to load driver: iris libGL error: MESA-LOADER: failed to open iris: /usr/lib/pressure-vessel/overrides/lib/i386-linux-gnu/dri/iris_dri.so: cannot open shared object file: No such file or directory (search paths /usr/lib/pressure-vessel/overrides/lib/x86_64-linux-gnu/dri:/usr/lib/pressure-vessel/overrides/lib/i386-linux-gnu/dri) libGL error: failed to load driver: iris libGL error: MESA-LOADER: failed to open swrast: /usr/lib/pressure-vessel/overrides/lib/i386-linux-gnu/dri/swrast_dri.so: cannot open shared object file: No such file or directory (search paths /usr/lib/pressure-vessel/overrides/lib/x86_64-linux-gnu/dri:/usr/lib/pressure-vessel/overrides/lib/i386-linux-gnu/dri) libGL error: failed to load driver: swrast X Error of failed request: GLXBadContext
Running these commands in terminal should fix it
sudo dpkg --add-architecture i386 sudo apt update sudo apt install \ libgl1-mesa-dri:i386 \ libgl1:i386 \ libvulkan1:i386 \ mesa-vulkan-drivers:i386
## NVidia GPU Get Driver Version
if you have a Nvidia GPU, check driver version using the command nvidia-smi which gives output like
±----------------------------------------------------------------------------+ | NVIDIA-SMI 535.154.05 Driver Version: 535.154.05 CUDA Version: 12.2 | ±----------------------------------------------------------------------------+
Run command to get the graphics library package for your driver (make sure to use your driver version, the command below uses 535 matching the driver version from the output of nvidia-smi).
sudo apt install libnvidia-gl-535:i386
## Check vulkan support
Use the command vulkaninfo | grep deviceName
which gives output like
WARNING: [Loader Message] Code 0 : terminator_CreateInstance: Received return code -9 from call to vkCreateInstance in ICD libvulkan_dzn.so. Skipping this driver. deviceName = Intel® UHD Graphics 630 (CFL GT2) deviceName = Quadro RTX 3000 deviceName = llvmpipe (LLVM 20.1.8, 256 bits) # software renderer
## EA App Issues (games CTD, EA App black screen, unresponsive, etc.)
For some more information on options you can change in Lutris to increase EA App stability, see this Reddit thread.
## “steam_app_######” is not responding message
Please see this Reddit thread for more info if you are getting this message frequently. The command ``gsettings set org.gnome.mutter check-alive-timeout XXXX` can reduce the message frequency by setting the value higher than the default of 5000 (5s), for example change it to 15000 (15s) or 20000 (20s).
To run any Sims 2 related program with the game installed via Lutris, you have to run the program inside the same prefix. In Lutris, click The Sims 2 image and then select the up arrow to the left of the Platform text. Click run EXE inside Wine prefix, navigate to the program you want to run and select the executable. The program will launch much like on Windows. There are some more detailed instructions for several common programs below, but these instructions are generally applicable to running any Sims 2 related program. Note that some other programs may require you to install additional dependencies in the prefix.
In Lutris, click The Sims 2 image and then select the up arrow to the left of the Platform text. Click run EXE inside Wine prefix, navigate to the TS2BodyShop.exe (or BodyShopLauncher.exe if using the BodyShop widescreen UI or if you got the game from our wiki/MagiPacks, as it includes this launcher), and it’ll open the same as on Windows.
Download the Hoodchecker and extract it from the zip archive, which will result in a folder containing the HoodChecker.exe. In Lutris, click The Sims 2 image and then select the up arrow to the left of the Platform text. Click run EXE inside Wine prefix, navigate to the Hoodchecker.exe, and it’ll open the same as on Windows.
Download SimPE - I recommend using the no-install version, i.e. the download without Installer in the name, in this case SimPe_0_77_69.zip. Unzip it and you’ll see the SimPE.exe file inside the folder. In Lutris, click The Sims 2 image and then select the up arrow to the left of the Platform text. Click run EXE inside Wine prefix, navigate to the SimPE.exe and it’ll open the same as on Windows. Note that you need to right click instead of left click on resources in the top right tree in order to see them in the plugin view below.
Download the Sims2Pack Clean Installer - I recommend using the no-install version, i.e. the download called Sims2PackInstaller_NoInstall.zip. Unzip it and you’ll see the Sims2Pack Clean Installer.exe inside the folder.
Update the save game path for the program by opening the S2PCI.ini file in this folder and modifying the SaveGamePath like so:
SaveGamePath=“/home/<user-name>/Games/<prefix>/drive_c/users/steamuser/Documents/EA Games/The Sims 2”
Make sure to actually put in your user name and the prefix! In my case, the prefix was called the-sims-2 because I chose the name The Sims 2 when installing via Lutris.
Click run EXE inside Wine prefix, navigate to the Sims2Pack Clean Installer.exe and it’ll open the same as on Windows.
Note that this not how you install sims2pack files, the program does not function this way on any OS which many players find confusing. To install a sims2pack file, you have to “open with” the Clean Installer. On Windows that’s done via the ‘open with’ context menu option or by setting up a file association so you can double click the sims2pack file to install with the Clean Pack installer automatically.
How to do this on Linux is detailed below.
In terminal, run the commands
cd /home/<user-name>/.local/share/applications/ nano CleanInstaller.desktop
Copy and paste the following into the file - make sure that you enter your actual user name wherever <user-name> is used, and make sure to change the wine runner used if yours is not wine-ge-8-26-x86_64.
[Desktop Entry] Type=Application Name=CleanInstaller Exec=env WINEPREFIX=/home/<user-name>/Games/<prefix>/ /home/<user-name>/.local/share/lutris/runners/wine/wine-ge-8-26-x86_64/bin/wine “/home/<user-name>/Downloads/Sims2Tools/MTS_Mootilda_1164470_Sims2PackInstaller_NoInstall/Sims2Pack Clean Installer/Sims2Pack Clean Installer.exe” %U Terminal=false Categories=Game; MimeType=application/x-sims2pack;
You may need to make the file executable for it to show up in the context menu
chmod +x /home/<user-name>/.local/share/applications/CleanInstaller.desktop
You can now right click on a .sims2pack, choose “Open with” and select “CleanInstaller” in the window that pops up (note that my example image has a bunch of these because I created one for each Linux install method! You only need one) - make sure to click the toggle at the bottom to “always use for this file type” which will then allow you to double click to install sims2pack files in future.
You will find a similar tutorial for doing this in this Tumblr post note that it uses the command
Exec=WINEPREFIX=“/home/[insert PC name]/Games/the-sims-2/” “/home/[insert PC name]/.local/share/lutris/runners/wine/wine-ge-8-26-x86_64/bin/wine” “[insert path to CleanInstaller.exe]” %U
Note that WINEPREFIX alone does not work here on GNOME, it simply won’t show the entry in the ‘open with’ menu. This is why we add env in front of it in the example above. If you are on Fedora, the linked Tumblr version will work for you as it handles mapping the paths differently.
If you installed the game via the EA app (i.e. your Lutris prefix is for the EA app not the Sims 2), the contents of your Desktop file need to be slightly different. Copy and paste this instead - make sure to put swap in your user name, prefix (ea-app is used here) and wine runner if using a different version.
[Desktop Entry] Type=Application Name=CleanInstaller Exec=sh -c ‘WINEPREFIX=/home/<user-name>/Games/ea-app /home/<user-name>/.local/share/lutris/runners/wine/wine-ge-8-26-x86_64/bin/wine “/home/<user-name>/Downloads/Sims2Tools/MTS_Mootilda_1164470_Sims2PackInstaller_NoInstall/Sims2Pack Clean Installer/Sims2Pack Clean Installer.exe” “$(/home/<user-name>/.local/share/lutris/runners/wine/wine-ge-8-26-x86_64/bin/winepath -w “$1”)”’ – %u Terminal=false Categories=Game; MimeType=application/x-sims2pack;
You can technically run it without the additional arguments however it requires both the Clean Installer and the sims2pack files you want to install to be located in the prefix or to use a bash script to ensure the correct paths are mapped, so the above method is best as it allows you to install sims2pack files from anywhere and it doesn’t matter where Clean Installer is located.
Note: you don’t have to repeat commands like export WINEPREFIX=$HOME/.sims2 if you’re using the same terminal session. I added them in a few places just to be sure anyone following alongs executes commands in the right prefix if they accidentally closed the terminal in between commands.
Create a 32-bit prefix
export WINEPREFIX=$HOME/.sims2
export WINEARCH=win32
wineboot -u
winetricks d3dx9 corefonts wininet
wine /path/to/your/setup.exe
For that last step, the path looks like wine “/home/<user-name>/Downloads/The_Sims_2_Repack_v5/The Sims 2_Repack_v5_Setup.exe”. Make sure to include quotation marks when the path includes spaces. Running this command will launch the installer - step through it to install game.
Download DXVK from the latest release - it’s the tar.gz archive you need to download.
Run the commands
cd ~/Downloads # or wherever you downloaded DXVK to
tar -xzf dxvk-2.7.1.tar.gz # change version if using a newer one
cd dxvk-2.7.1
export WINEPREFIX=$HOME/.sims2
cp x32/*.dll $WINEPREFIX/drive_c/windows/system32
To avoid D3DERR_INVALID_CALL on launch, run command winecfg to see the wine config and click the libraries tab. In the dropdown at the top search for and add:
d3d9
d3dx9_36
d3dx9_30
Click Apply and close window.
Run the game:
export WINEPREFIX=$HOME/.sims2
wine “$WINEPREFIX/drive_c/MagiPacks/The Sims 2/Fun with Pets/SP9/TSBin/Sims2EP9.exe”
or just wine “$HOME/.sims2/drive_c/MagiPacks/The Sims 2/Fun with Pets/SP9/TSBin/Sims2EP9.exe”
To run in windowed mode use wine “$WINEPREFIX/drive_c/MagiPacks/The Sims 2/Fun with Pets/SP9/TSBin/Sims2EP9.exe” -w
Note these commands are using Sims2EP9.exe - you can of course swap this out for Sims2RPC.exe to use RPC, though you need to use a different runner. See the section on RPC below for more details.
If you have a Nvidia GPU and want to be sure the game uses it, use these commands to run the game
export WINEPREFIX=$HOME/.sims2
__NV_PRIME_RENDER_OFFLOAD=1
__GLX_VENDOR_LIBRARY_NAME=nvidia
__VK_LAYER_NV_optimus=NVIDIA_only
wine “C:\MagiPacks\The Sims 2\Fun with Pets\SP9\TSBin\Sims2EP9.exe”
You can also make a bash script to run the game, this allows you to run the game using just one command but will execute all the commands in the script for you each time. For example, create the script using nano run-sims2.sh and copy contents:
#!/bin/bash
export WINEPREFIX=$HOME/.sims2
export __GL_THREADED_OPTIMIZATIONS=1 # only useful for nvidia gpu
wine “$WINEPREFIX/drive_c/MagiPacks/The Sims 2/Fun with Pets/SP9/TSBin/Sims2EP9.exe”
And then simply using ./run-sims2.sh to run the game in future (as long as you’re in the same folder as script).
If you want to install RPC or if you are using a repack such as MagiPack which includes RPC, you need to download the latest version of GE-Proton, which is 10-34 at the time of writing, and extract it. This is necessary because trying to run with the default wine leads to errors: wine “$WINEPREFIX/drive_c/MagiPacks/The Sims 2/Fun with Pets/SP9/TSBin/Sims2RPC.exe” will give “wine: Unhandled page fault on read access to 78995600 at address 78995600 (thread 011c), starting debugger…” wine “$WINEPREFIX/drive_c/MagiPacks/The Sims 2/Fun with Pets/SP9/TSBin/Sims2RPCSettings.exe” will give 0024:err:mscoree:CLRRuntimeInfo_GetRuntimeHost Wine Mono is not installed And while you can resolve some of these errors by installing dependencies winetricks dotnet48 vcrun2015, this will only resolve the issues with Sims2RPCSettings.exe and will not allow the actual game to run. Likely there is some other dependency missing which is already included in GE-Proton so it is easier to just use that version of wine. You can then use ~/Downloads/GE-Proton10-34/files/bin/wine “/home/<your-name>/.sims2/drive_c/MagiPacks/The Sims 2/Fun with Pets/SP9/TSBin/Sims2RPC.exe” to run via RPC. To run RPC Settings, you need to change to the TSBin directory or you will get a “Can’t find Sims2RPC executable” error when you click “Save and Play”. cd “$WINEPREFIX/drive_c/MagiPacks/The Sims 2/Fun with Pets/SP9/TSBin” ~/Downloads/GE-Proton10-34/files/bin/wine Sims2RPCSettings.exe
D3DERR_INVALID_CALL on launch See step 4 of the install instructions above for how to resolve this error. Installing via the EA App with wine This does not currently work at the moment, or at least not on this distro (Ubuntu) - I tried many solutions and the EA App simply would not install and run currently solely using Wine. The installer will open and run until about 95% completion and then the bar will not proceed any further. Likely there is some dependency issue here as there are similar issues reported with the EA App on WineHQ. If you really want to use the EA App, I recommend picking another method (Steam, Bottles, or Lutris) for installing on Linux. Some useful links if you are attempting to install the EA App with Wine: Gecko Mono-Gecko Install Wine dependecies required for Origin For the EA App, you would need a 64-bit prefix with some additional dependencies export WINEPREFIX=$HOME/.sims2-ea-app export WINEARCH=win64 wineboot -u WINEPREFIX=$HOME/.sims2-ea-app winetricks -q dxvk d3dx9 corefonts wininet d3dcompiler_47 WINEPREFIX=$HOME/.sims2-ea-app winetricks vcrun2022 tahoma arial WINEPREFIX=$HOME/.sims2-ea-app winetricks dotnet48 wget dl.winehq.org/wine/…/wine-gecko-2.47.4-x86.msi # download 32-bit gecko wget dl.winehq.org/…/wine-gecko-2.47.4-x86_64.msi # download 64-bit gecko WINEPREFIX=$HOME/.sims2-ea-app wine msiexec /i wine-gecko-2.47.4-x86.msi # install 32-bit gecko WINEPREFIX=$HOME/.sims2-ea-app wine msiexec /i wine-gecko-2.47.4-x86_64.msi # install 64-bit gecko winetricks -q htmlhelp winhttp webview2 # may not all be required
Use one of the following commands depending on which version of BodyShop you have
wine “C:\\MagiPacks\\The Sims 2\\Fun with Pets\\SP9\\CSBin\\TS2BodyShop.exe”
wine start /d “C:\\MagiPacks\\The Sims 2\\Fun with Pets\\SP9\\CSBin” BodyShopLauncher.exe
wine “$WINEPREFIX/drive_c/MagiPacks/The Sims 2/Fun with Pets/SP9/CSBin/BodyShopLauncher.exe” // only within the prefix in CSBin folder
wine “C:\\MagiPacks\\The Sims 2\\Fun with Pets\\SP9\\CSBin\\BodyShopLauncher.exe” // works only within the prefix in CSBin folder
Install the required dotnet dependency winetricks -q dotnet20
Then use this command to run Hoodchecker - note this assumes you’re in the same folder as the exe. If not, cd into the folder or else provide the full path to it.
wine HoodChecker.exe
::: spoiler 9.3) SimPE
Use this command to run SimPE - note this assumes you’re in the same folder as the exe. If not, cd into the folder or else provide the full path to it.
wine SimPE.exe
I ran this after Hoodchecker, so I’m not sure if it requires dotnet20 too but if it fails to launch, try install dotnet20.
Use this command to run CleanInstaller- note this assumes you’re in the same folder as the exe. If not, cd into the folder or else provide the full path to it.
wine ‘Sims2Pack Clean Installer.exe’
Clean installer also accepts a folder argument which it uses to install all sims2pack files in the folder. For example
wine ‘Sims2Pack Clean Installer.exe’ -f …/…/lots
The above command passes a relative path to a lots folder which contains sims2pack files. Sims2Pack Clean Installer installs all files in the folder (it will prompt for confirmation for each one though the prompt can be disabled in the ini file). You can also use an absolute rather than a relative path.
In terminal, run the commands
cd /home/<user-name>/.local/share/applications/ nano CleanInstaller.desktop
Copy and paste the following into the file - make sure that you enter your actual user name wherever <user-name> is used, and make sure to change the wine prefix name if yours is not .sim2.
[Desktop Entry] Type=Application Name=CleanInstaller Exec=env WINEPREFIX=/home/<user-name>/.sims2 /usr/bin/wine “/home/<user-name>/Downloads/MTS_Mootilda_1164470_Sims2PackInstaller_NoInstall/Sims2Pack Clean Installer/Sims2Pack Clean Installer.exe” %U Terminal=false Categories=Game; MimeType=application/x-sims2pack;
This works with Clean Installer and Sims2pack files both inside and outside the prefix. You can now right click on a .sims2pack, choose “Open with” and select “CleanInstaller” in the window that pops up (note that my example image has a bunch of these because I created one for each Linux install method! You only need one) - make sure to click the toggle at the bottom to “always use for this file type” which will then allow you to double click to install sims2pack files in future. Neither the Clean Installer itself nor the .sims2pack files need to be located within the prefix itself with this method.
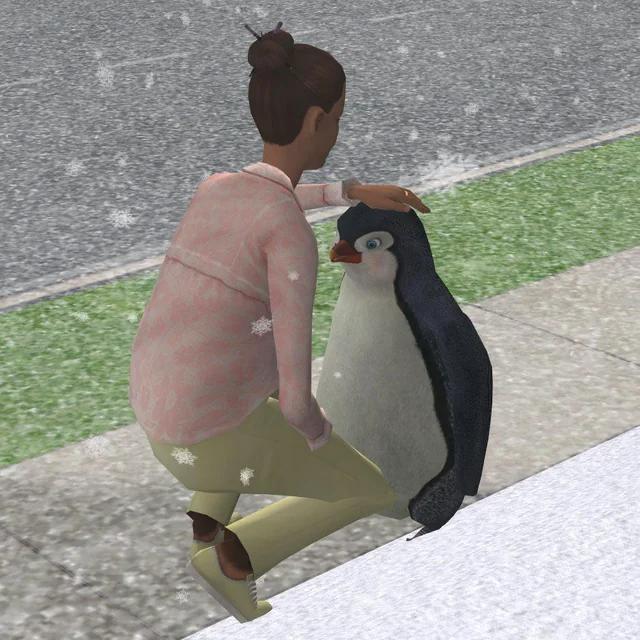
I won’t lie, I stole this image from a Reddit post, but I haven’t played in winter in so long I forgot about the penguins! Theyre so impossibly cute! What’s your favorite random bit of TS2 that makes you smile?
I won’t lie, I stole this image from a Reddit post, but I haven’t played in winter in so long I forgot about the penguins! Theyre so impossibly cute! What’s your favorite random bit of TS2 that makes you smile?
Please Note: This is copied from Reddit’s r/TheSims2Help’s Setting Up The Game Wiki Any linked headings will be linked back to the Reddit Wiki. In line links should denote where they go (reddit, lemmy, tumbler) anything not mentioned is probably another off reddit guide or .exe file. Most if not all content contained below was created by the Reddit r/Sims2Help team and all credit for this guide goes to them.
This section contains information on how to install and set up the game. If you’re looking for troubleshooting information instead, please see the troubleshooting section.
To get Sims 2 working well on modern systems, it needs a few simple tweaks that we have provided in the links below. Please pay special attention to the version of the game you have and if these fixes are applicable.
None of the information in this section will be relevant to you if you are playing on MacOS. Please see the Mac section of the wiki Lemmy Link, Reddit Link for information on playing on that OS. However, it is relevant if you are playing on Windows on your Mac with Bootcamp or Parallels.
Most of this information can be relevant but you should still check out the Linux Guide section of the wiki Lemmy Link, Reddit Link
If you want to play Sims 2 on a Steam Deck, please see this video tutorial.
Before you start trying to apply fixes for the game, you will need to know where to find your installation files. Please see below.
Depending on where you installed the game, and which version of the game you have, you might need to do some searching to find out exactly which folder your installation files are located in.
The simplest way to do this is right click on the shortcut on your desktop, and choose “open file location”, which will take you to the TSBin of your latest pack, like this. Usually it will be somewhere in Program Files - if you click in the space beside “TSBin” in the bar at the top, it will show you the full path.
Here are the default installation locations for different versions of the game. The game will be installed in one of these unless you decided to change the location.
MagiPack repack: C:\MagiPacks\The Sims 2
EA App Ultimate Collection: C:\Program Files\EA Games\The Sims 2 Ultimate Collection
Origin Ultimate Collection: C:\Program Files (x86)\Origin Games\The Sims 2 Ultimate Collection
Osab Starter Pack Ultimate Collection: C:\Program Files x86\The Sims 2 Starter Pack
Games4theworld Ultimate Collection: C:\Program Files\The Sims 2 Ultimate Collection
Discs: C:\Program Files (x86)\EA Games
MrDJ/Oldgamesdownload: C:\Program Files (x86)\Mr DJ\The Sims 2 Ultimate Collection
Legacy: C:\Program Files\EA Games\The Sims 2 Legacy
Steam: C:\Program Files\EA Games\The Sims 2 Legacy
This is not the location where your Downloads folder (for Mods/CC) or your personal Neighbourhoods will go. That’s always in Documents/EA Games.
This section does not apply to Legacy. Legacy cannot use the 4GB patch or the RPCLauncher.
If you have osab’s installer or MagiPack then you have the 4GB patch included with the RPC Launcher and the setting can be toggled in RPCSettings.
We highly recommend using the RPC Launcher if you don’t already have it. In order to use it, you need to have a NoCD/cracked exe which you can download from the link below. (The exe is referred to as George!)
You do not need to have pirated the game to use a cracked exe - you can use these even if you installed via disc or have The Ultimate Collection on the EA App.
The Sims 2 is a 32-bit game which means it can only use a maximum of 2GB of memory (RAM). Installing the 4GB patch will allow your game to use a maximum of 4GB of memory, reducing the chance of crashes and allowing you to play for hours upon hours. However, if you only have 4GB RAM, installing the 4GB patch is unlikely to help and will probably cause issues. You should really only install the 4GB patch if you have more than 4GB RAM.
You can download a pre-patched, cracked .exe, fondly named George, here! A cracked exe means that you will not need to use the disc or Origin/EA App to run the game when using this exe. The cracked exe can only be used if you have Mansion and Garden Stuff.
The .exe needs to be extracted from the .rar file and then placed in Your Installation Location > Fun with Pets > SP9 > TSBin (for the UC) or Your Installation Location > The Sims 2 Mansion and Garden Stuff > TSBin (for the discs/oldgamesdownload/Mr DJ’s “UC”). Your installation location can be found by referring to the information in the above section, “Where Are My Installation Files” or the Reddit wiki of the same.
Before putting the exe in there, make sure to rename your original Sims2EP9.exe to something else. For instance, mine is named Sims2EP9.exe.Backup. Once you’ve placed the cracked .exe in the TSBin, you can either run the game using the RPC launcher or right click on the cracked exe, make a shortcut, and send it to the desktop. Use that to launch the game.
Don’t run the game in compatibility mode as this will prevent the patch from working (same goes for the pre-patched exe, and the DXVK fix). It’s okay and recommended to “run as administrator” by right clicking and selecting that option on the executable (or checking the box for it in the Compatibility tab under Properties - just don’t check “run this program in compatibility mode for:”).
This section does not apply to Legacy. Legacy cannot use the 4GB patch or the RPCLauncher.
Follow the video guide on this Modthesims thread or use the instructions below for the 4GB patch.
To install the 4GB Patch Manually:
This section does not apply to Legacy. Legacy cannot use the 4GB patch or the RPCLauncher.
You can get the First Born Syndrome fix separately to or as part of the RPC launcher, and you can add it to any download of the game which has Mansion and Garden Stuff (A.K.A. Fun with Pets/SP9). If you are using the RPC launcher, then you already have the FBS fix included.
This is an incredibly helpful tool for Sims 2. The genetics randomizer for The Sims 2 is broken which causes something called First Born Syndrome. In short, if you make your Sims have a child, close the game, and make the same sims have another child the next time you play, those children will be clones of each other, which can be seen by looking at their personalities. The RPC Launcher fixes that issue by applying appropriate genetics code. This launcher may fix the DirectX 9 error as well.
The launcher also has the 4GB patch included. If you have Discord you can display what game you’re playing to your friends or other server members, and you can also set it up so it displays what you’re doing in the game. If you don’t want the Discord and other features, LazyDuchess has released a FBS Fix 2.0 which can be applied to your normal exe without the RPC Launcher.
TS2 Extender is the equivalent of RPC for Legacy, though some features differ. It still fixes first born syndrome among other features.
Edge scrolling does not work in windowed mode and this is not a bug.
Not applicable to Sims 2 Ultimate Collection through the EA App. Click the 3 dots in the top right of the game’s image on the Library screen and then click View Properties. Put -w in the box under Advanced Launch Arguments and click save. The game will then run windowed - remove the -w to go back to fullscreen.
Not applicable for RPC Launcher. You can toggle between windowed, borderless, and fullscreen in the RPCSettings.exe.
Not applicable to Legacy. You can use alt + enter to toggle window modes.
This will allow you to have your game in Windowed mode. This can also be used as a fix for the DirectX 9 error as well.
You can navigate to where you have your Sims 2 shortcut, which is usually on the desktop. Once you have found your shortcut on the desktop, right click on it and choose Properties. A box will pop up. Click on the Target line and scroll to the end with the arrow keys, or press End on your keyboard. Then, press the spacebar once followed by -w. So your Target line should read something like this:
“C:\Program Files\The Sims 2 Ultimate Collection\Fun with Pets\SP9\TSBin\Sims2EP9.exe” -w
Please do not copy the above line unless your installation location and folder names are the same. Depending on where your game is installed, yours will be different. Please type it out as described above.
It will look like this.
Press OK and when you load your game next, it will be in Windowed mode.
This should get around the DirectX9 error (“Failed to find any DirectX 9.0c compatible graphics adapters in this system!”) as well.
You can also use the above method to force the game to run in a different resolution. You follow the exact same path as before. You go to the Target line and type a space, followed by -r1920x1080. So, your Target line would look something like this:
“C:\Program Files\The Sims 2 Ultimate Collection\Fun with Pets\SP9\TSBin\Sims2EP9.exe” -w -r1920x1080
Please do not copy the above line unless your installation location and folder names are the same and the resolution is the correct one that you want. Depending on where your game is installed, yours will be different. Please type it out as described above.
You can force it to run in whatever resolution you like. You don’t need to use windowed mode to do this, just get rid of the -w if you don’t want it in windowed mode.
If you are using the version we have linked in this Wiki (the MagiPack repack or the previous osab’s installer) then you already have these fixes included.
If you are using another version (Games4TheWorld, OldGamesDownload, Archive.org you may need to apply the following fixes:
These are all the fixes you should need to get the game running on your PC. If you are still unable to get the game running, please check out the troubleshooting section Lemmy Link or Reddit Link before making a post as your issue will have been covered there already.
Please Note: This is copied from Reddit’s r/TheSims2Help’s Setting Up The Game Wiki Any linked headings will be linked back to the Reddit Wiki. In line links should denote where they go (reddit, lemmy, tumbler) anything not mentioned is probably another off reddit guide or .exe file. Most if not all content contained below was created by the Reddit r/Sims2Help team and all credit for this guide goes to them.
This section contains information on how to install and set up the game. If you’re looking for troubleshooting information instead, please see the troubleshooting section.
To get Sims 2 working well on modern systems, it needs a few simple tweaks that we have provided in the links below. Please pay special attention to the version of the game you have and if these fixes are applicable.
None of the information in this section will be relevant to you if you are playing on MacOS. Please see the Mac section of the wiki Lemmy Link, Reddit Link for information on playing on that OS. However, it is relevant if you are playing on Windows on your Mac with Bootcamp or Parallels.
Most of this information can be relevant but you should still check out the Linux Guide section of the wiki Lemmy Link, Reddit Link
If you want to play Sims 2 on a Steam Deck, please see this video tutorial.
Before you start trying to apply fixes for the game, you will need to know where to find your installation files. Please see below.
Depending on where you installed the game, and which version of the game you have, you might need to do some searching to find out exactly which folder your installation files are located in.
The simplest way to do this is right click on the shortcut on your desktop, and choose “open file location”, which will take you to the TSBin of your latest pack, like this. Usually it will be somewhere in Program Files - if you click in the space beside “TSBin” in the bar at the top, it will show you the full path.
Here are the default installation locations for different versions of the game. The game will be installed in one of these unless you decided to change the location.
MagiPack repack: C:\MagiPacks\The Sims 2
EA App Ultimate Collection: C:\Program Files\EA Games\The Sims 2 Ultimate Collection
Origin Ultimate Collection: C:\Program Files (x86)\Origin Games\The Sims 2 Ultimate Collection
Osab Starter Pack Ultimate Collection: C:\Program Files x86\The Sims 2 Starter Pack
Games4theworld Ultimate Collection: C:\Program Files\The Sims 2 Ultimate Collection
Discs: C:\Program Files (x86)\EA Games
MrDJ/Oldgamesdownload: C:\Program Files (x86)\Mr DJ\The Sims 2 Ultimate Collection
Legacy: C:\Program Files\EA Games\The Sims 2 Legacy
Steam: C:\Program Files\EA Games\The Sims 2 Legacy
This is not the location where your Downloads folder (for Mods/CC) or your personal Neighbourhoods will go. That’s always in Documents/EA Games.
This section does not apply to Legacy. Legacy cannot use the 4GB patch or the RPCLauncher.
If you have osab’s installer or MagiPack then you have the 4GB patch included with the RPC Launcher and the setting can be toggled in RPCSettings.
We highly recommend using the RPC Launcher if you don’t already have it. In order to use it, you need to have a NoCD/cracked exe which you can download from the link below. (The exe is referred to as George!)
You do not need to have pirated the game to use a cracked exe - you can use these even if you installed via disc or have The Ultimate Collection on the EA App.
The Sims 2 is a 32-bit game which means it can only use a maximum of 2GB of memory (RAM). Installing the 4GB patch will allow your game to use a maximum of 4GB of memory, reducing the chance of crashes and allowing you to play for hours upon hours. However, if you only have 4GB RAM, installing the 4GB patch is unlikely to help and will probably cause issues. You should really only install the 4GB patch if you have more than 4GB RAM.
You can download a pre-patched, cracked .exe, fondly named George, here! A cracked exe means that you will not need to use the disc or Origin/EA App to run the game when using this exe. The cracked exe can only be used if you have Mansion and Garden Stuff.
The .exe needs to be extracted from the .rar file and then placed in Your Installation Location > Fun with Pets > SP9 > TSBin (for the UC) or Your Installation Location > The Sims 2 Mansion and Garden Stuff > TSBin (for the discs/oldgamesdownload/Mr DJ’s “UC”). Your installation location can be found by referring to the information in the above section, “Where Are My Installation Files” or the Reddit wiki of the same.
Before putting the exe in there, make sure to rename your original Sims2EP9.exe to something else. For instance, mine is named Sims2EP9.exe.Backup. Once you’ve placed the cracked .exe in the TSBin, you can either run the game using the RPC launcher or right click on the cracked exe, make a shortcut, and send it to the desktop. Use that to launch the game.
Don’t run the game in compatibility mode as this will prevent the patch from working (same goes for the pre-patched exe, and the DXVK fix). It’s okay and recommended to “run as administrator” by right clicking and selecting that option on the executable (or checking the box for it in the Compatibility tab under Properties - just don’t check “run this program in compatibility mode for:”).
This section does not apply to Legacy. Legacy cannot use the 4GB patch or the RPCLauncher.
Follow the video guide on this Modthesims thread or use the instructions below for the 4GB patch.
To install the 4GB Patch Manually:
This section does not apply to Legacy. Legacy cannot use the 4GB patch or the RPCLauncher.
You can get the First Born Syndrome fix separately to or as part of the RPC launcher, and you can add it to any download of the game which has Mansion and Garden Stuff (A.K.A. Fun with Pets/SP9). If you are using the RPC launcher, then you already have the FBS fix included.
This is an incredibly helpful tool for Sims 2. The genetics randomizer for The Sims 2 is broken which causes something called First Born Syndrome. In short, if you make your Sims have a child, close the game, and make the same sims have another child the next time you play, those children will be clones of each other, which can be seen by looking at their personalities. The RPC Launcher fixes that issue by applying appropriate genetics code. This launcher may fix the DirectX 9 error as well.
The launcher also has the 4GB patch included. If you have Discord you can display what game you’re playing to your friends or other server members, and you can also set it up so it displays what you’re doing in the game. If you don’t want the Discord and other features, LazyDuchess has released a FBS Fix 2.0 which can be applied to your normal exe without the RPC Launcher.
TS2 Extender is the equivalent of RPC for Legacy, though some features differ. It still fixes first born syndrome among other features.
Edge scrolling does not work in windowed mode and this is not a bug.
Not applicable to Sims 2 Ultimate Collection through the EA App. Click the 3 dots in the top right of the game’s image on the Library screen and then click View Properties. Put -w in the box under Advanced Launch Arguments and click save. The game will then run windowed - remove the -w to go back to fullscreen.
Not applicable for RPC Launcher. You can toggle between windowed, borderless, and fullscreen in the RPCSettings.exe.
Not applicable to Legacy. You can use alt + enter to toggle window modes.
This will allow you to have your game in Windowed mode. This can also be used as a fix for the DirectX 9 error as well.
You can navigate to where you have your Sims 2 shortcut, which is usually on the desktop. Once you have found your shortcut on the desktop, right click on it and choose Properties. A box will pop up. Click on the Target line and scroll to the end with the arrow keys, or press End on your keyboard. Then, press the spacebar once followed by -w. So your Target line should read something like this:
“C:\Program Files\The Sims 2 Ultimate Collection\Fun with Pets\SP9\TSBin\Sims2EP9.exe” -w
Please do not copy the above line unless your installation location and folder names are the same. Depending on where your game is installed, yours will be different. Please type it out as described above.
It will look like this.
Press OK and when you load your game next, it will be in Windowed mode.
This should get around the DirectX9 error (“Failed to find any DirectX 9.0c compatible graphics adapters in this system!”) as well.
You can also use the above method to force the game to run in a different resolution. You follow the exact same path as before. You go to the Target line and type a space, followed by -r1920x1080. So, your Target line would look something like this:
“C:\Program Files\The Sims 2 Ultimate Collection\Fun with Pets\SP9\TSBin\Sims2EP9.exe” -w -r1920x1080
Please do not copy the above line unless your installation location and folder names are the same and the resolution is the correct one that you want. Depending on where your game is installed, yours will be different. Please type it out as described above.
You can force it to run in whatever resolution you like. You don’t need to use windowed mode to do this, just get rid of the -w if you don’t want it in windowed mode.
If you are using the version we have linked in this Wiki (the MagiPack repack or the previous osab’s installer) then you already have these fixes included.
If you are using another version (Games4TheWorld, OldGamesDownload, Archive.org you may need to apply the following fixes:
These are all the fixes you should need to get the game running on your PC. If you are still unable to get the game running, please check out the troubleshooting section Lemmy Link or Reddit Link before making a post as your issue will have been covered there already.
Please Note: This is copied from Reddit’s r/TheSims2Help’s Troubleshooting Wiki Any linked headings will be linked back to the Reddit Wiki. In line links should denote where they go (reddit, lemmy, tumbler) anything not mentioned is probably another off reddit guide or .exe file. Most if not all content contained below was created by the Reddit r/Sims2Help team and all credit for this guide goes to them.
If you’re looking for information on setting up the game on a modern computer, see the section to set up the game.
Firstly, we have to talk about OneDrive. If you don’t want a technical breakdown of why it’s bad, please simply uninstall it by pressing the Windows key and typing add or remove and open the program. Scroll down until you find OneDrive and choose uninstall. If you would like a more detailed answer, please click the OneDrive link below.
OneDrive is a program that comes installed on all Windows PCs. It works by monitoring your local folders on your PC, copying those files, and uploading them to the cloud as a backup. It does this in the background so you may be unaware that it’s working away behind the scenes.
You may think that you do not have OneDrive installed, or that you aren’t signed into OneDrive, but you most likely are. When you first setup your new PC, Windows will ask you to log in with an email address. If you use a Microsoft account to do this (which is quickly becoming the only option), your Windows account will automatically sign you in to OneDrive to make the most of their cloud services. When you then install Sims 2, your save files are put into the Documents folder, which is one of the automatic locations that OneDrive syncs to the cloud.
OneDrive is a known problem for many older games, including Sims 2. This is due to the way that older games access and save files. Sims 2 does not like files to be overwritten or merged as the data has to be saved in a certain way with hundreds of files required to be in sync with each other while OneDrive tries to constantly sync data as its updated. When Sims 2 is running it accesses and re-writes its own files, and if OneDrive is also actively backing up the files, it can cause problems such as missing Sims, broken neighborhoods, or reverted saves. Even if Sims 2 isn’t running when OneDrive syncs, when it merges the local files with the cloud files it causes the same problems.
The best way to avoid this issue is by simply uninstalling OneDrive. This is the option we always recommend. If you don’t have it on your PC, then there is no way it can intefere with your game.
If you continue to have issues after you have uninstalled OneDrive, your save may be unsalvagable. To avoid this issue, you should regularly make back-ups of your game. You can reset your Sims 2 save by following this guide.
If you’re getting a blank error pop-up box titled “The Sims 2” with only an “OK” button or your game just won’t open (even if Origin/EA App opens if you have the game through the app) it’s related to your cache. You can clear your cache to fix the issue.
On AMD GPUs, the resolution of your screen may change and/or your entire screen may freeze/turn blue after clicking the shortcut to run the game. It may seem like the game won’t open but it will, you just need to be patient - try leaving your computer for 15 minutes and then come back to it. This wait is normal, and the game itself will run fine once it is open.
There are two possible solutions for this issue if you don’t want to experience the long boot time every time you want to play the game. The first is running the Graphics Rules Maker and choosing the “Disable Texture Memory Estimate Adjustment” option (or you can manually add this line to your Graphics Rules file: boolProp disableTexMemEstimateAdjustment true) - the Legacy Graphics Rules file linked in the tech setup section should also work.
The DXVK fix also typically gets rid of this long wait time, however, you should not use DXVK unless your system can support it - ensure that you follow the DXVK guide (linked in the DXVK Section) properly.
Only applicable to Games4TheWorld version
With the games4theworld (G4TW) version of the Ultimate Collection, which is linked in the ‘Download TS2’ section of this wiki, if Origin opens when you try to launch the game after installation you have probably missed a step, most likely replacing the crack. Please try following the instructions included in the download again to install the crack, which will prevent Origin from opening.
If you get this error, which looks like this then you haven’t installed the game correctly. If you got the game from games4theworld, try following the installation instructions again, taking particular care with the steps relating to the Touchup exe and applying the crack. For osab’s installer, try running the standalone installer available on the download page. If you got the game elsewhere, try reapplying the crack that was provided with the game.
Aside from installation issues, if you are getting this error after the game has previously worked then the issue is likely your antivirus - it is very important that you add exceptions for the game’s files. See the bullet point on antivirus software in the crashing section below.
It may also be that something has deleted the registry entries for the game, for examples, programs like CCleaner may incorrectly do this. You may use the Standalone Installer to restore the entries for the Ultimate Collection only, and you must make sure not to run these programs again - registry cleaners are largely unnecessary, and definitely do not need to be run on a regular basis, especially if you don’t know what keys it’s deleting.
Not applicable to Legacy.
This error can happen for a couple of reasons, none of which are related to installing DirectX 9, and looks like this. The most common reason for this error is not having a < 100Hz refresh rate, using DXVK, or a typo in the Graphics Rules or Video Cards sgr files. Any error in these files, even just a small typo like a punctuation mark, or the absence of these files, will result in this error.
Using the DXVK fix may also cause this error, so you should not use it (or check to box to install it as part of Osab’s Starter Pack/MagiPack) unless you know your computer requires it. If you need to remove DXVK, just go to your install location then Fun with Pets/SP9/TSBin and delete the d3d9.dll file.
Another reason for the DirectX 9 error is related to your computer’s refresh rate. If you don’t have a 60Hz (or just <100Hz) option on your computer, you will get the DX9 error. Two solutions for this are listed below.
Having a screen which does not natively support 60Hz, which is becoming more common nowadays with some screens only having 120Hz or 144Hz options, will result in the game refusing the load in full screen mode and giving the DX9 error from the moment you install it. You can use the Custom Resolution Utility to create a 60Hz option for your computer.
Windowed mode is another fix for the DirectX 9 error - see how to put the game in windowed mode here - and the RPC Launcher will do the same provided you don’t select the full screen option. The downside of Windowed mode and Bordered full screen (which the RPC provides) is that you can’t use edge scrolling.
The RPC Launcher may also fix the DirectX9 error on its own (whether you use windowed, borderless or fullscreen mode), and offers many other useful features such as a fix for Firstborn syndrome so it is highly recommended you use it.
(Fix for Unable to Edit Resolution + DirectX 9 Error - Adding a <100Hz refresh rate)
Not applicable to Legacy.
If you have a screen which does not have a 60Hz refresh rate option by default, you may experience the DirectX 9 error when trying to launch the game in full screen or you may not be able to edit the game’s resolution.
To check if you have a 60Hz refresh rate:
You can add a 60Hz refresh rate using the Custom Resolution Utility as follows:
Note that driver updates may result in the 60Hz option being removed and you will have to add it again. Simply repeat the process above if this happens
There is more info on this issue on Leefish in this and this thread.
Some users experience crashing when loading any neighbourhood (without any CC/mods) or frequently while playing. The 4GB patch and Graphics Rules Maker are two things you can use to help with crashing. If you have already applied these fixes and the game is recognising your hardware, you can try other fixes on this page.
If you experience crashing during switching categories in the Build/Buy menu, you will benefit from this mod by spockthewok. This patch fixes The Sims 2 Build/Buy crashes by adding proper checks for invalid data when sorting objects, rather than relying on a supposed object limit. It works even with very large custom content folders and helps prevent crashes overall. You can read more about it here.
Make sure to add your installation location (see Where Are My Installation Files Reddit Link or scroll to the top here), your save location (Documents/EA Games) and the game application itself, if that’s an option on your antivirus.
If you’re not sure how to make an exception for the game, just Google “your antivirus name + add exception”.
Some antivirus software will have an additional setting “Data Protection” (e.g. Norton 360) - make sure to add the game as an exception here too as not doing so may stop the game from saving any progress you make.
See this Reddit thread - this fix can greatly help with crashing and pink flashing. The actual exe is available here as the original link seems to be down.
Delete your cache files
DXVK fix Reddit Link or scroll down to the DXVK section
Crashing on the Main Street Mobile Homes lot specifically? See reddit thread here - it’s a known bug!
Not applicable to Legacy. If you have Legacy, ensure that the Smooth Edges setting is turned to More.
You will need to run the Graphics Rules Maker or have the Legacy graphics rules file from the Graphics Rules section Lemmy Link, Reddit Link to be able to use the Smooth Edges option in the game’s settings.
You can also use the new “disable dirty rectangle optimisations” option in the GRM 2.3.0 which should fix flickering without enabling smooth edges.
Fix already included in MagiPack.
You might run into the issue of black boxes beneath your Sims, like this, which is actually supposed to be their shadows. You can download a mod by Nopke here to fix it.
Some people recommend turning down or off shadows as a fix, but it doesn’t work for everyone and Nopke’s mod allows you to still have shadows that display correctly. Turning down or off shadows can help with performance, however, so you may wish to do that anyway if you find the game is laggy.
If you experience a white screen when running with your dedicated GPU, right clicking on the game’s shortcut and clicking properties, then clicking the Compatibility tab and checking the box “disable full screen optimisations” may fix the problem. See this Reddit thread for an image of the problem.
Please see the download linked above and, if you’re interested in this sort of thing, the dissertation of the problem and how it was fixed here. It’s a fascinating read!
The long-held community belief that pink flashing is caused by running out of texture memory has been disproven in the dissertation above and we finally have an answer for why it happens.
In the game, there are several colours used when the game can’t access a texture for an object. Some may have seen both red and blue flashing (red is usually seen when playing on a virtual machine and the more common blue is seen when a texture for an object is missing) but the most prevalent is pink flashing.
The pink flashing error happens because the game has a built-in safety check from its old 32-bit design. Back then, computers could only use about 4GB of memory, and games were limited to using about 2GB of that. This is why the 4GB patch is often recommended for the game, so it allows the game to access more memory and thus reducing crashes. However, the game includes a rule that says if something is stored above that 2GB limit, don’t use it. This is done to avoid crashing.
On modern 64-bit systems, especially if you apply a 4GB patch, the game can now use more memory and may store things above that old 2GB limit. The only problem is that the original safety check is still there, so when the game tries to use those higher memory addresses, it refuses and that failure shows up as pink flashing. This shows that the issue isn’t really about running out of texture memory, as many people thought, but about the game not being able to access certain parts of memory due to an old built-in limit.
There are two versions of this fix provided: one that removes the limit entirely, and one that raises it.
Version 1 completely removes the safety check. The game will treat all memory the same, even above the old 2GB limit. This version may be prone to crashing, as pink soup is often an early indicator that your game will soon experience a crash. This is not ideal as this means players may lose data or saves may become corrupted if the crash happens at an inopportune time.
Version 2 keeps the safety check, but moves the limit higher (to about 3.5GB). The idea is that if pink flashing does happens, it acts as a warning that memory usage is getting too high, so you can restart the game before it crashes.
The author did several tests to make sure the fix works. First, they had to reproduce the pink flashing error. They did this by creating a neighbourhood with lots of high-poly custom content in the neighbourhood. Then, once pink flashing had ocurred, they began testing. Without the patch, they experienced pink flashing or crashing 5 out of 5 times. With the patch, they experienced no pink flashing or crashing 5 out of 5 times. They also tested the patch in comparison with just changing the texture memory which had no observed effect. They also tested with DXVK which only stopped the pink flashing or crashing in 2 out of 5 of the tests.
So far, this patch is looking extremely promising. The community will no doubt stress test it and we will be able to learn more about this in the forseeable future. For now, we will leave the Wiki as it is, but we will try to educate the community as much as possible regarding this new patch.
Anything from sims to objects to lots to hood deco can flash pink and the game may or may not crash not long after you see pink flashing - so save immediately to be safe! Pink flashing is not harmful to your hoods and will not affect them long term, but it may affect how long you can play for at a time. Closing the game and reopening it is one quick fix for pink soup, but this is only helpful if you only see it after playing for a while (e.g. after 4/5 hours of playing). Some users (typically on higher end GPUs) will see pink flashing much quicker - possibly as soon as they open the game.
Pink flashing can occasionally happen as a result of the way CC is made (e.g. see this thread) or because you are trying to use shaders from packs you don’t have (e.g. if you try to use LazyDuchess’ bright CAS fix with just the base game installed, you will experience pink flashing - later packs such as Seasons modified the shaders so it is not compatible without the pack). It looks like this reddit image or this reddit image or this archive image.
LazyDuchess’ pink flashing fix can result in things that would flash pink turning invisible instead and there is a cheat listed to make them visible again. This works very well for some people in stopping pink flashing.
Turning down/off settings such as reflections, shadows, view distance, fade distance and snow, as well as not using/removing from your userstartup.cheat file cheats related to the lot skirt size may also stop pink flashing.
Increasing lot imposter quality with RPC is known to cause pink flashing - aside from turning the setting back down, you also need to regenerate the lot imposters by making a change in the lot and saving to trigger an update.
CC with large texture sizes (generally 2K textures) contribute greatly to pink flashing - try using optimised texture sizes (e.g. some creators have created optimised versions of sky boxes for this reason) or remove the CC altogether and see if it helps. This Tumbler post talks about this as well as recommending CC with lower poly counts to lower memory usage.
Another potential fix is the DXVK fix detailed Reddit link here or scroll down to the DXVK section.
See this Reddit thread - this fix can greatly help with crashing and pink flashing. The actual exe is available here as the original link seems to be down.
The RPC launcher (which is included with the MagiPack version of the game we link in this wiki) defaults to running the game in borderless windowed mode. If you also have a more columns in CAS mod (such as Chris Hatch’s CAS300.package), your CAS screen may be cut off like this because the more columns mod requires a certain screen width (e.g. 1920) and even though your screen may be this exact size, running in borderless mode means less of the window is available to the game. To fix this issue, simply run the game in full screen instead by modifying the setting in RPCSettings.exe.
This issue may also be caused by using the wrong ‘more columns’ mod for your resolution even without running in borderless mode. For example, if your screen width is 1366 and you try to use the file for screen width 1920, you would see the same issue. The solution is to use the correct mod for your screen size.
If you use the Clean UI, the more columns mod is automatically included with this and the issue can also appear if your screen resolution is 1920x1080 and you choose the 1920 options for the Clean UI. To fix this, you can choose a smaller resolution option in the Clean UI here. Please see this Reddit image example of a 1920x1080 resolution being cut off by the mod, but reducing the Clean UI CAS option from 1920 to 1524 fixes the issue.
Fix already included in MagiPack.
LazyDuchess has released a fix for all of these issues, which you can find in this Tumbler post.
This fix works for the “silhouette” issue as well, where sims appear as silhouettes rather than overly bright. LazyDuchess has explained why these issues happen in this Tumbler post.
DXVK is useful for fixing several issues such a persistent pink/purple flashing which isn’t fixed by other means, persistent crashing, or the AMD GPU issue, which results in long boot times, where your computer may freeze up and take minutes to even show the EA logo. You most likely will need the DXVK fix on newer AMD cards (such as the RX 5700 XT) and possibly on some Nvidia cards to be able to play at all.
Please do not use the DXVK fix unless you have exhausted all other options and are still having issues as many problems can be fixed by other means (e.g. using the updated Graphics Rules, applying the 4GB patch as detailed in previous sections). You shouldn’t be using it unless you actually need it and your computer can support it (i.e. passes the Vulkan test in the instructions) because DXVK can actually cause issues as well, such as the DX9 error.
To use DXVK with Sims 2 (abridged version of the full guide):
Please note that if you use the DXVK fix, your config log will say that your graphics card is a Nvidia GeForce 7800 GTX regardless of what you actually have and this is intended. If your config log does not list this card, then you aren’t using DXVK
Note that you may see some tutorials incorrectly say to use the 64 bit version (e.g. Ani Bats’ YouTube tutorial) - this version will not work with the game as it is a 32-bit game. You can verify this by looking at the graphics device info in your config log in Documents/EA Games/The Sims 2 (UC)/Logs/<your-pc-name>-config-log.txt.
The full guide by CrazySim is available here - this has a bunch of other useful info relating to DXVK and can help with troubleshooting issues related to it too.
Some versions of the DXVK fix can cause graphical issues (such as the thumbnails issue shown in this Reddit thread and the pixelation in this Reddit thread or this Reddit thread). If you experience any graphical issues such as the ones mentioned, please try turning on smooth edges. If that doesn’t work, try using a different version of DXVK (you can access all the versions of it on the download page).
If you’ve followed this guide and you’re still having issues, please try this Tumbler Guide.
Driver updates in late 2024 have resulted in this error occurring in Intel GPUs - Intel ARC GPUs were initially affected but it now seems like all Intel GPUs with the latest drivers are encountering this error. The issue is with displaying shadows and the fix is simply to disable them in game.
You cannot disable shadows from the neighbourhood screen so you must load a lot (it must be one without sims, either unoccupied residential or a community lot, as lots with sims, including CAS, will crash due to their shadows) and then open the game’s graphics settings and turn off shadows. On the Legacy Edition you may have to do this each time you launch the game as there is a bug where it resets the settings.
Using the DXVK fix (reddit link or scroll up) is an alternate fix which may resolve this error but disabling shadows is quicker and DXVK sometimes introduces graphical artifacts or other issues so it is advised to disable shadows first to see if that fixes it for your game.
When using the RPC launcher (which is included with the MagiPack repack), you may see errors about MSVCP140.dll and VCRUNTIME140.dll not being found. Many computers will already include these dependencies from other programs, but if, for example, you’ve freshly installed Windows or are playing on Parallels on Mac, you will see see these errors.
To fix it, you need to install the 32-bit (x86) Visual C++ Redistributable for Visual Studio 2015 - note that Microsoft currently requires you to login and sign up to the dev program to access this specific download. If you don’t want to sign up, you can get the correct installer here as I uploaded it to Google Drive. Download and run the installer by double clicking the file then follow the instructions. After it’s installed, you should be able to run from RPC without errors.
These errors cannot occur when running with the original game’s executable Sims2EP9 because it does not use these dependencies.
As a reminder I did not create this guide, it’s copied from Reddit’s r/Sims2Help wiki’s Setting up the Game Guide, Legacy Edition Section and their Trouble Shooting Guide. I tried to denote any links that go back to reddit and if there was an appropriate Fediverse link, to include it.
Please Note: This is copied from Reddit’s r/TheSims2Help’s Troubleshooting Wiki Any linked headings will be linked back to the Reddit Wiki. In line links should denote where they go (reddit, lemmy, tumbler) anything not mentioned is probably another off reddit guide or .exe file. Most if not all content contained below was created by the Reddit r/Sims2Help team and all credit for this guide goes to them.
If you’re looking for information on setting up the game on a modern computer, see the section to set up the game.
Firstly, we have to talk about OneDrive. If you don’t want a technical breakdown of why it’s bad, please simply uninstall it by pressing the Windows key and typing add or remove and open the program. Scroll down until you find OneDrive and choose uninstall. If you would like a more detailed answer, please click the OneDrive link below.
OneDrive is a program that comes installed on all Windows PCs. It works by monitoring your local folders on your PC, copying those files, and uploading them to the cloud as a backup. It does this in the background so you may be unaware that it’s working away behind the scenes.
You may think that you do not have OneDrive installed, or that you aren’t signed into OneDrive, but you most likely are. When you first setup your new PC, Windows will ask you to log in with an email address. If you use a Microsoft account to do this (which is quickly becoming the only option), your Windows account will automatically sign you in to OneDrive to make the most of their cloud services. When you then install Sims 2, your save files are put into the Documents folder, which is one of the automatic locations that OneDrive syncs to the cloud.
OneDrive is a known problem for many older games, including Sims 2. This is due to the way that older games access and save files. Sims 2 does not like files to be overwritten or merged as the data has to be saved in a certain way with hundreds of files required to be in sync with each other while OneDrive tries to constantly sync data as its updated. When Sims 2 is running it accesses and re-writes its own files, and if OneDrive is also actively backing up the files, it can cause problems such as missing Sims, broken neighborhoods, or reverted saves. Even if Sims 2 isn’t running when OneDrive syncs, when it merges the local files with the cloud files it causes the same problems.
The best way to avoid this issue is by simply uninstalling OneDrive. This is the option we always recommend. If you don’t have it on your PC, then there is no way it can intefere with your game.
If you continue to have issues after you have uninstalled OneDrive, your save may be unsalvagable. To avoid this issue, you should regularly make back-ups of your game. You can reset your Sims 2 save by following this guide.
If you’re getting a blank error pop-up box titled “The Sims 2” with only an “OK” button or your game just won’t open (even if Origin/EA App opens if you have the game through the app) it’s related to your cache. You can clear your cache to fix the issue.
On AMD GPUs, the resolution of your screen may change and/or your entire screen may freeze/turn blue after clicking the shortcut to run the game. It may seem like the game won’t open but it will, you just need to be patient - try leaving your computer for 15 minutes and then come back to it. This wait is normal, and the game itself will run fine once it is open.
There are two possible solutions for this issue if you don’t want to experience the long boot time every time you want to play the game. The first is running the Graphics Rules Maker and choosing the “Disable Texture Memory Estimate Adjustment” option (or you can manually add this line to your Graphics Rules file: boolProp disableTexMemEstimateAdjustment true) - the Legacy Graphics Rules file linked in the tech setup section should also work.
The DXVK fix also typically gets rid of this long wait time, however, you should not use DXVK unless your system can support it - ensure that you follow the DXVK guide (linked in the DXVK Section) properly.
Only applicable to Games4TheWorld version
With the games4theworld (G4TW) version of the Ultimate Collection, which is linked in the ‘Download TS2’ section of this wiki, if Origin opens when you try to launch the game after installation you have probably missed a step, most likely replacing the crack. Please try following the instructions included in the download again to install the crack, which will prevent Origin from opening.
If you get this error, which looks like this then you haven’t installed the game correctly. If you got the game from games4theworld, try following the installation instructions again, taking particular care with the steps relating to the Touchup exe and applying the crack. For osab’s installer, try running the standalone installer available on the download page. If you got the game elsewhere, try reapplying the crack that was provided with the game.
Aside from installation issues, if you are getting this error after the game has previously worked then the issue is likely your antivirus - it is very important that you add exceptions for the game’s files. See the bullet point on antivirus software in the crashing section below.
It may also be that something has deleted the registry entries for the game, for examples, programs like CCleaner may incorrectly do this. You may use the Standalone Installer to restore the entries for the Ultimate Collection only, and you must make sure not to run these programs again - registry cleaners are largely unnecessary, and definitely do not need to be run on a regular basis, especially if you don’t know what keys it’s deleting.
Not applicable to Legacy.
This error can happen for a couple of reasons, none of which are related to installing DirectX 9, and looks like this. The most common reason for this error is not having a < 100Hz refresh rate, using DXVK, or a typo in the Graphics Rules or Video Cards sgr files. Any error in these files, even just a small typo like a punctuation mark, or the absence of these files, will result in this error.
Using the DXVK fix may also cause this error, so you should not use it (or check to box to install it as part of Osab’s Starter Pack/MagiPack) unless you know your computer requires it. If you need to remove DXVK, just go to your install location then Fun with Pets/SP9/TSBin and delete the d3d9.dll file.
Another reason for the DirectX 9 error is related to your computer’s refresh rate. If you don’t have a 60Hz (or just <100Hz) option on your computer, you will get the DX9 error. Two solutions for this are listed below.
Having a screen which does not natively support 60Hz, which is becoming more common nowadays with some screens only having 120Hz or 144Hz options, will result in the game refusing the load in full screen mode and giving the DX9 error from the moment you install it. You can use the Custom Resolution Utility to create a 60Hz option for your computer.
Windowed mode is another fix for the DirectX 9 error - see how to put the game in windowed mode here - and the RPC Launcher will do the same provided you don’t select the full screen option. The downside of Windowed mode and Bordered full screen (which the RPC provides) is that you can’t use edge scrolling.
The RPC Launcher may also fix the DirectX9 error on its own (whether you use windowed, borderless or fullscreen mode), and offers many other useful features such as a fix for Firstborn syndrome so it is highly recommended you use it.
(Fix for Unable to Edit Resolution + DirectX 9 Error - Adding a <100Hz refresh rate)
Not applicable to Legacy.
If you have a screen which does not have a 60Hz refresh rate option by default, you may experience the DirectX 9 error when trying to launch the game in full screen or you may not be able to edit the game’s resolution.
To check if you have a 60Hz refresh rate:
You can add a 60Hz refresh rate using the Custom Resolution Utility as follows:
Note that driver updates may result in the 60Hz option being removed and you will have to add it again. Simply repeat the process above if this happens
There is more info on this issue on Leefish in this and this thread.
Some users experience crashing when loading any neighbourhood (without any CC/mods) or frequently while playing. The 4GB patch and Graphics Rules Maker are two things you can use to help with crashing. If you have already applied these fixes and the game is recognising your hardware, you can try other fixes on this page.
If you experience crashing during switching categories in the Build/Buy menu, you will benefit from this mod by spockthewok. This patch fixes The Sims 2 Build/Buy crashes by adding proper checks for invalid data when sorting objects, rather than relying on a supposed object limit. It works even with very large custom content folders and helps prevent crashes overall. You can read more about it here.
Make sure to add your installation location (see Where Are My Installation Files Reddit Link or scroll to the top here), your save location (Documents/EA Games) and the game application itself, if that’s an option on your antivirus.
If you’re not sure how to make an exception for the game, just Google “your antivirus name + add exception”.
Some antivirus software will have an additional setting “Data Protection” (e.g. Norton 360) - make sure to add the game as an exception here too as not doing so may stop the game from saving any progress you make.
See this Reddit thread - this fix can greatly help with crashing and pink flashing. The actual exe is available here as the original link seems to be down.
Delete your cache files
DXVK fix Reddit Link or scroll down to the DXVK section
Crashing on the Main Street Mobile Homes lot specifically? See reddit thread here - it’s a known bug!
Not applicable to Legacy. If you have Legacy, ensure that the Smooth Edges setting is turned to More.
You will need to run the Graphics Rules Maker or have the Legacy graphics rules file from the Graphics Rules section Lemmy Link, Reddit Link to be able to use the Smooth Edges option in the game’s settings.
You can also use the new “disable dirty rectangle optimisations” option in the GRM 2.3.0 which should fix flickering without enabling smooth edges.
Fix already included in MagiPack.
You might run into the issue of black boxes beneath your Sims, like this, which is actually supposed to be their shadows. You can download a mod by Nopke here to fix it.
Some people recommend turning down or off shadows as a fix, but it doesn’t work for everyone and Nopke’s mod allows you to still have shadows that display correctly. Turning down or off shadows can help with performance, however, so you may wish to do that anyway if you find the game is laggy.
If you experience a white screen when running with your dedicated GPU, right clicking on the game’s shortcut and clicking properties, then clicking the Compatibility tab and checking the box “disable full screen optimisations” may fix the problem. See this Reddit thread for an image of the problem.
Please see the download linked above and, if you’re interested in this sort of thing, the dissertation of the problem and how it was fixed here. It’s a fascinating read!
The long-held community belief that pink flashing is caused by running out of texture memory has been disproven in the dissertation above and we finally have an answer for why it happens.
In the game, there are several colours used when the game can’t access a texture for an object. Some may have seen both red and blue flashing (red is usually seen when playing on a virtual machine and the more common blue is seen when a texture for an object is missing) but the most prevalent is pink flashing.
The pink flashing error happens because the game has a built-in safety check from its old 32-bit design. Back then, computers could only use about 4GB of memory, and games were limited to using about 2GB of that. This is why the 4GB patch is often recommended for the game, so it allows the game to access more memory and thus reducing crashes. However, the game includes a rule that says if something is stored above that 2GB limit, don’t use it. This is done to avoid crashing.
On modern 64-bit systems, especially if you apply a 4GB patch, the game can now use more memory and may store things above that old 2GB limit. The only problem is that the original safety check is still there, so when the game tries to use those higher memory addresses, it refuses and that failure shows up as pink flashing. This shows that the issue isn’t really about running out of texture memory, as many people thought, but about the game not being able to access certain parts of memory due to an old built-in limit.
There are two versions of this fix provided: one that removes the limit entirely, and one that raises it.
Version 1 completely removes the safety check. The game will treat all memory the same, even above the old 2GB limit. This version may be prone to crashing, as pink soup is often an early indicator that your game will soon experience a crash. This is not ideal as this means players may lose data or saves may become corrupted if the crash happens at an inopportune time.
Version 2 keeps the safety check, but moves the limit higher (to about 3.5GB). The idea is that if pink flashing does happens, it acts as a warning that memory usage is getting too high, so you can restart the game before it crashes.
The author did several tests to make sure the fix works. First, they had to reproduce the pink flashing error. They did this by creating a neighbourhood with lots of high-poly custom content in the neighbourhood. Then, once pink flashing had ocurred, they began testing. Without the patch, they experienced pink flashing or crashing 5 out of 5 times. With the patch, they experienced no pink flashing or crashing 5 out of 5 times. They also tested the patch in comparison with just changing the texture memory which had no observed effect. They also tested with DXVK which only stopped the pink flashing or crashing in 2 out of 5 of the tests.
So far, this patch is looking extremely promising. The community will no doubt stress test it and we will be able to learn more about this in the forseeable future. For now, we will leave the Wiki as it is, but we will try to educate the community as much as possible regarding this new patch.
Anything from sims to objects to lots to hood deco can flash pink and the game may or may not crash not long after you see pink flashing - so save immediately to be safe! Pink flashing is not harmful to your hoods and will not affect them long term, but it may affect how long you can play for at a time. Closing the game and reopening it is one quick fix for pink soup, but this is only helpful if you only see it after playing for a while (e.g. after 4/5 hours of playing). Some users (typically on higher end GPUs) will see pink flashing much quicker - possibly as soon as they open the game.
Pink flashing can occasionally happen as a result of the way CC is made (e.g. see this thread) or because you are trying to use shaders from packs you don’t have (e.g. if you try to use LazyDuchess’ bright CAS fix with just the base game installed, you will experience pink flashing - later packs such as Seasons modified the shaders so it is not compatible without the pack). It looks like this reddit image or this reddit image or this archive image.
LazyDuchess’ pink flashing fix can result in things that would flash pink turning invisible instead and there is a cheat listed to make them visible again. This works very well for some people in stopping pink flashing.
Turning down/off settings such as reflections, shadows, view distance, fade distance and snow, as well as not using/removing from your userstartup.cheat file cheats related to the lot skirt size may also stop pink flashing.
Increasing lot imposter quality with RPC is known to cause pink flashing - aside from turning the setting back down, you also need to regenerate the lot imposters by making a change in the lot and saving to trigger an update.
CC with large texture sizes (generally 2K textures) contribute greatly to pink flashing - try using optimised texture sizes (e.g. some creators have created optimised versions of sky boxes for this reason) or remove the CC altogether and see if it helps. This Tumbler post talks about this as well as recommending CC with lower poly counts to lower memory usage.
Another potential fix is the DXVK fix detailed Reddit link here or scroll down to the DXVK section.
See this Reddit thread - this fix can greatly help with crashing and pink flashing. The actual exe is available here as the original link seems to be down.
The RPC launcher (which is included with the MagiPack version of the game we link in this wiki) defaults to running the game in borderless windowed mode. If you also have a more columns in CAS mod (such as Chris Hatch’s CAS300.package), your CAS screen may be cut off like this because the more columns mod requires a certain screen width (e.g. 1920) and even though your screen may be this exact size, running in borderless mode means less of the window is available to the game. To fix this issue, simply run the game in full screen instead by modifying the setting in RPCSettings.exe.
This issue may also be caused by using the wrong ‘more columns’ mod for your resolution even without running in borderless mode. For example, if your screen width is 1366 and you try to use the file for screen width 1920, you would see the same issue. The solution is to use the correct mod for your screen size.
If you use the Clean UI, the more columns mod is automatically included with this and the issue can also appear if your screen resolution is 1920x1080 and you choose the 1920 options for the Clean UI. To fix this, you can choose a smaller resolution option in the Clean UI here. Please see this Reddit image example of a 1920x1080 resolution being cut off by the mod, but reducing the Clean UI CAS option from 1920 to 1524 fixes the issue.
Fix already included in MagiPack.
LazyDuchess has released a fix for all of these issues, which you can find in this Tumbler post.
This fix works for the “silhouette” issue as well, where sims appear as silhouettes rather than overly bright. LazyDuchess has explained why these issues happen in this Tumbler post.
DXVK is useful for fixing several issues such a persistent pink/purple flashing which isn’t fixed by other means, persistent crashing, or the AMD GPU issue, which results in long boot times, where your computer may freeze up and take minutes to even show the EA logo. You most likely will need the DXVK fix on newer AMD cards (such as the RX 5700 XT) and possibly on some Nvidia cards to be able to play at all.
Please do not use the DXVK fix unless you have exhausted all other options and are still having issues as many problems can be fixed by other means (e.g. using the updated Graphics Rules, applying the 4GB patch as detailed in previous sections). You shouldn’t be using it unless you actually need it and your computer can support it (i.e. passes the Vulkan test in the instructions) because DXVK can actually cause issues as well, such as the DX9 error.
To use DXVK with Sims 2 (abridged version of the full guide):
Please note that if you use the DXVK fix, your config log will say that your graphics card is a Nvidia GeForce 7800 GTX regardless of what you actually have and this is intended. If your config log does not list this card, then you aren’t using DXVK
Note that you may see some tutorials incorrectly say to use the 64 bit version (e.g. Ani Bats’ YouTube tutorial) - this version will not work with the game as it is a 32-bit game. You can verify this by looking at the graphics device info in your config log in Documents/EA Games/The Sims 2 (UC)/Logs/<your-pc-name>-config-log.txt.
The full guide by CrazySim is available here - this has a bunch of other useful info relating to DXVK and can help with troubleshooting issues related to it too.
Some versions of the DXVK fix can cause graphical issues (such as the thumbnails issue shown in this Reddit thread and the pixelation in this Reddit thread or this Reddit thread). If you experience any graphical issues such as the ones mentioned, please try turning on smooth edges. If that doesn’t work, try using a different version of DXVK (you can access all the versions of it on the download page).
If you’ve followed this guide and you’re still having issues, please try this Tumbler Guide.
Driver updates in late 2024 have resulted in this error occurring in Intel GPUs - Intel ARC GPUs were initially affected but it now seems like all Intel GPUs with the latest drivers are encountering this error. The issue is with displaying shadows and the fix is simply to disable them in game.
You cannot disable shadows from the neighbourhood screen so you must load a lot (it must be one without sims, either unoccupied residential or a community lot, as lots with sims, including CAS, will crash due to their shadows) and then open the game’s graphics settings and turn off shadows. On the Legacy Edition you may have to do this each time you launch the game as there is a bug where it resets the settings.
Using the DXVK fix (reddit link or scroll up) is an alternate fix which may resolve this error but disabling shadows is quicker and DXVK sometimes introduces graphical artifacts or other issues so it is advised to disable shadows first to see if that fixes it for your game.
When using the RPC launcher (which is included with the MagiPack repack), you may see errors about MSVCP140.dll and VCRUNTIME140.dll not being found. Many computers will already include these dependencies from other programs, but if, for example, you’ve freshly installed Windows or are playing on Parallels on Mac, you will see see these errors.
To fix it, you need to install the 32-bit (x86) Visual C++ Redistributable for Visual Studio 2015 - note that Microsoft currently requires you to login and sign up to the dev program to access this specific download. If you don’t want to sign up, you can get the correct installer here as I uploaded it to Google Drive. Download and run the installer by double clicking the file then follow the instructions. After it’s installed, you should be able to run from RPC without errors.
These errors cannot occur when running with the original game’s executable Sims2EP9 because it does not use these dependencies.
As a reminder I did not create this guide, it’s copied from Reddit’s r/Sims2Help wiki’s Setting up the Game Guide, Legacy Edition Section and their Trouble Shooting Guide. I tried to denote any links that go back to reddit and if there was an appropriate Fediverse link, to include it.
Please Note: This is copied from Reddit’s r/TheSims2Help’s Legacy Edition Wiki page. Any linked headings will be linked back to the Reddit Wiki. In line links should denote where they go (reddit, lemmy, tumbler) anything not mentioned is probably another off reddit guide or .exe file. Most if not all content contained below was created by the Reddit r/Sims2Help team and all credit for this guide goes to them.
This section is for Sims 2 Legacy users only. This version of the game is unable to be edited in the same ways as The Ultimate Collection due to the way that EA has changed the game for the re-release. If you are using the Legacy Edition, please read the below information before applying any fixes to your game.
You should not use The Graphics Rules Maker, or GRM, for The Sims 2 Legacy. This version of the game does not need these fixes to be applied. If you do use it for the Legacy version, it may or may not affect performance (in terms of pink flashing and graphics). If you have used it on your Legacy version of the game and want to undo the changes, you can simply grab the Legacy Graphics Rules.sgr file linked in the tech setup section.
You do not need to use the 4GB patch with the Legacy version of the game as it has already been patched. It does not affect anything if you do patch the game again.
The RPC launcher does not work with Legacy. The TS2 Extender is the equivalent of RPC for Legacy, though some features differ.
The BodyShop does not come with the Legacy Edition. You can use this installer to install BodyShop for Legacy.
The Clean UI mod will not work with the Legacy version of the game.
OneDrive is a program that comes installed on all Windows PCs. It works by monitoring your local folders on your PC, copying those files, and uploading them to the cloud as a backup. It does this in the background so you may be unaware that it’s working away behind the scenes. You may think that you do not have OneDrive installed, or that you aren’t signed into OneDrive, but you most likely are. When you first setup your new PC, Windows will ask you to log in with an email address. If you use a Microsoft account to do this (which is quickly becoming the only option), your Windows account will automatically sign you in to OneDrive to make the most of their cloud services. When you then install Sims 2, your save files are put into the Documents folder, which is one of the automatic locations that OneDrive syncs to the cloud.
OneDrive is a known problem for many older games, including Sims 2. This is due to the way that older games access and save files. Sims 2 does not like files to be overwritten or merged as the data has to be saved in a certain way with hundreds of files required to be in sync with each other while OneDrive tries to constantly sync data as its updated. When Sims 2 is running it accesses and re-writes its own files, and if OneDrive is also actively backing up the files, it can cause problems such as missing Sims, broken neighborhoods, or reverted saves. Even if Sims 2 isn’t running when OneDrive syncs, when it merges the local files with the cloud files it causes the same problems.
The best way to avoid this issue is by simply uninstalling OneDrive. This is the option we always recommend. If you don’t have it on your PC, then there is no way it can intefere with your game.
If you continue to have issues after you have uninstalled OneDrive, your save may be unsalvagable. To avoid this issue, you should regularly make back-ups of your game. You can reset your Sims 2 save by following this guide.
To install the Scriptorium with the Legacy Collection, follow this Reddit guide as the installer is not designed for Legacy and will not put the files in the right location.
Please Note: This is copied from Reddit’s r/TheSims2Help’s Legacy Edition Wiki page. Any linked headings will be linked back to the Reddit Wiki. In line links should denote where they go (reddit, lemmy, tumbler) anything not mentioned is probably another off reddit guide or .exe file. Most if not all content contained below was created by the Reddit r/Sims2Help team and all credit for this guide goes to them.
This section is for Sims 2 Legacy users only. This version of the game is unable to be edited in the same ways as The Ultimate Collection due to the way that EA has changed the game for the re-release. If you are using the Legacy Edition, please read the below information before applying any fixes to your game.
You should not use The Graphics Rules Maker, or GRM, for The Sims 2 Legacy. This version of the game does not need these fixes to be applied. If you do use it for the Legacy version, it may or may not affect performance (in terms of pink flashing and graphics). If you have used it on your Legacy version of the game and want to undo the changes, you can simply grab the Legacy Graphics Rules.sgr file linked in the tech setup section.
You do not need to use the 4GB patch with the Legacy version of the game as it has already been patched. It does not affect anything if you do patch the game again.
The RPC launcher does not work with Legacy. The TS2 Extender is the equivalent of RPC for Legacy, though some features differ.
The BodyShop does not come with the Legacy Edition. You can use this installer to install BodyShop for Legacy.
The Clean UI mod will not work with the Legacy version of the game.
OneDrive is a program that comes installed on all Windows PCs. It works by monitoring your local folders on your PC, copying those files, and uploading them to the cloud as a backup. It does this in the background so you may be unaware that it’s working away behind the scenes. You may think that you do not have OneDrive installed, or that you aren’t signed into OneDrive, but you most likely are. When you first setup your new PC, Windows will ask you to log in with an email address. If you use a Microsoft account to do this (which is quickly becoming the only option), your Windows account will automatically sign you in to OneDrive to make the most of their cloud services. When you then install Sims 2, your save files are put into the Documents folder, which is one of the automatic locations that OneDrive syncs to the cloud.
OneDrive is a known problem for many older games, including Sims 2. This is due to the way that older games access and save files. Sims 2 does not like files to be overwritten or merged as the data has to be saved in a certain way with hundreds of files required to be in sync with each other while OneDrive tries to constantly sync data as its updated. When Sims 2 is running it accesses and re-writes its own files, and if OneDrive is also actively backing up the files, it can cause problems such as missing Sims, broken neighborhoods, or reverted saves. Even if Sims 2 isn’t running when OneDrive syncs, when it merges the local files with the cloud files it causes the same problems.
The best way to avoid this issue is by simply uninstalling OneDrive. This is the option we always recommend. If you don’t have it on your PC, then there is no way it can intefere with your game.
If you continue to have issues after you have uninstalled OneDrive, your save may be unsalvagable. To avoid this issue, you should regularly make back-ups of your game. You can reset your Sims 2 save by following this guide.
To install the Scriptorium with the Legacy Collection, follow this Reddit guide as the installer is not designed for Legacy and will not put the files in the right location.
Please Note: This is copied from Reddit’s r/TheSims2Help’s Mac Setup Wiki page. Any linked headings will be linked back to the Reddit Wiki. In line links should denote where they go (reddit, lemmy, tumbler) anything not mentioned is probably another off reddit guide or .exe file. Most if not all content contained below was created by the Reddit r/Sims2Help team and all credit for this guide goes to them.
On MacOS, you can find Aspyr’s port of The Sims 2, The Sims 2 Super Collection, here. One advantage of Aspyr’s version is that the game was updated to 64-bit in January 2020 so there is no need to apply the 4GB patch (or any of the other Windows-only fixes listed in the tech support section of our wiki). This version has also been updated to work with Silicon Macs, though some Macs with newer displays need to modify their refresh rate setting to prevent crashing.
The MacOS collection of Sims 2 is called the Super Collection - make sure you use this name when searching for information as using other terminology, such as Ultimate Collection, will bring up Windows-related results because the UC is only available on Windows. Aspyr have an FAQ page for the Super Collection which you can access here.
To run the game in Windowed mode on v1.2.4, use the dropdown menu in the launcher. For v1.2.5, the launcher menu has disappeared for some reason - unless you launch while offline. A user in this thread disovered that going offline before launching the game allows you to access the options in the latest version.
Your save files, or the equivalent of Documents/EA Games/The Sims 2 (UC) on Windows, are located in this location in Finder: * 64-bit version: ~/Library/Containers/com.aspyr.sims2.appstore/Data/Library/Application Support/Aspyr/The Sims 2/ * 32-bit version: ~/Library/Application Support/Aspyr/The Sims 2/ (A potential alternate location is ~/Library/Containers/The Sims™ 2 Super Collection/Data/Library/Application Support/Aspyr/The Sims 2/) The file locations above may actually vary based on the particular OS version, as I have seen the 64-bit version use the listed 32-bit location. If you can’t find your save folder where you think it should be, try one of the other listed locations! This is where your Downloads folder should be made to use mods/CC, and where your Neighbourhoods are located (which you should backup regularly!).
Your installation location, or the equivalent of the Program Files install location on Windows, has different paths for the base game and the expansion packs, as well as for the 32-bit and 64-bit versions of the game. Most people playing with the Super Collection will be using the 64-bit version as the 32-bit version is only for MacOSes that are quite old, and doesn’t apply to Catalina and above. Open the Applications folder, right click “The Sims 2”, and select “Show package contents”. Then go to the correct location from these options: 64-bit locations: * Base Game: Contents/Assets/TSData/ * EPs/SPs: Contents/Assets/Expansion Packs/<Expansion Name>/TSData/ 32-bit locations: * Base Game: Contents/Home/TSData/ * EPs/SPs: Contents/Home/Expansion Packs/<Expansion Name>/TSData/
Please see the mods info section of the wiki which provides information for installing mods and CC on both Windows and MacOS. Note that as a Mac player, you need to be careful that you don’t use mods/CC that require packs which you don’t have - you’ll never be able to use a mod that requires Apartment Life, for example, as that pack was not ported to MacOS, and this also applies to stuff packs, you cannot use objects from packs you don’t have. Please read the below information on the MacOS file limit also as you are likely to hit while using CC/mods and this will corrupt your hood.
Please note that half of the 18 available packs for the game were never ported to MacOS and it is not possible to play the rest of the packs on this OS. If you would like to play The Sims 2 with all of the packs (called the Ultimate Collection), you can use Bootcamp (non-Silicon Macs only) or Parallels to run Windows and then you can follow the instructions in the download TS2 section to install the Ultimate Collection. Here is a guide on how to set up Bootcamp.
Silicon Macs cannot currently use Bootcamp to run a Windows OS and play with the Ultimate Collection. However, they can use Parallels and there have been reports that this works quite well - no other VM (VMWare, etc.) currently work well enough for TS2 (many graphical glitches can’t be solved currently). See this thread for an idea of the issues and feel free to experiment with the files linked if you are trying to use VMWare. You can follow this YouTube tutorial, made by u/kak6e here on reddit, to see how to set up the Sims 2 on Parallels. They weren’t able to make the links in the YouTube description clickable, so be sure to download Parallels, The Sims 2 Starter Pack, and u/kak6e’s graphics rules and video cards files. You can get clean templates if you want them, but these are not necessary, and information on the RPC launcher is available here. This guide has also helped players on Silicon Macs to get up and running with the UC on Parallels. Also make sure to set your Parallels preset to Gaming rather than Productivity as this may prevent an issue with the lot bin not working as well as a low disc space error (see this Reddit thread).
Set your Parallels preset to Gaming - having it set to Productivity or anything else will disable the lot bin and possibly show low disk space errors when launching the game as well.
You need to set the graphics to “Best for Retina Display” rather than “scaled” as mentioned in this Reddit thread.
(IKEA, Teen Style, Kitchen and Bath, Celebration, H&M Fashion, Mansion & Garden, FreeTime and Apartment Life Stuff)
The Super Collection for MacOS contains half of the packs of the Ultimate Collection (which has all Sims 2 packs) because the rest were never ported to MacOS. u/Strappys (dtergentcc on Tumblr) has extracted the CAS stuff from all of the packs which are not on MacOS (IKEA, Teen Style, Kitchen and Bath, Celebration, H&M Fashion, Mansion & Garden, FreeTime and Apartment Life Stuff) and made them available to download - details can be found here. They are working on extracting all of the build/buy objects as well! There was a previous attempt by a simmer named HugeLunatic to extract IKEA, Teen Style, Kitchen and Bath, and Celebration Stuff, however there were several issues with these extracted items. We will maintain the link here until the build/buy objects are available from dtergentcc above. The CAS stuff from this link doesn’t work so you should instead download them from the link above. You can try the build/buy objects from here but note that several users have experienced crashing with these versions, and in that case you need to remove the packages. You can follow the instructions here to install them in the Super Collection.
Check out this guide for in depth instructions for installing the clean templates on Mac - note, the author made a typo and where they say “34 bit” version they really mean 32 bit version of the game.
Aspyr also provide the Sims 2 Extras on the app store. You can also download them here if you’re having trouble with the Aspyr website. This allows you to use BodyShop (like an extended CAS for creating sims in more details, and creating CC) and PackageInstaller (allows you to install Sims2Pack files, such as lots or sims - not necessary for most mods/CC).
If you get an error that the developer cannot be verified when trying to open the Sims 2 extras programs, eg. “The Sims™ 2: Package Installer” cannot be opened because the developer cannot be verified." then this is due to a security feature on newer MacOS. You can still open the programs - press Ctrl + click on the program and choose Open. This will override the security settings and allow it to open - same goes for any other application on MacOS that you get this message with (though be careful, as it is a security feature for a reason but obviously the Sims 2 and its Extras are safe). Alternatively, you can allow the program under Privacy and Security in settings.
Note that some users have reported that trying to increase the file limit on recent versions of MacOS no longer works - unfortunately, in that case your only option is to take the steps listed in the link below to reduce your number of open files If you’re having issues playing on MacOS (such as disappearing sims or lots, or hoods disappearing but reappearing if you remove your Downloads folder, for example) but you know you’ve not done something to cause corruption, the file limit is likely the problem. MacOS has a file limit, which means that your system can only load a certain number of files - exceeding this limit for The Sims 2 results in corruption when the game is unable to load all of the files for a neighbourhood resulting in characters getting chomped. This page explains the issue really well and describes what you can do to prevent it from happening - primarily, don’t have other programs open while running the game as the file limit is for all open programs, not just for one program, and secondly, reduce your number of CC/mod files. Merging CC is one way of decreasing the number of files you have while not actually losing the different pieces of CC - there is a guide for it here. Unfortunately, to do this you need access to the Windows OS, either as a virtual machine (eg. using Parallels), via Bootcamp, or on a physical machine. There is also an incredibly detailed guide on all of these issues and symptoms here. April Black has explained how exceeding the file limit results in corruption in this Reddit comment.
Please note that the corruption section of the wiki is also relevant to players on MacOS, and, in addition to this, there is a specific cause of corruption which only happens on MacOS due a limit on that OS - this is explained in the file limit subsection above - as well as another bug which only happens on MacOS and results in hoods being rendered unplayable.
There is another bug which seems to be specific to MacOS and which is unfortunately highly recurrent. See this recent thread for more details - essentially, at a certain point (which may be after just a short time - I have encountered users who have had it happen to 4 hoods in 4 months) the hood fails to load on MacOS and continuously crashes. More threads on the issue here, here, here, and here. When this happens, the hood does also crash on Windows and isn’t readable by HoodChecker. However, as it is possible to use SimPE on Windows, the issue can be fixed (or at least patched, as I don’t know the root cause) - specifically, the issue lies with the neighbourhood memory. It throws an error and making any edit at all to any memory will rectify it. The hood can then be played as normal on Windows (longevity has not been tested, however, but certainly longer than MacOS) while on MacOS unfortunately the hood will load once then cause the same error again. It seems that the game at some point simply fails to be able to save the hood memory correctly, and even after seemingly fixing the problem (to the extent it works on Windows to run more than once) it doesn’t work, indicating that fixing it likely requires modifying something else, specific to the MacOS implementation. If you have experienced this bug and would like your hood fixed, feel free to DM me (u/Mysterious_Potential) or create a thread and I’ll help you out. I intend to further investigate the issue at some point and have kept many of the hoods this has previously occurred in to help in the testing process. Potentially of note: when I used the “fix” option in the Hoodchecker on the fixed versions of the hoods, they crashed on loading again even on Windows, and this time it was not the memory error in SimPE - this is possibly related to the root cause and could be helpful in determining it.
The Super Collection is compatible with Silicon Macs and should work fine with them - reviews saying otherwise are largely outdated (the game was updated but people don’t typically go back and edit their reviews). As of January 2022, Macbooks with two new versions of M1 chip (Pro and Max) have some issues running the game - thanks to u/impossibleisnothings for mentioning this in this thread. Some workarounds include: * changing the refresh rate from ProMotion to 60Hz * connect a monitor to the MacBook, and open the game with the lid closed If you have any issues running the game after trying these fixes, please contact Aspyr and tell them you are unable to play the game - the more people who do, the more likely they are to fix the issue.
If you are playing on MacOS Sonoma and experience crashing that isn’t resolved by changing refresh rate to 60Hz, go to this location in Finder: ~/Library/Containers/The Sims™ 2: Super Collection/Data/Library/Application Support/Aspyr/The Sims 2/ (note this is the hidden Library folder, not the normal one you can see) and if the “The Sims 2” folder exists, rename it to “backup” then try running the game.
There’s an issue with the debug Force Error (or Force Error > Reset) option on MacOS, in that it doesn’t typically work. The MacSpork package will fix this problem - note this is a direct download so clicking the link will automatically download the file (if you get a privacy error, click Advanced and then proceed - it’s safe). If it seems like the download isn’t working, please try a different browser (e.g. Firefox, Chrome, etc.).
Since the 64-bit update of the Super Collection was released in January 2020, the boolProp dontmergenhflora false cheat does not work. There is a thread about the issue here and we encourage you to report the issue to Aspyr if you are also experiencing it - the more people who report it, the more likely they are to prioritise and fix it!
Thanks to u/Sethyb00 for mentioning this issue, described as “Often weird visual streaks/lines from moving objects. Often from cars in neighbourhood view, dragging an object in build/buy, moving the cursor quickly, etc. It’s not an awful bug but we’re not sure if it’s graphics card related or actually from the game build.” If you also experience this issue, please contact Aspyr to report the issue so that they are more likely to prioritise fixing it.
Some users of the Super Collection have reported an unusual issue wherein their sims wants become incredibly bland. This could be the result of a bug in the Super Collection. You can read about this issue in detail in this thread and this one. Once again if you experience this issue, please contact Aspyr and report it so that they will know that it is affecting more users.
Reminder, I did not write this guide it’s from Reddit’s r/Sims2Help wiki.
Please Note: This is copied from Reddit’s r/TheSims2Help’s Mac Setup Wiki page. Any linked headings will be linked back to the Reddit Wiki. In line links should denote where they go (reddit, lemmy, tumbler) anything not mentioned is probably another off reddit guide or .exe file. Most if not all content contained below was created by the Reddit r/Sims2Help team and all credit for this guide goes to them.
On MacOS, you can find Aspyr’s port of The Sims 2, The Sims 2 Super Collection, here. One advantage of Aspyr’s version is that the game was updated to 64-bit in January 2020 so there is no need to apply the 4GB patch (or any of the other Windows-only fixes listed in the tech support section of our wiki). This version has also been updated to work with Silicon Macs, though some Macs with newer displays need to modify their refresh rate setting to prevent crashing.
The MacOS collection of Sims 2 is called the Super Collection - make sure you use this name when searching for information as using other terminology, such as Ultimate Collection, will bring up Windows-related results because the UC is only available on Windows. Aspyr have an FAQ page for the Super Collection which you can access here.
To run the game in Windowed mode on v1.2.4, use the dropdown menu in the launcher. For v1.2.5, the launcher menu has disappeared for some reason - unless you launch while offline. A user in this thread disovered that going offline before launching the game allows you to access the options in the latest version.
Your save files, or the equivalent of Documents/EA Games/The Sims 2 (UC) on Windows, are located in this location in Finder: * 64-bit version: ~/Library/Containers/com.aspyr.sims2.appstore/Data/Library/Application Support/Aspyr/The Sims 2/ * 32-bit version: ~/Library/Application Support/Aspyr/The Sims 2/ (A potential alternate location is ~/Library/Containers/The Sims™ 2 Super Collection/Data/Library/Application Support/Aspyr/The Sims 2/) The file locations above may actually vary based on the particular OS version, as I have seen the 64-bit version use the listed 32-bit location. If you can’t find your save folder where you think it should be, try one of the other listed locations! This is where your Downloads folder should be made to use mods/CC, and where your Neighbourhoods are located (which you should backup regularly!).
Your installation location, or the equivalent of the Program Files install location on Windows, has different paths for the base game and the expansion packs, as well as for the 32-bit and 64-bit versions of the game. Most people playing with the Super Collection will be using the 64-bit version as the 32-bit version is only for MacOSes that are quite old, and doesn’t apply to Catalina and above. Open the Applications folder, right click “The Sims 2”, and select “Show package contents”. Then go to the correct location from these options: 64-bit locations: * Base Game: Contents/Assets/TSData/ * EPs/SPs: Contents/Assets/Expansion Packs/<Expansion Name>/TSData/ 32-bit locations: * Base Game: Contents/Home/TSData/ * EPs/SPs: Contents/Home/Expansion Packs/<Expansion Name>/TSData/
Please see the mods info section of the wiki which provides information for installing mods and CC on both Windows and MacOS. Note that as a Mac player, you need to be careful that you don’t use mods/CC that require packs which you don’t have - you’ll never be able to use a mod that requires Apartment Life, for example, as that pack was not ported to MacOS, and this also applies to stuff packs, you cannot use objects from packs you don’t have. Please read the below information on the MacOS file limit also as you are likely to hit while using CC/mods and this will corrupt your hood.
Please note that half of the 18 available packs for the game were never ported to MacOS and it is not possible to play the rest of the packs on this OS. If you would like to play The Sims 2 with all of the packs (called the Ultimate Collection), you can use Bootcamp (non-Silicon Macs only) or Parallels to run Windows and then you can follow the instructions in the download TS2 section to install the Ultimate Collection. Here is a guide on how to set up Bootcamp.
Silicon Macs cannot currently use Bootcamp to run a Windows OS and play with the Ultimate Collection. However, they can use Parallels and there have been reports that this works quite well - no other VM (VMWare, etc.) currently work well enough for TS2 (many graphical glitches can’t be solved currently). See this thread for an idea of the issues and feel free to experiment with the files linked if you are trying to use VMWare. You can follow this YouTube tutorial, made by u/kak6e here on reddit, to see how to set up the Sims 2 on Parallels. They weren’t able to make the links in the YouTube description clickable, so be sure to download Parallels, The Sims 2 Starter Pack, and u/kak6e’s graphics rules and video cards files. You can get clean templates if you want them, but these are not necessary, and information on the RPC launcher is available here. This guide has also helped players on Silicon Macs to get up and running with the UC on Parallels. Also make sure to set your Parallels preset to Gaming rather than Productivity as this may prevent an issue with the lot bin not working as well as a low disc space error (see this Reddit thread).
Set your Parallels preset to Gaming - having it set to Productivity or anything else will disable the lot bin and possibly show low disk space errors when launching the game as well.
You need to set the graphics to “Best for Retina Display” rather than “scaled” as mentioned in this Reddit thread.
(IKEA, Teen Style, Kitchen and Bath, Celebration, H&M Fashion, Mansion & Garden, FreeTime and Apartment Life Stuff)
The Super Collection for MacOS contains half of the packs of the Ultimate Collection (which has all Sims 2 packs) because the rest were never ported to MacOS. u/Strappys (dtergentcc on Tumblr) has extracted the CAS stuff from all of the packs which are not on MacOS (IKEA, Teen Style, Kitchen and Bath, Celebration, H&M Fashion, Mansion & Garden, FreeTime and Apartment Life Stuff) and made them available to download - details can be found here. They are working on extracting all of the build/buy objects as well! There was a previous attempt by a simmer named HugeLunatic to extract IKEA, Teen Style, Kitchen and Bath, and Celebration Stuff, however there were several issues with these extracted items. We will maintain the link here until the build/buy objects are available from dtergentcc above. The CAS stuff from this link doesn’t work so you should instead download them from the link above. You can try the build/buy objects from here but note that several users have experienced crashing with these versions, and in that case you need to remove the packages. You can follow the instructions here to install them in the Super Collection.
Check out this guide for in depth instructions for installing the clean templates on Mac - note, the author made a typo and where they say “34 bit” version they really mean 32 bit version of the game.
Aspyr also provide the Sims 2 Extras on the app store. You can also download them here if you’re having trouble with the Aspyr website. This allows you to use BodyShop (like an extended CAS for creating sims in more details, and creating CC) and PackageInstaller (allows you to install Sims2Pack files, such as lots or sims - not necessary for most mods/CC).
If you get an error that the developer cannot be verified when trying to open the Sims 2 extras programs, eg. “The Sims™ 2: Package Installer” cannot be opened because the developer cannot be verified." then this is due to a security feature on newer MacOS. You can still open the programs - press Ctrl + click on the program and choose Open. This will override the security settings and allow it to open - same goes for any other application on MacOS that you get this message with (though be careful, as it is a security feature for a reason but obviously the Sims 2 and its Extras are safe). Alternatively, you can allow the program under Privacy and Security in settings.
Note that some users have reported that trying to increase the file limit on recent versions of MacOS no longer works - unfortunately, in that case your only option is to take the steps listed in the link below to reduce your number of open files If you’re having issues playing on MacOS (such as disappearing sims or lots, or hoods disappearing but reappearing if you remove your Downloads folder, for example) but you know you’ve not done something to cause corruption, the file limit is likely the problem. MacOS has a file limit, which means that your system can only load a certain number of files - exceeding this limit for The Sims 2 results in corruption when the game is unable to load all of the files for a neighbourhood resulting in characters getting chomped. This page explains the issue really well and describes what you can do to prevent it from happening - primarily, don’t have other programs open while running the game as the file limit is for all open programs, not just for one program, and secondly, reduce your number of CC/mod files. Merging CC is one way of decreasing the number of files you have while not actually losing the different pieces of CC - there is a guide for it here. Unfortunately, to do this you need access to the Windows OS, either as a virtual machine (eg. using Parallels), via Bootcamp, or on a physical machine. There is also an incredibly detailed guide on all of these issues and symptoms here. April Black has explained how exceeding the file limit results in corruption in this Reddit comment.
Please note that the corruption section of the wiki is also relevant to players on MacOS, and, in addition to this, there is a specific cause of corruption which only happens on MacOS due a limit on that OS - this is explained in the file limit subsection above - as well as another bug which only happens on MacOS and results in hoods being rendered unplayable.
There is another bug which seems to be specific to MacOS and which is unfortunately highly recurrent. See this recent thread for more details - essentially, at a certain point (which may be after just a short time - I have encountered users who have had it happen to 4 hoods in 4 months) the hood fails to load on MacOS and continuously crashes. More threads on the issue here, here, here, and here. When this happens, the hood does also crash on Windows and isn’t readable by HoodChecker. However, as it is possible to use SimPE on Windows, the issue can be fixed (or at least patched, as I don’t know the root cause) - specifically, the issue lies with the neighbourhood memory. It throws an error and making any edit at all to any memory will rectify it. The hood can then be played as normal on Windows (longevity has not been tested, however, but certainly longer than MacOS) while on MacOS unfortunately the hood will load once then cause the same error again. It seems that the game at some point simply fails to be able to save the hood memory correctly, and even after seemingly fixing the problem (to the extent it works on Windows to run more than once) it doesn’t work, indicating that fixing it likely requires modifying something else, specific to the MacOS implementation. If you have experienced this bug and would like your hood fixed, feel free to DM me (u/Mysterious_Potential) or create a thread and I’ll help you out. I intend to further investigate the issue at some point and have kept many of the hoods this has previously occurred in to help in the testing process. Potentially of note: when I used the “fix” option in the Hoodchecker on the fixed versions of the hoods, they crashed on loading again even on Windows, and this time it was not the memory error in SimPE - this is possibly related to the root cause and could be helpful in determining it.
The Super Collection is compatible with Silicon Macs and should work fine with them - reviews saying otherwise are largely outdated (the game was updated but people don’t typically go back and edit their reviews). As of January 2022, Macbooks with two new versions of M1 chip (Pro and Max) have some issues running the game - thanks to u/impossibleisnothings for mentioning this in this thread. Some workarounds include: * changing the refresh rate from ProMotion to 60Hz * connect a monitor to the MacBook, and open the game with the lid closed If you have any issues running the game after trying these fixes, please contact Aspyr and tell them you are unable to play the game - the more people who do, the more likely they are to fix the issue.
If you are playing on MacOS Sonoma and experience crashing that isn’t resolved by changing refresh rate to 60Hz, go to this location in Finder: ~/Library/Containers/The Sims™ 2: Super Collection/Data/Library/Application Support/Aspyr/The Sims 2/ (note this is the hidden Library folder, not the normal one you can see) and if the “The Sims 2” folder exists, rename it to “backup” then try running the game.
There’s an issue with the debug Force Error (or Force Error > Reset) option on MacOS, in that it doesn’t typically work. The MacSpork package will fix this problem - note this is a direct download so clicking the link will automatically download the file (if you get a privacy error, click Advanced and then proceed - it’s safe). If it seems like the download isn’t working, please try a different browser (e.g. Firefox, Chrome, etc.).
Since the 64-bit update of the Super Collection was released in January 2020, the boolProp dontmergenhflora false cheat does not work. There is a thread about the issue here and we encourage you to report the issue to Aspyr if you are also experiencing it - the more people who report it, the more likely they are to prioritise and fix it!
Thanks to u/Sethyb00 for mentioning this issue, described as “Often weird visual streaks/lines from moving objects. Often from cars in neighbourhood view, dragging an object in build/buy, moving the cursor quickly, etc. It’s not an awful bug but we’re not sure if it’s graphics card related or actually from the game build.” If you also experience this issue, please contact Aspyr to report the issue so that they are more likely to prioritise fixing it.
Some users of the Super Collection have reported an unusual issue wherein their sims wants become incredibly bland. This could be the result of a bug in the Super Collection. You can read about this issue in detail in this thread and this one. Once again if you experience this issue, please contact Aspyr and report it so that they will know that it is affecting more users.
Reminder, I did not write this guide it’s from Reddit’s r/Sims2Help wiki.
Please Note: This is copied from Reddit’s r/TheSims2Help’s Sims Stories Games page. Any linked headings will be linked back to the Reddit Wiki. In line links should denote where they go (reddit, lemmy, tumbler) anything not mentioned is probably another off reddit guide or .exe file. Most if not all content contained below was created by the Reddit r/Sims2Help team and all credit for this guide goes to them.
A few Notes:
There are direct download and magnet torrent links available for each Stories game.
Direct downloads are typically slower but do not require any other programs to use nor any VPN. Direct downloads are also more likely to be taken down.
Torrents are quicker but you must have a torrent client to use it and in some countries (e.g. Germany) you may need a VPN if piracy is taken seriously there. Torrents are unlikely to stop working and rely on at least one person still having the file available.
If any link is unavailable or stops working, please create a thread or message the mods so we can test whether the link needs to be removed or replaced.
For the torrent links, you need to have a torrent client to download the game - I recommend using Deluge (this is a direct download link, after downloading click on the file to install it) as it is free and ad-free with no annoying pop-ups. qBittorrent is another popular alternative and may be easier to use with a VPN (instructions here).
It depends on where you are in the world and whether your country cares at all about piracy for personal use, and as such some people may prefer not to torrent without it.
The direct downloads are in 7z and zip archives while the torrent downloads are in rar archives so you will need to extract the files once the download has finished. Open File Explorer and go to the location you downloaded the files to (usually your computer’s Downloads folder by default). Windows 11 should be able to natively extract the files using the “Extract all” option when you right click the archive; for earlier Windows versions use a program like 7-Zip (direct download; this program has no ads and is free forever) or WinRAR.
The Graphics Rules Maker (GRM) will automatically edit your Graphics Rules and Video Cards sgr files for you - make sure to get the latest download from that link, as if you downloaded the game from Games4theworld, you will have the old V1.1 version of the program which had several problems.
Note that you need to have Windows 10 in order to use the latest version of the GRM; if you have an earlier OS, use the link above to download an earlier version.
The following instructions were taken and adapted from Osab’s Starter Pack Guide (the Stories Starter Pack is no longer available and was taken down via DMCA)
It’s fine to check all the boxes in the program, though you shouldn’t check “Disable Sim Shadows” unless you don’t want Sim shadows for some reason. Instead, if you are experiencing the black shadow box issue, get the Shadow fix mod which will allow you to keep shadows in your game but without the black boxes.
Please see the troubleshooting guide in the wiki Lemmy Link, Reddit link. Although that section was written with the main Sims 2 game in mind, the Stories games use the same engine as The Sims 2 and as such many mods/CC are compatible with the Stories games too, and most of the same fixes apply. If you cannot resolve your issue based on the information in that section, please create a thread.
Please Note: This is copied from Reddit’s r/TheSims2Help’s Sims Stories Games page. Any linked headings will be linked back to the Reddit Wiki. In line links should denote where they go (reddit, lemmy, tumbler) anything not mentioned is probably another off reddit guide or .exe file. Most if not all content contained below was created by the Reddit r/Sims2Help team and all credit for this guide goes to them.
A few Notes:
There are direct download and magnet torrent links available for each Stories game.
Direct downloads are typically slower but do not require any other programs to use nor any VPN. Direct downloads are also more likely to be taken down.
Torrents are quicker but you must have a torrent client to use it and in some countries (e.g. Germany) you may need a VPN if piracy is taken seriously there. Torrents are unlikely to stop working and rely on at least one person still having the file available.
If any link is unavailable or stops working, please create a thread or message the mods so we can test whether the link needs to be removed or replaced.
For the torrent links, you need to have a torrent client to download the game - I recommend using Deluge (this is a direct download link, after downloading click on the file to install it) as it is free and ad-free with no annoying pop-ups. qBittorrent is another popular alternative and may be easier to use with a VPN (instructions here).
It depends on where you are in the world and whether your country cares at all about piracy for personal use, and as such some people may prefer not to torrent without it.
The direct downloads are in 7z and zip archives while the torrent downloads are in rar archives so you will need to extract the files once the download has finished. Open File Explorer and go to the location you downloaded the files to (usually your computer’s Downloads folder by default). Windows 11 should be able to natively extract the files using the “Extract all” option when you right click the archive; for earlier Windows versions use a program like 7-Zip (direct download; this program has no ads and is free forever) or WinRAR.
The Graphics Rules Maker (GRM) will automatically edit your Graphics Rules and Video Cards sgr files for you - make sure to get the latest download from that link, as if you downloaded the game from Games4theworld, you will have the old V1.1 version of the program which had several problems.
Note that you need to have Windows 10 in order to use the latest version of the GRM; if you have an earlier OS, use the link above to download an earlier version.
The following instructions were taken and adapted from Osab’s Starter Pack Guide (the Stories Starter Pack is no longer available and was taken down via DMCA)
It’s fine to check all the boxes in the program, though you shouldn’t check “Disable Sim Shadows” unless you don’t want Sim shadows for some reason. Instead, if you are experiencing the black shadow box issue, get the Shadow fix mod which will allow you to keep shadows in your game but without the black boxes.
Please see the troubleshooting guide in the wiki Lemmy Link, Reddit link. Although that section was written with the main Sims 2 game in mind, the Stories games use the same engine as The Sims 2 and as such many mods/CC are compatible with the Stories games too, and most of the same fixes apply. If you cannot resolve your issue based on the information in that section, please create a thread.

Wow I remember a friend installing this on my computer in about 2004/2005 and using I think it was daemon tools at the time so I didn’t need the disk. I had no idea I was about to be hooked for life on a game when I sat down to make my first character in Pleasantview.
I did ultimately kill her on accident 😂 but I did figure out how to play and I’ve spent an accumulative probably few years playing this game since that day.
Wow I remember a friend installing this on my computer in about 2004/2005 and using I think it was daemon tools at the time so I didn’t need the disk. I had no idea I was about to be hooked for life on a game when I sat down to make my first character in Pleasantview.
I did ultimately kill her on accident 😂 but I did figure out how to play and I’ve spent an accumulative probably few years playing this game since that day.
You can find the original Reddit wiki for r/sims2help right here. Most if not all of the info provided below is from the Reddit wiki. We tried to keep all their links intact so a lot of links will link back to reddit’s guides. They should be denoted as “Reddit Thread,” “Reddit Post,” “Reddit Link” “Reddit Image” etc. I don’t want to remove their links since they did all the hard work and deserve the credit.
Note: Additional information can be found in the Reddit Wiki That was not included here. Things like: Old Tech Support, Tutorials, and the Aesthetics Guide and maybe a few things we missed.
You can find the original Reddit wiki for r/sims2help right here. Most if not all of the info provided below is from the Reddit wiki. We tried to keep all their links intact so a lot of links will link back to reddit’s guides. They should be denoted as “Reddit Thread,” “Reddit Post,” “Reddit Link” “Reddit Image” etc. I don’t want to remove their links since they did all the hard work and deserve the credit.
Note: Additional information can be found in the Reddit Wiki That was not included here. Things like: Old Tech Support, Tutorials, and the Aesthetics Guide and maybe a few things we missed.
Please Note: This is copied from Reddit’s r/TheSims2Help’s Graphics Rules Files & Graphics Rules Maker Wiki page. Any linked headings will be linked back to the Reddit Wiki. In line links should denote where they go (reddit, lemmy, tumbler) anything not mentioned is probably another off reddit guide or .exe file. Most if not all content contained below was created by the Reddit r/Sims2Help team and all credit for this guide goes to them.
This section is not applicable to Legacy. These fixes are already included in MagiPack and osab’s installer.
We now recommend using this Graphics Rules.sgr file instead of running the GRM. This graphics rules file is from the Legacy Edition and has increased compatibility.
To use it, just download the file and place it in your install location. Please see the below versions for where you can find the correct folder.
Ultimate Collection:
Fun with Pets/SP9/TSData/Res/Config
Discs or other version:
Mansion and Garden Stuff/TSData/Res/Config
There will already be a file with the same name so you will need to replace it with the new one. You can also put this in the CSConfig folder if you want to apply the changes to BodyShop.
This section does not apply to Legacy.
We recommend using the Graphics Rules file linked above instead of the GRM. If you have issues with the above file, try the GRM!
The Graphics Rules Maker (GRM) will automatically edit your Graphics Rules and Video Cards sgr files for you.
If you already have a copy of this included in the install of your game, please do not use that version and instead install the latest version from the link above. This is due to the fact that the old V1.1 version of the program had several problems.
Note that you need to have Windows 10 in order to use the latest version of the GRM; if you have an earlier OS, use the link above to download an earlier version.
When you run the GRM, select “The Sims 2” in the top dropdown labelled “game”.
If it doesn’t say “Game Found” beneath the file path, click “Locate Game” and go to where the game is installed on your PC.
Once it says “Game Found”, click the Auto-detect button and the program will select the best specs for your system.
It’s fine to check all the boxes in the program, though you shouldn’t check “Disable Sim Shadows” unless you don’t want Sim shadows.
If you are experiencing the black shadow box issue, get the Shadow fix mod which will allow you to keep shadows in your game but without the black boxes.
Generally, if you have dual graphics (common in gaming laptops), you want your games to use your dedicated (Nvidia or AMD) GPU instead of your Intel/AMD graphics chip.
Follow the instructions here (Windows 10) or here (Windows 11) to set the game to use your dedicated (high performance) GPU.
If you use RPC, you need to add Sims2EP9RPC.exe and Sims2RPC.exe
If you do not use RPC, you need to add Sims2EP9.exe.
These are all located in the installation location of the latest pack you own in the TSBin folder.
Legacy Collection:
Fun with Pets/EP9
Ultimate Collection:
Fun with Pets/SP9
Disc versions and other digital downloads:
Mansion and Garden Stuff
You can also use your graphics control panel to set the game to use the dedicated GPU. There are instructions for both Nvidia and AMD here.
Please Note: This is copied from Reddit’s r/TheSims2Help’s Graphics Rules Files & Graphics Rules Maker Wiki page. Any linked headings will be linked back to the Reddit Wiki. In line links should denote where they go (reddit, lemmy, tumbler) anything not mentioned is probably another off reddit guide or .exe file. Most if not all content contained below was created by the Reddit r/Sims2Help team and all credit for this guide goes to them.
This section is not applicable to Legacy. These fixes are already included in MagiPack and osab’s installer.
We now recommend using this Graphics Rules.sgr file instead of running the GRM. This graphics rules file is from the Legacy Edition and has increased compatibility.
To use it, just download the file and place it in your install location. Please see the below versions for where you can find the correct folder.
Ultimate Collection:
Fun with Pets/SP9/TSData/Res/Config
Discs or other version:
Mansion and Garden Stuff/TSData/Res/Config
There will already be a file with the same name so you will need to replace it with the new one. You can also put this in the CSConfig folder if you want to apply the changes to BodyShop.
This section does not apply to Legacy.
We recommend using the Graphics Rules file linked above instead of the GRM. If you have issues with the above file, try the GRM!
The Graphics Rules Maker (GRM) will automatically edit your Graphics Rules and Video Cards sgr files for you.
If you already have a copy of this included in the install of your game, please do not use that version and instead install the latest version from the link above. This is due to the fact that the old V1.1 version of the program had several problems.
Note that you need to have Windows 10 in order to use the latest version of the GRM; if you have an earlier OS, use the link above to download an earlier version.
When you run the GRM, select “The Sims 2” in the top dropdown labelled “game”.
If it doesn’t say “Game Found” beneath the file path, click “Locate Game” and go to where the game is installed on your PC.
Once it says “Game Found”, click the Auto-detect button and the program will select the best specs for your system.
It’s fine to check all the boxes in the program, though you shouldn’t check “Disable Sim Shadows” unless you don’t want Sim shadows.
If you are experiencing the black shadow box issue, get the Shadow fix mod which will allow you to keep shadows in your game but without the black boxes.
Generally, if you have dual graphics (common in gaming laptops), you want your games to use your dedicated (Nvidia or AMD) GPU instead of your Intel/AMD graphics chip.
Follow the instructions here (Windows 10) or here (Windows 11) to set the game to use your dedicated (high performance) GPU.
If you use RPC, you need to add Sims2EP9RPC.exe and Sims2RPC.exe
If you do not use RPC, you need to add Sims2EP9.exe.
These are all located in the installation location of the latest pack you own in the TSBin folder.
Legacy Collection:
Fun with Pets/EP9
Ultimate Collection:
Fun with Pets/SP9
Disc versions and other digital downloads:
Mansion and Garden Stuff
You can also use your graphics control panel to set the game to use the dedicated GPU. There are instructions for both Nvidia and AMD here.
Please Note: This is copied from Reddit’s r/TheSims2Help’s Downloading The Sims 2 Wiki page. Any linked headings will be linked back to the Reddit Wiki. In line links should denote where they go (reddit, lemmy, tumbler) anything not mentioned is probably another off reddit guide or .exe file. Most if not all content contained below was created by the Reddit r/Sims2Help team and all credit for this guide goes to them.
You need to have a torrent client to download the game - I recommend using Deluge (this is a direct download link for Windows, after downloading click on the file to install it - or click here if you need a download for another OS or version) as it is free and ad-free with no annoying pop-ups. qBittorrent is another popular alternative and may be easier to use with a VPN (instructions here).
It depends on where you are in the world and whether your country cares at all about piracy for personal use, and as such some people may prefer not to torrent without it.
We recommend using this download for the Sims 2 Ultimate Collection - this is a magnet link so it should offer to open your installed torrent client automatically. It will then start downloading the file.
Once the file has finished downloading, it will say that it is “Seeding”, you can right click on this and choose “Remove Torrent”. Make sure to select “Remove Torrent” and not “Remove With Data” from the confirmation pop up as you just want to remove the torrent from the client while keeping the data downloaded (the game itself).
You will need to extract the files once the download has finished. Open File Explorer and go to the location you downloaded the files to (usually your computer’s Downloads folder by default). Windows 11 should be able to natively extract the files using the “Extract all” option when you right click the archive; for earlier Windows versions use a program like 7-Zip (direct download; this program has no ads and is free forever) or WinRAR. Note that the archive is not extracted if you see this screen and if you try to run setup from here, you will get an insert disk error. The same error will also happen if you double click on the archive to “open” it in Windows 11 instead of extracting it. Once extracted, double click on the setup.exe file to install the game. We recommend using the default install location (C:/MagiPacks/The Sims 2) which is outside Program Files as this makes it easier to make any edits for graphics, etc. On the screen with the option to choose your language, we recommend scrolling down past the language selection and checking the box “my hardware does NOT support” Vulkan so that DXVK will not be included - DXVK is only needed on certain hardware and unless you know you need it, there’s no need to include it as it can cause graphical glitches and prevent the game from launching on some devices. If you accidentally checked the box and want to remove DXVK after, go to C:/MagiPacks/The Sims 2/Fun with Pets/SP9/TSBin and delete the d3d9.dll file. You do not need to check the box for the Graphics Rules Maker as the game includes a modified Graphics Rules file from the Legacy Edition which should work best for modern computers (though you can still try the GRM later if you have issues) and all resolution and graphics options should be unlocked in the game by default. You can also choose whether to include the Prima Guides and soundtrack from here.
You can run the game by double clicking the “The Sims 2” shortcut on your Desktop. When it first opens (note this may take a while), after the initial loading screen you will see a window pop-up. Click enable custom content in the bottom left and click okay, then restart the game. This ensures the CEP (and any Store/Pre-Order/bonus items, if you keep them, as well as any other mod/CC you download) will work.
If you have any issues during or after installing, please check the technical support section Lemmy Link, Reddit Link and for other general questions or mods/CC information, check out the other wiki sections Lemmy Link, Reddit Link. Feel free to make a post in the sub if you can’t find the answer to your problem!
- RPC Launcher (includes 4GB patch, first born syndrome fix + multiple other optional features) - Store, pre-order, and bonus Maxis content (not CC) - BodyShop Clean UI + Widescreen - Pie Menu Text Strings fix (fixes some buggy text in game; located in Fun with Pets/SP9/TSData/Res /UI) - UI text font fix (fixes some buggy UI text fonts; merged with ui.package in Fun with Pets/SP9/TSData/Res /UI) - Sim shadow fix (fixes black box shadows; located in Fun with Pets/SP9/TSData/Res /Materials) - Bright CAS fix (fixes overly bright or dark CAS; located in Fun with Pets/SP9/TSData/Res /Materials) As mentioned, this version includes the Store, Pre-Order, and Bonus content - if you do not want this stuff, go to Documents/EA Games/The Sims 2/Downloads and delete the folders (or any individual items you don’t want). Keep the file named _EnableColorOptionsGMND as this is part of the CEP, which doesn’t do anything by itself but is required to use recolours of certain Maxis items. This version mistakenly contains a duplicate of the preorder items - these are located in the install location under Fun with Pets/SP9/TSData/Res/Catalog/Bins. It won’t cause any issues to have these duplicates but if you prefer, you can delete the Preorder-Bonus folder from Downloads OR delete everything in the install location under Fun with Pets/SP9/TSData/Res/Catalog/Bins except globalcatbin.bundle.package so that you only have one set of files - keeping the files in Bins instead of Downloads means they won’t have a delete icon or CC star in game.
This version is also the Ultimate Collection but requires several manual steps - we do not recommend this for non-tech-savvy users as many find steps 6-10 quite difficult. The download above is easier and completely automatic as well as including pre-order + bonus content. We keep this download simply as an alternate if required!
Click here (this is a magnet link - once you click this, your browser will ask to open it in your torrent client; you must have a torrent client already installed as per Step 1 above). Extract the files after it’s finished downloading.
When you read through the instructions on this download, it will tell you to use the Graphics Rules Maker (GRM). Please do not use the version of the GRM included with the download - it is an older version that has several bugs. Instead download the latest version from the link provided above.
See the Technical Setup section of the Wiki Lemmy Link, Reddit Link to learn what settings you should use in the Graphics Rules Maker - there is plenty of other useful information there as well so please read that section after installing the game.
osab’s Standalone Installer can be used to install the registry entries for the game if you already have the game files for the proper Ultimate Collection (from EA App, osab’s Starter Pack, Magipack repack, games4theworld UC but not oldgamesdownload/MrDJ version and not for Legacy Collection) as well as installing some extra optional things (e.g. GRM, clean hoods, etc.).
Note that you may see a warning like this when you run the installer - this is just because the code for it is unsigned (as it costs money) but the application is safe to run and you can do so by clicking “More info” and then clicking the “Run anyway” button that appears.
The link above is for the 64-bit standalone installer, suitable for the vast majority of Windows computers today. If you happen to still have a 32-bit OS, the 32-bit version of the standalone installer is available here.
All of the above linked versions of the game include all expansion and stuff packs made for the game and come bundled with some helpful fixes. Be advised that, with these versions, you cannot choose which packs you install. It’s all or nothing.
However, you can use the RPC Launcher to choose which packs are enabled when playing (note this is a debug feature, i.e. there may be some issues with it) or use the AnyGameStarter for the UC - please backup your hoods before trying either method to disable packs and note that the linked AnyGameStarter version is specifically for the Ultimate Collection. It will not work with disc installs or disc repacks such as the “Ultimate Collection” from oldgamesdownload/MrDJ. Also be aware that the AnyGameStarter can be quite buggy as it directly modifies the registry and can potentially mess up your Documents folder paths as well as the game install as a result - RPC’s method of disabling paths is generally safer and less likely to cause issues.
Please see the Mac section of the wiki Lemmy Link, Reddit link. All of the information relevant to playing Sims 2 on MacOS is in that section - the rest of this section is only relevant if you play on Windows (including on Windows through Bootcamp or Parallels on a Mac) or Linux using Lutris or a Steam deck, for example.
It depends on which version you want to run - the discs and the Ultimate Collection have lower requirements than the Legacy Edition re-release.
The Sims 2 was released in 2004 which means almost any computer will be able to run it nowadays. Even cheap laptops/notebooks will be able to run the game, though the performance may not be great. To find your system information, press the windows key and type dxdiag. From there, it will tell you about your processor (CPU) and memory (RAM). To check your graphics card, go to the Display tab. Requirements for the Ultimate Collection: * 2GHz CPU * 2GB of RAM OR > 4GB with the 4GB patch installed * 256MB graphics card * 13+GB of free disk space 13GB of disk space is the absolute minimum needed for the Ultimate Collection to install. Additionally, you have to remember that another folder will be made in your Documents (under EA Games/The Sims 2 or The Sims 2 Ultimate Collection). This is where your neighbourhoods, lots, screenshots, settings, and mods will be saved. My (u/ProperSpeak) personal folder in Documents is almost 4GB. Having 20GB total available is preferable but, if you plan to get a lot of custom content, you’ll need a lot more space. Some people have more than 20GB of custom content alone!
The Legacy Collection has increased requirements, listed below: * Operating system: Windows 10 * Processor (CPU): i3 3220, Ryzen 3 1200, AMD FX6300 * Memory (RAM): 4GB * Hard drive (free space): 16GB available space * Graphics card (video): * GPU: NVIDIA: GTX 600 series or later or * AMD: Radeon HD 7000 series or later * Intel HD Graphics 620 series or later
Please Note: This is copied from Reddit’s r/TheSims2Help’s Downloading The Sims 2 Wiki page. Any linked headings will be linked back to the Reddit Wiki. In line links should denote where they go (reddit, lemmy, tumbler) anything not mentioned is probably another off reddit guide or .exe file. Most if not all content contained below was created by the Reddit r/Sims2Help team and all credit for this guide goes to them.
You need to have a torrent client to download the game - I recommend using Deluge (this is a direct download link for Windows, after downloading click on the file to install it - or click here if you need a download for another OS or version) as it is free and ad-free with no annoying pop-ups. qBittorrent is another popular alternative and may be easier to use with a VPN (instructions here).
It depends on where you are in the world and whether your country cares at all about piracy for personal use, and as such some people may prefer not to torrent without it.
We recommend using this download for the Sims 2 Ultimate Collection - this is a magnet link so it should offer to open your installed torrent client automatically. It will then start downloading the file.
Once the file has finished downloading, it will say that it is “Seeding”, you can right click on this and choose “Remove Torrent”. Make sure to select “Remove Torrent” and not “Remove With Data” from the confirmation pop up as you just want to remove the torrent from the client while keeping the data downloaded (the game itself).
You will need to extract the files once the download has finished. Open File Explorer and go to the location you downloaded the files to (usually your computer’s Downloads folder by default). Windows 11 should be able to natively extract the files using the “Extract all” option when you right click the archive; for earlier Windows versions use a program like 7-Zip (direct download; this program has no ads and is free forever) or WinRAR. Note that the archive is not extracted if you see this screen and if you try to run setup from here, you will get an insert disk error. The same error will also happen if you double click on the archive to “open” it in Windows 11 instead of extracting it. Once extracted, double click on the setup.exe file to install the game. We recommend using the default install location (C:/MagiPacks/The Sims 2) which is outside Program Files as this makes it easier to make any edits for graphics, etc. On the screen with the option to choose your language, we recommend scrolling down past the language selection and checking the box “my hardware does NOT support” Vulkan so that DXVK will not be included - DXVK is only needed on certain hardware and unless you know you need it, there’s no need to include it as it can cause graphical glitches and prevent the game from launching on some devices. If you accidentally checked the box and want to remove DXVK after, go to C:/MagiPacks/The Sims 2/Fun with Pets/SP9/TSBin and delete the d3d9.dll file. You do not need to check the box for the Graphics Rules Maker as the game includes a modified Graphics Rules file from the Legacy Edition which should work best for modern computers (though you can still try the GRM later if you have issues) and all resolution and graphics options should be unlocked in the game by default. You can also choose whether to include the Prima Guides and soundtrack from here.
You can run the game by double clicking the “The Sims 2” shortcut on your Desktop. When it first opens (note this may take a while), after the initial loading screen you will see a window pop-up. Click enable custom content in the bottom left and click okay, then restart the game. This ensures the CEP (and any Store/Pre-Order/bonus items, if you keep them, as well as any other mod/CC you download) will work.
If you have any issues during or after installing, please check the technical support section Lemmy Link, Reddit Link and for other general questions or mods/CC information, check out the other wiki sections Lemmy Link, Reddit Link. Feel free to make a post in the sub if you can’t find the answer to your problem!
- RPC Launcher (includes 4GB patch, first born syndrome fix + multiple other optional features) - Store, pre-order, and bonus Maxis content (not CC) - BodyShop Clean UI + Widescreen - Pie Menu Text Strings fix (fixes some buggy text in game; located in Fun with Pets/SP9/TSData/Res /UI) - UI text font fix (fixes some buggy UI text fonts; merged with ui.package in Fun with Pets/SP9/TSData/Res /UI) - Sim shadow fix (fixes black box shadows; located in Fun with Pets/SP9/TSData/Res /Materials) - Bright CAS fix (fixes overly bright or dark CAS; located in Fun with Pets/SP9/TSData/Res /Materials) As mentioned, this version includes the Store, Pre-Order, and Bonus content - if you do not want this stuff, go to Documents/EA Games/The Sims 2/Downloads and delete the folders (or any individual items you don’t want). Keep the file named _EnableColorOptionsGMND as this is part of the CEP, which doesn’t do anything by itself but is required to use recolours of certain Maxis items. This version mistakenly contains a duplicate of the preorder items - these are located in the install location under Fun with Pets/SP9/TSData/Res/Catalog/Bins. It won’t cause any issues to have these duplicates but if you prefer, you can delete the Preorder-Bonus folder from Downloads OR delete everything in the install location under Fun with Pets/SP9/TSData/Res/Catalog/Bins except globalcatbin.bundle.package so that you only have one set of files - keeping the files in Bins instead of Downloads means they won’t have a delete icon or CC star in game.
This version is also the Ultimate Collection but requires several manual steps - we do not recommend this for non-tech-savvy users as many find steps 6-10 quite difficult. The download above is easier and completely automatic as well as including pre-order + bonus content. We keep this download simply as an alternate if required!
Click here (this is a magnet link - once you click this, your browser will ask to open it in your torrent client; you must have a torrent client already installed as per Step 1 above). Extract the files after it’s finished downloading.
When you read through the instructions on this download, it will tell you to use the Graphics Rules Maker (GRM). Please do not use the version of the GRM included with the download - it is an older version that has several bugs. Instead download the latest version from the link provided above.
See the Technical Setup section of the Wiki Lemmy Link, Reddit Link to learn what settings you should use in the Graphics Rules Maker - there is plenty of other useful information there as well so please read that section after installing the game.
osab’s Standalone Installer can be used to install the registry entries for the game if you already have the game files for the proper Ultimate Collection (from EA App, osab’s Starter Pack, Magipack repack, games4theworld UC but not oldgamesdownload/MrDJ version and not for Legacy Collection) as well as installing some extra optional things (e.g. GRM, clean hoods, etc.).
Note that you may see a warning like this when you run the installer - this is just because the code for it is unsigned (as it costs money) but the application is safe to run and you can do so by clicking “More info” and then clicking the “Run anyway” button that appears.
The link above is for the 64-bit standalone installer, suitable for the vast majority of Windows computers today. If you happen to still have a 32-bit OS, the 32-bit version of the standalone installer is available here.
All of the above linked versions of the game include all expansion and stuff packs made for the game and come bundled with some helpful fixes. Be advised that, with these versions, you cannot choose which packs you install. It’s all or nothing.
However, you can use the RPC Launcher to choose which packs are enabled when playing (note this is a debug feature, i.e. there may be some issues with it) or use the AnyGameStarter for the UC - please backup your hoods before trying either method to disable packs and note that the linked AnyGameStarter version is specifically for the Ultimate Collection. It will not work with disc installs or disc repacks such as the “Ultimate Collection” from oldgamesdownload/MrDJ. Also be aware that the AnyGameStarter can be quite buggy as it directly modifies the registry and can potentially mess up your Documents folder paths as well as the game install as a result - RPC’s method of disabling paths is generally safer and less likely to cause issues.
Please see the Mac section of the wiki Lemmy Link, Reddit link. All of the information relevant to playing Sims 2 on MacOS is in that section - the rest of this section is only relevant if you play on Windows (including on Windows through Bootcamp or Parallels on a Mac) or Linux using Lutris or a Steam deck, for example.
It depends on which version you want to run - the discs and the Ultimate Collection have lower requirements than the Legacy Edition re-release.
The Sims 2 was released in 2004 which means almost any computer will be able to run it nowadays. Even cheap laptops/notebooks will be able to run the game, though the performance may not be great. To find your system information, press the windows key and type dxdiag. From there, it will tell you about your processor (CPU) and memory (RAM). To check your graphics card, go to the Display tab. Requirements for the Ultimate Collection: * 2GHz CPU * 2GB of RAM OR > 4GB with the 4GB patch installed * 256MB graphics card * 13+GB of free disk space 13GB of disk space is the absolute minimum needed for the Ultimate Collection to install. Additionally, you have to remember that another folder will be made in your Documents (under EA Games/The Sims 2 or The Sims 2 Ultimate Collection). This is where your neighbourhoods, lots, screenshots, settings, and mods will be saved. My (u/ProperSpeak) personal folder in Documents is almost 4GB. Having 20GB total available is preferable but, if you plan to get a lot of custom content, you’ll need a lot more space. Some people have more than 20GB of custom content alone!
The Legacy Collection has increased requirements, listed below: * Operating system: Windows 10 * Processor (CPU): i3 3220, Ryzen 3 1200, AMD FX6300 * Memory (RAM): 4GB * Hard drive (free space): 16GB available space * Graphics card (video): * GPU: NVIDIA: GTX 600 series or later or * AMD: Radeon HD 7000 series or later * Intel HD Graphics 620 series or later
Please Note: This is copied from Reddit’s r/TheSims2Help’s Playing on Linux Wiki page. Any linked headings will be linked back to the Reddit Wiki. In line links should denote where they go (reddit, lemmy, tumbler) anything not mentioned is probably another off reddit guide or .exe file. Most if not all content contained below was created by the Reddit r/Sims2Help team and all credit for this guide goes to them.
Part two can be found here: Linux (continued): Lutris & Wine
* Bottles is a user-friendly manager for Wine that lets you create isolated environments called bottles and auto installs the dependencies such as DXVK. * Lutris is a game launcher which supports Wine and Proton as well as Native Linux games. You can use install scripts (.yaml) or install directly from a setup executable * Steam is a store and a launcher that uses Proton automatically for Windows games, it tries to handle everything for you behind the scenes * Proton is a custom version of Wine made by Valve (Owner of Steam) * Wine translates Windows API calls to the Linux equivalent so you can run Windows executable files (.exe) — I will detail installing the game, both with and without the EA App, and running the programs BodyShop, Clean Installer, SimPE, and Hoodchecker for each of the 4 options above. In terms of ease of install, if you have a Steam account or are willing to create one or are using a Steam Deck, then Steam is an extremely easy method to get the game and all associated programs running on Linux. You do not need to purchase the game on Steam for this method to work, you can use a downloaded version of the game (such as the UC download linked in the Download TS2 section of our wiki. If you don’t want to use Steam, Bottles and Lutris are both very easy methods to set up the game. Lutris may require more fiddling to figure out the correct dependencies for some programs outside the game itself and I also experienced more errors with it (for example, winetricks continuously refused to open after being opened and closed once, saying it was still running but not actually showing up!). However, Lutris does have a nice UI and is integrated with other game stores so you may prefer to use it, and the game itself works perfectly with it. Wine by itself is the most awkward and least recommended method for running the game on Linux. While it is possible to get the game running this way, it requires the most management and handling of dependencies of all the methods. Regardless of which method you chose, you will be able to play the game and use the 4 mentioned programs with it, though your install experience may vary slightly depending on your distro. These instructions were written with Ubuntu in mind though equivalent commands for other distros can be easily found online.
If you’re looking to run Sims 2 on a Steamdeck you can check out this video tutorial on Youtube.
## - GPU Drivers Before starting, make sure you have the correct drivers for your GPU. How to do this depends on which distro you’re using - if you search “download [AMD|Intel|Nvidia] drivers for [distro]” you should find helpful information on this. This GitHub repo provides the required commands to get the drivers for many distros and this repository also offers the proprietary GPU drivers for Nvidia. — ## - Getting the Game — You can download the Sims 2 Ultimate Collection using the link in the Download TS2 section of the wiki. You will need a torrent client to download the game - Deluge and qBittorrent are both available on Linux as well so you can use the same torrrent client links from that section to get one for your distro. Once the game is downloaded, extract the rar archive and then you are ready to proceed with installing using one of the options below. You can also use the UC from the EA App or the Legacy Collection from the EA App or Steam, or any other repack. You just need to have the games files and/or a setup installer.
1. Install Steam and run it.
2. Click Games tab at top and Add a non-Steam game to my Library.
3. Click browse in the bottom left of the window, navigate to where you have the Sims 2 Repack setup exe and select it.
4. Click add selected programs.
5. Go to your Library tab and right click on the newly added exe, click properties.
6. Click compatibility tab, check the force box and select Proton Experimental from the dropdown -> you may want to try Proton GE if you’re having issues.
7. Close properties window and click Play button in Steam.
8. Steam may need to download some dependencies for Proton Experimental or whichever you chose, wait until it’s finished and then the Sims 2 Installer will appear.
9. Click through the install (Default options are fine) and once the install completes, close the installer.
10. Next you need to locate where the prefix is stored. Use the command find ~/.steam/steam/steamapps/compatdata -type f -iname “Sims2RPC.exe” 2>/dev/null to get the exact path to the Sims2RPC.exe (you can also use Sims2EP9.exe in the command instead if not using RPC). Prefixes are typically created under ~/.steam/steam/steamapps/compatdata/<appid>/pfx/
11. Right click on the exe in your steam library again. Click properties and paste in the path you just got from the command in the Target box. Ensure you keep the quotation marks around it or it will fail to launch.
The path will look like “/home/<user-name>/.steam/steam/steamapps/compatdata/2772910551/pfx/drive_c/MagiPacks/The Sims 2/Fun with Pets/SP9/TSBin/Sims2EP9.exe” (set to Sims2RPC.exe instead of Sims2EP9.exe to use RPC). In the “Start in” box, paste the exact same path up to the TSBin, i.e. “/home/<user-name>/.steam/steam/steamapps/compatdata/2772910551/pfx/drive_c/MagiPacks/The Sims 2/Fun with Pets/SP9/TSBin”.
12. Close properties and press Play in Steam; the game should now launch normally.
13. You can rename the game in your library in properties under Shortcut in the top box (e.g. change the name The Sims 2_Repack_v5_Setup.exe to The Sims 2 Ultimate Collection). You can also change the icon used here by clicking the black box to the left of the text. Under the Customisation tab you can further modify the artwork so the game looks like a regular game in your library.
14. To run in windowed mode, open properties for the game in Steam and add -w in the launch options box. Or you can run RPCSettings.exe (by changing the Target to this exe) and change to windowed mode in there. You can also modify other settings in here. After saving, you can revert back to using the regular Sims2RPC.exe in the target so that you don’t have to go through settings every time.
15. Once you’ve located the game the first time, you can click the Browse button from then on if you prefer to select in a GUI rather than typing the path. However, it’s important to note that if you do this, it will NOT include quotation marks around the target or “start in” box so the game/program will fail to launch. Make sure to add back quotation marks around the entire path (i.e. target should start and end with it) - this is always required where a path or argument to a program contains spaces.
I don’t own the Legacy Collection on Steam, however, the install should be straight forward as you are basically skipping the install steps. You possibly still need to change the Proton version by following steps 5 and 6 above.
1. Download Windows EA App installer.
2. Add EA app installer as a non-Steam game (click browse, locate + add the executable, same steps 2 - 4 as above).
3. Change Proton version to experimental (might have to select it twice in the drop down, I found it reverted to another version the first selection every time) - follow steps 5 and 6 above to do this.
4. Press play in steam and EA app installer will run; click through the install.
5. Once installed, it shows the EA App log in screen. Log in and you’ll see your normal EA app library
6. Close EA app / press blue stop button in Steam.
7. Right click on the EA App in Steam, click properties and change target to “/home/<user-name>/.steam/steam/steamapps/compatdata/4007406707/pfx/drive_c/Program Files/Electronic Arts/EA Desktop/13.680.0.6193/EA Desktop/EADesktop.exe” (click browse for the right file as your prefix number in compatdata will be different). Make sure to add quotation marks at start and end due to spaces in the path. For “start in” change to “/home/<user-name>/.steam/steam/steamapps/compatdata/4007406707/pfx/drive_c/Program Files/Electronic Arts/EA Desktop/13.680.0.6193/EA Desktop” (i.e. the same as the Target but without the exe at the end). Again be sure to include quotation marks.
8. Press the blue play button on EA App in Steam again & wait for it to open.
9. Locate Sims 2 in your library and install it.
10. Press play and you can play as normal. If it freezes during launch just kill it with Steam blue stop button and launch again - this happened occasionally but the game was fine once opened.
11. If you want to have a separate entry for the Sims 2 so you don’t have to launch EA app first, click add non steam game, browse to the Sims 2 install location inside the prefix which will look this assuming you kept the default install location for the game: “/home/<user-name>/.steam/steam/steamapps/compatdata/4007406707/pfx/drive_c/Program Files/EA Games/The Sims 2 Ultimate Collection/Fun with Pets/SP9/TSBin/Sims2EP9.exe” and set target and start in values as explained above - don’t forget quotation marks (selecting via Browse will not add them).
12. Click Properties on the new Sims 2 entry in Steam, select Force Proton and use the same version as you used for the EA app. Add this for launch options in Shortcut tab which sets the same prefix as EA app (make sure you use your actual path with your username and prefix id under compatdata). STEAM_COMPAT_DATA_PATH=“/home/<user-name>/.steam/steam/steamapps/compatdata/4007406707” %command%
13. Press the blue play button to launch the game - it’ll take a few seconds as it still has to launch the EA app first. You can use a noCD/cracked exe to avoid the EA App having to run, and you can also use RPC this way.
Note that the EA App prefix may break when the app updates. You’ll likely need to reinstall it if this happens.
If you’re having issues getting the game to install or run via Steam, add PROTON_LOG=1 %command% to the launch options and when you press start, ~/steam-<appid>.log will be created in home to help with debugging.
To run any Sims 2 related program with the game installed via Steam, you have to run the program inside the same prefix. The program will launch much like on Windows. There are some more detailed instructions for several common programs below, but these instructions are generally applicable to running any Sims 2 related program. Note that some other programs may require you to install additional dependencies in the prefix. There are 2 ways to run related programs in Steam. You can either change the ‘Start In’ and ‘Target’ properties for The Sims 2 entry in Steam each time you want to run another program, or you can create different entries in Steam for each program (e.g. The Sims 2, SimPE, BodyShop will all show as separate games in the library) using a special launch option which allows you to avoid changing the properties every time you want to run another program.
1. In Steam, click Games tab at top and Add a non-Steam game to my Library.
2. Click browse in the bottom left of the window, navigate to where you have the program’s exe and select it.
3. Click add selected programs.
4. Go to your Library tab and right click on the newly added exe, click properties.
5. Add this to launch options, making sure that you use the actual path to your prefix ID for the Sims 2 (or the EA App if using it) STEAM_COMPAT_DATA_PATH=~/.steam/steam/steamapps/compatdata/<ID> %command% e.g. STEAM_COMPAT_DATA_PATH=“/home/<user-name>/.steam/steam/steamapps/compatdata/2772910551” %command%. By default, Steam will create a new compatdata folder for this new shortcut which you don’t want to use because the program needs access to the Sims 2 files. This launch option allows that to happen.
6. Click compatibility tab, check the force box and select the same Proton version as you use for the Sims 2 (or the EA App if using that).
7. Close properties window and click Play button in Steam to launch the program.
Note the paths for the program in target and start in do not have to be inside the prefix folder but can still run within the prefix and access the files in there as long as the launch option is set.
You can follow the instructions above to create a separate Steam entry for BodyShop. Or you can right click on The Sims 2 game (or EA App) in Steam, click Properties and change Target to the path for CSBin/BodyShopLauncher.exe (or CSBin/TS2BodyShop.exe) instead of TSBin/Sims2EP9.exe and change Start In to the path up to CSBin.
Download the Hoodchecker and extract it from the zip archive, which will result in a folder containing the HoodChecker.exe.
You can follow the instructions above to create a separate Steam entry for Hoodchecker. Or you can right click on The Sims 2 game (or EA App) in Steam, click Properties and change Target to the path for Hoodchecker, which will look like “/home/<user-name>/Downloads/MTS_Mootilda_1236080_HoodChecker/HoodChecker.exe” and start in “/home/<user-name>/Downloads/MTS_Mootilda_1236080_HoodChecker”. Then press the blue play button to run the program.
Download SimPE - I recommend using the no-install version, i.e. the download without Installer in the name, in this case SimPe_0_77_69.zip. Unzip it and you’ll see the SimPE.exe file inside the folder.
You can follow the instructions above to create a separate Steam entry for SimPE. Or you can right click on The Sims 2 game (or EA App) in Steam, click Properties and change Target to the path for Hoodchecker, which will look like “/home/<user-name>/Downloads/SimPe_0_77_69/SimPe.exe” and start in “/home/<user-name>/Downloads/SimPe_0_77_69”. Then press the blue play button to run the program. Note that you need to right click instead of left click on resources in the top right tree in order to see them in the plugin view below.
Download the Sims2Pack Clean Installer - I recommend using the no-install version, i.e. the download called Sims2PackInstaller_NoInstall.zip. Unzip it and you’ll see the Sims2Pack Clean Installer.exe inside the folder.
You can follow the instructions above to create a separate Steam entry for Clean Installer. Or you can right click on The Sims 2 game (or EA App) in Steam, click Properties and change Target to the path for Hoodchecker, which will look like “/home/<user-name>/Downloads/MTS_Mootilda_1164470_Sims2PackInstaller_NoInstall/Sims2Pack Clean Installer/Sims2Pack Clean Installer.exe” and start in “/home/<user-name>/Downloads/MTS_Mootilda_1164470_Sims2PackInstaller_NoInstall/Sims2Pack Clean Installer”. Then press the blue play button to run the program.
Note that this not how you install sims2pack files, the program does not function this way on any OS which many players find confusing. To install a sims2pack file, you have to “open with” the Clean Installer. On Windows that’s done via the ‘open with’ context menu option or by setting up a file association so you can double click the sims2pack file to install with the Clean Pack installer automatically.
How to do this on Linux is detailed below.
In terminal, run the commands
cd /home/<user-name>/.local/share/applications/ nano CleanInstaller.desktop
Copy and paste the following into the file - make sure that you enter your actual user name wherever <user-name> is used, and make sure to change the Proton version used if yours is not Proton - Experimental. Also make sure that the ID under compatdata in the path is set to the actual prefix ID you have for the game.
[Desktop Entry] Type=Application Name=CleanInstaller Exec=env WINEPREFIX=“/home/<user-name>/.steam/steam/steamapps/compatdata/4007406707/pfx” “/home/<user-name>/.steam/steam/steamapps/common/Proton - Experimental/files/bin/wine” “/home/<user-name>/Downloads/MTS_Mootilda_1164470_Sims2PackInstaller_NoInstall/Sims2Pack Clean Installer/Sims2Pack Clean Installer.exe” %U MimeType=application/x-Sims2Pack; Categories=Game;
You may need to make the file executable for it to show up in the context menu
chmod +x /home/<user-name>/.local/share/applications/CleanInstaller.desktop
You can now right click on a .sims2pack, choose “Open with” and select “CleanInstaller” in the window that pops up (note that my example image has a bunch of these because I created one for each Linux install method! You only need one) - make sure to click the toggle at the bottom to “always use for this file type” which will then allow you to double click to install sims2pack files in future. Neither the Clean Installer itself nor the .sims2pack files need to be located within the prefix itself with this method.
If you want to pass arguments to clean installer such as an individual .sims2pack file or a folder using -f, make sure to use the Windows-absolute path rather than Linux or it will not work when using the STEAM_COMPAT_DATA_PATH argument.
For example, use
STEAM_COMPAT_DATA_PATH=“/home/<user-name>/.steam/steam/steamapps/compatdata/2772910551” %command% -f C:/Sims2Tools/lots
or
STEAM_COMPAT_DATA_PATH=“/home/<user-name>/.steam/steam/steamapps/compatdata/2772910551” %command% -f C:\\Sims2Tools\\lots
but not
STEAM_COMPAT_DATA_PATH=“/home/<user-name>/.steam/steam/steamapps/compatdata/2772910551” %command% -f “/home/<user-name>/.steam/steam/steamapps/compatdata/2772910551/pfx/drive_c/Sims2Tools/lots”
or
STEAM_COMPAT_DATA_PATH=“/home/<user-name>/.steam/steam/steamapps/compatdata/2772910551” %command% -f /home/<user-name>/Downloads/Sims2Tools/lots"
because you will get a Sims2Pack Clean Installer Error “There is nothing in this folder to install”.
Use the commands
sudo apt install flatpak flatpak remote-add --if-not-exists flathub https://dl.flathub.org/repo/flathub.flatpakrepo flatpak install flathub com.usebottles.bottles
You’ll see this during install:
“Note that the directories ‘/var/lib/flatpak/exports/share’ ‘/home/<user-name>/.local/share/flatpak/exports/share’ are not in the search path set by the XDG_DATA_DIRS environment variable, so applications installed by Flatpak may not appear on your desktop until the session is restarted.”
To start it after install use flatpak run com.usebottles.bottles or log out and log back in (note this will close all your open apps) if you want to access it from the apps menu by searching Bottles (it will be available this way after that first time you log back in).
1. When Bottles opens, it’ll install some dependencies on first launch such as DXVK. Wait until it finishes then click Bottles tab at the top and click Create New Bottle.
2. Name it The Sims 2 (or whatever you want) and select Gaming as the profile so it’s optimised for games. Leave runner as default, soda-9.0-1 at time of writing. You can leave the Bottle directory on default or change it if you want to store the bottle’s data (which will include the game’s install + save folder, where you put mods/hoods/etc.) somewhere else. Then click create and wait for it to be ready.
3. Once the bottle is ready, click on it and it will show you the details of the bottle.
5. Click Browse button beside Browse C:/ drive. Drag the The_Sims_2_Repack_v5 folder (extracted not the rar archive) from wherever you downloaded it to into the bottle’s drive - this is important as the installer will not run if located outside the bottle.
6. Click run executable back on the Bottles app. In the window that appears, double click drive_c, then double click The_Sims_2_Repack_v5 and finally select the The Sims2_Repack_v5_Setup.exe + click run.
7. This will bring up the installer just like in Windows - note that the installer will not appear if you do not move the repack folder into the Bottle as in step 5 above (i.e. you cannot run the installer from outside the Bottle).
8. Click through the installer - don’t select DXVK or GRM as these are not required.
9. Once installed, you should be able to just click the play button beside Sims2RPC to launch.
10. If you want to add a shortcut to the other executables in Bottles such as RPC Settings or BodyShop, click Add Shortcuts back in Bottles and navigate to /home/<user-name>/.var/app/com.usebottles.bottles/data/bottles/bottles/the-sims-2/drive_c/MagiPacks/The Sims 2/Fun with Pets/SP9/TSBin and select Sims2RPCSettings.exe. Use Sims2RPCSettings if you want to change windowed mode or modify other settings.
11. You can repeat step 10 to add shorcuts for the non RPC exe (Sims2EP9.exe or Sims2EP9RPC.exe) and BodyShop (instead of TSBin, it’s in CSBin and the exe is either TS2BodyShop.exe or BodyShopLauncher.exe if you installed the widescreen launcher for BodyShop, which also comes as part of the MagiPack repack. If you have both of these executables you should use the launcher one as it makes some changes to the UI for wide screen which may not work well with the regular launcher). Note that BodyShop can take some time to launch and this is normal, even on Windows.
1. When Bottles opens, it’ll install some dependencies on first launch such as DXVK. Wait until it finishes then click the hamburger menu in the top left and click Preferences.
2. Click Runners tab and install ge-proton10-34 (image shows wine-ge-proton8-26 installing but you actually need 10-34). Feel free to try other versions. At the time of writing, the EA App would not work with soda-9.0-1 and wine-ge-proton8-26 (it either failed to install or lunch). It would launch with the sys wine runner but the Sims 2 then would not launch with that runner. Wait for the runner to install and then close preferences.
3. Click Bottles tab at the top and click Create New Bottle.
4. Name it EA App (or whatever you want) and select Gaming as the profile so it’s optimised for games. Select ge-proton10-34 as the runner. You can leave the Bottle directory on default or change it if you want to store the bottle’s data (which will include the game’s install + save folder, where you put mods/hoods/etc.) somewhere else. Then click create and wait for it to be ready.
5. Once the bottle is ready, click on it and it will show you the details of the bottle. Click Intall Programs under the Programs section and click Install beside EA Launcher.
6. This will bring up the EA App Installer. Complete the install and login to the EA App when it’s finished.
7. Locate The Sims 2 in your library and click install.
8. Once the game is installed, you can click play in the EA app and it will run as normal.
9. If you want to add a shortcut to the game in Bottles to avoid manually launching the EA App each time you play, click Add Shortcuts back in Bottles and navigate to /home/<user-name>/.var/app/com.usebottles.bottles/data/bottles/bottles/EA-App/drive_c/Program Files/EA Games/The Sims 2 Ultimate Collection/Fun with Pets/SP9/TSBin and select Sims2EP9.exe.
10. You can repeat step 9 to add a shorcut for BodyShop but instead of TSBin, it’s in CSBin and the exe is either TS2BodyShop.exe or BodyShopLauncher.exe if you installed the widescreen launcher for BodyShop. If you have both of these executables you should use the launcher one as it makes some changes to the UI for wide screen which may not work well with the regular launcher.
11. You can click the 3 dots beside the Sims2EP9, select ‘Change Launch Options’ and add -w in command arguments to run the game in windowed mode.
Under Options/Settings, make sure discrete graphics is enabled so the game can use your dedicated GPU. I left my bottle using Windows 10 but it’d probably be the same for Windows 11.
To run any Sims 2 related program with the game installed via Bottles, you have to run the program inside the same Bottles which translates to copying the program’s folder to the C drive in the bottle. This will be at a location like /home/<user-name>/.var/app/com.usebottles.bottles/data/bottles/bottles/the-sims-2/drive_c/ where “the-sims-2” is the name of the bottle in lower case with spaces replaced by hyphens.
Once the program is in there, you can click “Add a Shortcut” in Bottles to add shortcuts to the executables so you don’t have to locate the program each time you want to run it.
Note that I used the no install versions for all programs demonstrated here, the installer versions may work differently.
How to make a shortcut for BodyShop is explained in step 10 of the install instructions. There’s no special handling for BodyShop as the program is already part of the game’s files so it is already in the Bottle’s C drive.
Download the Hoodchecker and extract it from the zip archive, which will result in a folder containing the HoodChecker.exe. Move/copy this folder to the C drive of the bottle which looks like /home/<user-name>/.var/app/com.usebottles.bottles/data/bottles/bottles/the-sims-2/drive_c/ - you can put it in a subfolder in here if you prefer or just leave it in drive_c, it doesn’t matter.
In Bottles, click the Run Executable button in the Sims 2 bottle and navigate to the folder containing Hoodchecker.exe in drive_c. Select this executable to run the program just like on Windows. Use the “Add a shortcut” option in Bottles to avoid having to find this executable each time you want to use it.
Download SimPE - I recommend using the no-install version, i.e. the download without Installer in the name, in this case SimPe_0_77_69.zip. Unzip it and you’ll see the SimPE.exe file inside the folder. In Bottles, click the Run Executable button in the Sims 2 bottle and navigate to the folder containing SimPE.exe in drive_c. Select this executable to run the program just like on Windows. Use the “Add a shortcut” option in Bottles to avoid having to find this executable each time you want to use it. Note that for some reason, Plugin view will show as empty unless you middle or right click the resource (instead of left click like on Windows).
Download the Sims2Pack Clean Installer - I recommend using the no-install version, i.e. the download called Sims2PackInstaller_NoInstall.zip. Unzip it and you’ll see the Sims2Pack Clean Installer.exe inside the folder.
Update the save game path for the program by opening the S2PCI.ini file in this folder and modifying the SaveGamePath like so:
SaveGamePath=“/home/<user-name>/.var/app/com.usebottles.bottles/data/bottles/bottles/the-sims-2/drive_c/users/steamuser/Documents/EA Games/The Sims 2"”
Make sure to actually put in your user name, bottle name, and that the save game folder is correct (The Sims 2 is correct for the MagiPack repack).
In Bottles, click the Run Executable button in the Sims 2 bottle and navigate to the folder containing Sims2Pack Clean Installer.exe in drive_c. Select this executable to run the program just like on Windows. Use the “Add a shortcut” option in Bottles to avoid having to find this executable each time you want to use it.
Note that this not how you install sims2pack files, the program does not function this way on any OS which many players find confusing. To install a sims2pack file, you have to “open with” the Clean Installer. On Windows that’s done via the ‘open with’ context menu option or by setting up a file association so you can double click the sims2pack file to install with the Clean Pack installer automatically.
How to do this on Linux is detailed below.
In terminal, run the commands below one at a time, pressing enter in between each one. Make sure that you enter your actual user name wherever <user-name> is used.
cd /home/<user-name>/.local/share/applications/ nano CleanInstaller.desktop
Copy and paste the following into the file - make sure that you enter your actual user name wherever <user-name> is used, and make sure to change the bottle name if yours is not the-sims-2. Also note you probably need to use a different command under exec if you didn’t install bottles via flatpak.
[Desktop Entry] Type=Application Name=CleanInstaller Exec=flatpak run --command=bash com.usebottles.bottles -c ‘wine “/home/<user-name>/.var/app/com.usebottles.bottles/data/bottles/bottles/the-sims-2/drive_c/MTS_Mootilda_1164470_Sims2PackInstaller_NoInstall/Sims2Pack Clean Installer/Sims2Pack Clean Installer.exe” “$@”’ dummy %U Terminal=false Categories=Game; MimeType=application/x-sims2pack;
You may need to make the file executable for it to show up in the context menu
chmod +x /home/<user-name>/.local/share/applications/CleanInstaller.desktop
You can now right click on a .sims2pack, choose “Open with” and select “CleanInstaller” in the window that pops up (note that my example image has a bunch of these because I created one for each Linux install method! You only need one) - make sure to click the toggle at the bottom to “always use for this file type” which will then allow you to double click to install sims2pack files in future.
However, with Bottles the file must be in the Bottle (i.e. put it somewhere in/under the drive_c folder) for double click install to work with this method.
If you install the game via the EA App, double click to ‘open with’ for Clean Installer works fine (though clean installer and any sims2pack files must be physically inside drive_c prefix of the EA App) with one issue if you’re using the Ultimate Collection. The UC from the EA App contains a TM symbol in the name and there’s no way to get the Clean Installer to recognise this folder via Bottles.
On Windows, Clean Installer auto finds the correct UC folder with hardcoded TM symbol but on Linux, the folder it defaults to is incorrect and is just The Sims 2. When you set the correct folder with TM symbol “/home/<user-name>/.var/app/com.usebottles.bottles/data/bottles/bottles/EA-App/drive_c/users/steamuser/Documents/EA Games/The Sims™ 2 Ultimate Collection” the symbol will show up incorrectly in the app and so it will install in a different folder under EA Games with the messed up name (The Simsâ„¢ 2 Ultimate Collection).
You can copy the files to the correct Teleport folder under the UC folder with the TM but you would have to do this every time you install files via the Clean Installer. To resolve this permanently you can remove the TM symbol from the registry in the prefix. In Bottles with EA App bottle open, scroll down to Tools section and click Registry Editor, then follow comment #8 in this thread to remove the TM symbol.
Please Note: This is copied from Reddit’s r/TheSims2Help’s Playing on Linux Wiki page. Any linked headings will be linked back to the Reddit Wiki. In line links should denote where they go (reddit, lemmy, tumbler) anything not mentioned is probably another off reddit guide or .exe file. Most if not all content contained below was created by the Reddit r/Sims2Help team and all credit for this guide goes to them.
Part two can be found here: Linux (continued): Lutris & Wine
* Bottles is a user-friendly manager for Wine that lets you create isolated environments called bottles and auto installs the dependencies such as DXVK. * Lutris is a game launcher which supports Wine and Proton as well as Native Linux games. You can use install scripts (.yaml) or install directly from a setup executable * Steam is a store and a launcher that uses Proton automatically for Windows games, it tries to handle everything for you behind the scenes * Proton is a custom version of Wine made by Valve (Owner of Steam) * Wine translates Windows API calls to the Linux equivalent so you can run Windows executable files (.exe) — I will detail installing the game, both with and without the EA App, and running the programs BodyShop, Clean Installer, SimPE, and Hoodchecker for each of the 4 options above. In terms of ease of install, if you have a Steam account or are willing to create one or are using a Steam Deck, then Steam is an extremely easy method to get the game and all associated programs running on Linux. You do not need to purchase the game on Steam for this method to work, you can use a downloaded version of the game (such as the UC download linked in the Download TS2 section of our wiki. If you don’t want to use Steam, Bottles and Lutris are both very easy methods to set up the game. Lutris may require more fiddling to figure out the correct dependencies for some programs outside the game itself and I also experienced more errors with it (for example, winetricks continuously refused to open after being opened and closed once, saying it was still running but not actually showing up!). However, Lutris does have a nice UI and is integrated with other game stores so you may prefer to use it, and the game itself works perfectly with it. Wine by itself is the most awkward and least recommended method for running the game on Linux. While it is possible to get the game running this way, it requires the most management and handling of dependencies of all the methods. Regardless of which method you chose, you will be able to play the game and use the 4 mentioned programs with it, though your install experience may vary slightly depending on your distro. These instructions were written with Ubuntu in mind though equivalent commands for other distros can be easily found online.
If you’re looking to run Sims 2 on a Steamdeck you can check out this video tutorial on Youtube.
## - GPU Drivers Before starting, make sure you have the correct drivers for your GPU. How to do this depends on which distro you’re using - if you search “download [AMD|Intel|Nvidia] drivers for [distro]” you should find helpful information on this. This GitHub repo provides the required commands to get the drivers for many distros and this repository also offers the proprietary GPU drivers for Nvidia. — ## - Getting the Game — You can download the Sims 2 Ultimate Collection using the link in the Download TS2 section of the wiki. You will need a torrent client to download the game - Deluge and qBittorrent are both available on Linux as well so you can use the same torrrent client links from that section to get one for your distro. Once the game is downloaded, extract the rar archive and then you are ready to proceed with installing using one of the options below. You can also use the UC from the EA App or the Legacy Collection from the EA App or Steam, or any other repack. You just need to have the games files and/or a setup installer.
1. Install Steam and run it.
2. Click Games tab at top and Add a non-Steam game to my Library.
3. Click browse in the bottom left of the window, navigate to where you have the Sims 2 Repack setup exe and select it.
4. Click add selected programs.
5. Go to your Library tab and right click on the newly added exe, click properties.
6. Click compatibility tab, check the force box and select Proton Experimental from the dropdown -> you may want to try Proton GE if you’re having issues.
7. Close properties window and click Play button in Steam.
8. Steam may need to download some dependencies for Proton Experimental or whichever you chose, wait until it’s finished and then the Sims 2 Installer will appear.
9. Click through the install (Default options are fine) and once the install completes, close the installer.
10. Next you need to locate where the prefix is stored. Use the command find ~/.steam/steam/steamapps/compatdata -type f -iname “Sims2RPC.exe” 2>/dev/null to get the exact path to the Sims2RPC.exe (you can also use Sims2EP9.exe in the command instead if not using RPC). Prefixes are typically created under ~/.steam/steam/steamapps/compatdata/<appid>/pfx/
11. Right click on the exe in your steam library again. Click properties and paste in the path you just got from the command in the Target box. Ensure you keep the quotation marks around it or it will fail to launch.
The path will look like “/home/<user-name>/.steam/steam/steamapps/compatdata/2772910551/pfx/drive_c/MagiPacks/The Sims 2/Fun with Pets/SP9/TSBin/Sims2EP9.exe” (set to Sims2RPC.exe instead of Sims2EP9.exe to use RPC). In the “Start in” box, paste the exact same path up to the TSBin, i.e. “/home/<user-name>/.steam/steam/steamapps/compatdata/2772910551/pfx/drive_c/MagiPacks/The Sims 2/Fun with Pets/SP9/TSBin”.
12. Close properties and press Play in Steam; the game should now launch normally.
13. You can rename the game in your library in properties under Shortcut in the top box (e.g. change the name The Sims 2_Repack_v5_Setup.exe to The Sims 2 Ultimate Collection). You can also change the icon used here by clicking the black box to the left of the text. Under the Customisation tab you can further modify the artwork so the game looks like a regular game in your library.
14. To run in windowed mode, open properties for the game in Steam and add -w in the launch options box. Or you can run RPCSettings.exe (by changing the Target to this exe) and change to windowed mode in there. You can also modify other settings in here. After saving, you can revert back to using the regular Sims2RPC.exe in the target so that you don’t have to go through settings every time.
15. Once you’ve located the game the first time, you can click the Browse button from then on if you prefer to select in a GUI rather than typing the path. However, it’s important to note that if you do this, it will NOT include quotation marks around the target or “start in” box so the game/program will fail to launch. Make sure to add back quotation marks around the entire path (i.e. target should start and end with it) - this is always required where a path or argument to a program contains spaces.
I don’t own the Legacy Collection on Steam, however, the install should be straight forward as you are basically skipping the install steps. You possibly still need to change the Proton version by following steps 5 and 6 above.
1. Download Windows EA App installer.
2. Add EA app installer as a non-Steam game (click browse, locate + add the executable, same steps 2 - 4 as above).
3. Change Proton version to experimental (might have to select it twice in the drop down, I found it reverted to another version the first selection every time) - follow steps 5 and 6 above to do this.
4. Press play in steam and EA app installer will run; click through the install.
5. Once installed, it shows the EA App log in screen. Log in and you’ll see your normal EA app library
6. Close EA app / press blue stop button in Steam.
7. Right click on the EA App in Steam, click properties and change target to “/home/<user-name>/.steam/steam/steamapps/compatdata/4007406707/pfx/drive_c/Program Files/Electronic Arts/EA Desktop/13.680.0.6193/EA Desktop/EADesktop.exe” (click browse for the right file as your prefix number in compatdata will be different). Make sure to add quotation marks at start and end due to spaces in the path. For “start in” change to “/home/<user-name>/.steam/steam/steamapps/compatdata/4007406707/pfx/drive_c/Program Files/Electronic Arts/EA Desktop/13.680.0.6193/EA Desktop” (i.e. the same as the Target but without the exe at the end). Again be sure to include quotation marks.
8. Press the blue play button on EA App in Steam again & wait for it to open.
9. Locate Sims 2 in your library and install it.
10. Press play and you can play as normal. If it freezes during launch just kill it with Steam blue stop button and launch again - this happened occasionally but the game was fine once opened.
11. If you want to have a separate entry for the Sims 2 so you don’t have to launch EA app first, click add non steam game, browse to the Sims 2 install location inside the prefix which will look this assuming you kept the default install location for the game: “/home/<user-name>/.steam/steam/steamapps/compatdata/4007406707/pfx/drive_c/Program Files/EA Games/The Sims 2 Ultimate Collection/Fun with Pets/SP9/TSBin/Sims2EP9.exe” and set target and start in values as explained above - don’t forget quotation marks (selecting via Browse will not add them).
12. Click Properties on the new Sims 2 entry in Steam, select Force Proton and use the same version as you used for the EA app. Add this for launch options in Shortcut tab which sets the same prefix as EA app (make sure you use your actual path with your username and prefix id under compatdata). STEAM_COMPAT_DATA_PATH=“/home/<user-name>/.steam/steam/steamapps/compatdata/4007406707” %command%
13. Press the blue play button to launch the game - it’ll take a few seconds as it still has to launch the EA app first. You can use a noCD/cracked exe to avoid the EA App having to run, and you can also use RPC this way.
Note that the EA App prefix may break when the app updates. You’ll likely need to reinstall it if this happens.
If you’re having issues getting the game to install or run via Steam, add PROTON_LOG=1 %command% to the launch options and when you press start, ~/steam-<appid>.log will be created in home to help with debugging.
To run any Sims 2 related program with the game installed via Steam, you have to run the program inside the same prefix. The program will launch much like on Windows. There are some more detailed instructions for several common programs below, but these instructions are generally applicable to running any Sims 2 related program. Note that some other programs may require you to install additional dependencies in the prefix. There are 2 ways to run related programs in Steam. You can either change the ‘Start In’ and ‘Target’ properties for The Sims 2 entry in Steam each time you want to run another program, or you can create different entries in Steam for each program (e.g. The Sims 2, SimPE, BodyShop will all show as separate games in the library) using a special launch option which allows you to avoid changing the properties every time you want to run another program.
1. In Steam, click Games tab at top and Add a non-Steam game to my Library.
2. Click browse in the bottom left of the window, navigate to where you have the program’s exe and select it.
3. Click add selected programs.
4. Go to your Library tab and right click on the newly added exe, click properties.
5. Add this to launch options, making sure that you use the actual path to your prefix ID for the Sims 2 (or the EA App if using it) STEAM_COMPAT_DATA_PATH=~/.steam/steam/steamapps/compatdata/<ID> %command% e.g. STEAM_COMPAT_DATA_PATH=“/home/<user-name>/.steam/steam/steamapps/compatdata/2772910551” %command%. By default, Steam will create a new compatdata folder for this new shortcut which you don’t want to use because the program needs access to the Sims 2 files. This launch option allows that to happen.
6. Click compatibility tab, check the force box and select the same Proton version as you use for the Sims 2 (or the EA App if using that).
7. Close properties window and click Play button in Steam to launch the program.
Note the paths for the program in target and start in do not have to be inside the prefix folder but can still run within the prefix and access the files in there as long as the launch option is set.
You can follow the instructions above to create a separate Steam entry for BodyShop. Or you can right click on The Sims 2 game (or EA App) in Steam, click Properties and change Target to the path for CSBin/BodyShopLauncher.exe (or CSBin/TS2BodyShop.exe) instead of TSBin/Sims2EP9.exe and change Start In to the path up to CSBin.
Download the Hoodchecker and extract it from the zip archive, which will result in a folder containing the HoodChecker.exe.
You can follow the instructions above to create a separate Steam entry for Hoodchecker. Or you can right click on The Sims 2 game (or EA App) in Steam, click Properties and change Target to the path for Hoodchecker, which will look like “/home/<user-name>/Downloads/MTS_Mootilda_1236080_HoodChecker/HoodChecker.exe” and start in “/home/<user-name>/Downloads/MTS_Mootilda_1236080_HoodChecker”. Then press the blue play button to run the program.
Download SimPE - I recommend using the no-install version, i.e. the download without Installer in the name, in this case SimPe_0_77_69.zip. Unzip it and you’ll see the SimPE.exe file inside the folder.
You can follow the instructions above to create a separate Steam entry for SimPE. Or you can right click on The Sims 2 game (or EA App) in Steam, click Properties and change Target to the path for Hoodchecker, which will look like “/home/<user-name>/Downloads/SimPe_0_77_69/SimPe.exe” and start in “/home/<user-name>/Downloads/SimPe_0_77_69”. Then press the blue play button to run the program. Note that you need to right click instead of left click on resources in the top right tree in order to see them in the plugin view below.
Download the Sims2Pack Clean Installer - I recommend using the no-install version, i.e. the download called Sims2PackInstaller_NoInstall.zip. Unzip it and you’ll see the Sims2Pack Clean Installer.exe inside the folder.
You can follow the instructions above to create a separate Steam entry for Clean Installer. Or you can right click on The Sims 2 game (or EA App) in Steam, click Properties and change Target to the path for Hoodchecker, which will look like “/home/<user-name>/Downloads/MTS_Mootilda_1164470_Sims2PackInstaller_NoInstall/Sims2Pack Clean Installer/Sims2Pack Clean Installer.exe” and start in “/home/<user-name>/Downloads/MTS_Mootilda_1164470_Sims2PackInstaller_NoInstall/Sims2Pack Clean Installer”. Then press the blue play button to run the program.
Note that this not how you install sims2pack files, the program does not function this way on any OS which many players find confusing. To install a sims2pack file, you have to “open with” the Clean Installer. On Windows that’s done via the ‘open with’ context menu option or by setting up a file association so you can double click the sims2pack file to install with the Clean Pack installer automatically.
How to do this on Linux is detailed below.
In terminal, run the commands
cd /home/<user-name>/.local/share/applications/ nano CleanInstaller.desktop
Copy and paste the following into the file - make sure that you enter your actual user name wherever <user-name> is used, and make sure to change the Proton version used if yours is not Proton - Experimental. Also make sure that the ID under compatdata in the path is set to the actual prefix ID you have for the game.
[Desktop Entry] Type=Application Name=CleanInstaller Exec=env WINEPREFIX=“/home/<user-name>/.steam/steam/steamapps/compatdata/4007406707/pfx” “/home/<user-name>/.steam/steam/steamapps/common/Proton - Experimental/files/bin/wine” “/home/<user-name>/Downloads/MTS_Mootilda_1164470_Sims2PackInstaller_NoInstall/Sims2Pack Clean Installer/Sims2Pack Clean Installer.exe” %U MimeType=application/x-Sims2Pack; Categories=Game;
You may need to make the file executable for it to show up in the context menu
chmod +x /home/<user-name>/.local/share/applications/CleanInstaller.desktop
You can now right click on a .sims2pack, choose “Open with” and select “CleanInstaller” in the window that pops up (note that my example image has a bunch of these because I created one for each Linux install method! You only need one) - make sure to click the toggle at the bottom to “always use for this file type” which will then allow you to double click to install sims2pack files in future. Neither the Clean Installer itself nor the .sims2pack files need to be located within the prefix itself with this method.
If you want to pass arguments to clean installer such as an individual .sims2pack file or a folder using -f, make sure to use the Windows-absolute path rather than Linux or it will not work when using the STEAM_COMPAT_DATA_PATH argument.
For example, use
STEAM_COMPAT_DATA_PATH=“/home/<user-name>/.steam/steam/steamapps/compatdata/2772910551” %command% -f C:/Sims2Tools/lots
or
STEAM_COMPAT_DATA_PATH=“/home/<user-name>/.steam/steam/steamapps/compatdata/2772910551” %command% -f C:\\Sims2Tools\\lots
but not
STEAM_COMPAT_DATA_PATH=“/home/<user-name>/.steam/steam/steamapps/compatdata/2772910551” %command% -f “/home/<user-name>/.steam/steam/steamapps/compatdata/2772910551/pfx/drive_c/Sims2Tools/lots”
or
STEAM_COMPAT_DATA_PATH=“/home/<user-name>/.steam/steam/steamapps/compatdata/2772910551” %command% -f /home/<user-name>/Downloads/Sims2Tools/lots"
because you will get a Sims2Pack Clean Installer Error “There is nothing in this folder to install”.
Use the commands
sudo apt install flatpak flatpak remote-add --if-not-exists flathub https://dl.flathub.org/repo/flathub.flatpakrepo flatpak install flathub com.usebottles.bottles
You’ll see this during install:
“Note that the directories ‘/var/lib/flatpak/exports/share’ ‘/home/<user-name>/.local/share/flatpak/exports/share’ are not in the search path set by the XDG_DATA_DIRS environment variable, so applications installed by Flatpak may not appear on your desktop until the session is restarted.”
To start it after install use flatpak run com.usebottles.bottles or log out and log back in (note this will close all your open apps) if you want to access it from the apps menu by searching Bottles (it will be available this way after that first time you log back in).
1. When Bottles opens, it’ll install some dependencies on first launch such as DXVK. Wait until it finishes then click Bottles tab at the top and click Create New Bottle.
2. Name it The Sims 2 (or whatever you want) and select Gaming as the profile so it’s optimised for games. Leave runner as default, soda-9.0-1 at time of writing. You can leave the Bottle directory on default or change it if you want to store the bottle’s data (which will include the game’s install + save folder, where you put mods/hoods/etc.) somewhere else. Then click create and wait for it to be ready.
3. Once the bottle is ready, click on it and it will show you the details of the bottle.
5. Click Browse button beside Browse C:/ drive. Drag the The_Sims_2_Repack_v5 folder (extracted not the rar archive) from wherever you downloaded it to into the bottle’s drive - this is important as the installer will not run if located outside the bottle.
6. Click run executable back on the Bottles app. In the window that appears, double click drive_c, then double click The_Sims_2_Repack_v5 and finally select the The Sims2_Repack_v5_Setup.exe + click run.
7. This will bring up the installer just like in Windows - note that the installer will not appear if you do not move the repack folder into the Bottle as in step 5 above (i.e. you cannot run the installer from outside the Bottle).
8. Click through the installer - don’t select DXVK or GRM as these are not required.
9. Once installed, you should be able to just click the play button beside Sims2RPC to launch.
10. If you want to add a shortcut to the other executables in Bottles such as RPC Settings or BodyShop, click Add Shortcuts back in Bottles and navigate to /home/<user-name>/.var/app/com.usebottles.bottles/data/bottles/bottles/the-sims-2/drive_c/MagiPacks/The Sims 2/Fun with Pets/SP9/TSBin and select Sims2RPCSettings.exe. Use Sims2RPCSettings if you want to change windowed mode or modify other settings.
11. You can repeat step 10 to add shorcuts for the non RPC exe (Sims2EP9.exe or Sims2EP9RPC.exe) and BodyShop (instead of TSBin, it’s in CSBin and the exe is either TS2BodyShop.exe or BodyShopLauncher.exe if you installed the widescreen launcher for BodyShop, which also comes as part of the MagiPack repack. If you have both of these executables you should use the launcher one as it makes some changes to the UI for wide screen which may not work well with the regular launcher). Note that BodyShop can take some time to launch and this is normal, even on Windows.
1. When Bottles opens, it’ll install some dependencies on first launch such as DXVK. Wait until it finishes then click the hamburger menu in the top left and click Preferences.
2. Click Runners tab and install ge-proton10-34 (image shows wine-ge-proton8-26 installing but you actually need 10-34). Feel free to try other versions. At the time of writing, the EA App would not work with soda-9.0-1 and wine-ge-proton8-26 (it either failed to install or lunch). It would launch with the sys wine runner but the Sims 2 then would not launch with that runner. Wait for the runner to install and then close preferences.
3. Click Bottles tab at the top and click Create New Bottle.
4. Name it EA App (or whatever you want) and select Gaming as the profile so it’s optimised for games. Select ge-proton10-34 as the runner. You can leave the Bottle directory on default or change it if you want to store the bottle’s data (which will include the game’s install + save folder, where you put mods/hoods/etc.) somewhere else. Then click create and wait for it to be ready.
5. Once the bottle is ready, click on it and it will show you the details of the bottle. Click Intall Programs under the Programs section and click Install beside EA Launcher.
6. This will bring up the EA App Installer. Complete the install and login to the EA App when it’s finished.
7. Locate The Sims 2 in your library and click install.
8. Once the game is installed, you can click play in the EA app and it will run as normal.
9. If you want to add a shortcut to the game in Bottles to avoid manually launching the EA App each time you play, click Add Shortcuts back in Bottles and navigate to /home/<user-name>/.var/app/com.usebottles.bottles/data/bottles/bottles/EA-App/drive_c/Program Files/EA Games/The Sims 2 Ultimate Collection/Fun with Pets/SP9/TSBin and select Sims2EP9.exe.
10. You can repeat step 9 to add a shorcut for BodyShop but instead of TSBin, it’s in CSBin and the exe is either TS2BodyShop.exe or BodyShopLauncher.exe if you installed the widescreen launcher for BodyShop. If you have both of these executables you should use the launcher one as it makes some changes to the UI for wide screen which may not work well with the regular launcher.
11. You can click the 3 dots beside the Sims2EP9, select ‘Change Launch Options’ and add -w in command arguments to run the game in windowed mode.
Under Options/Settings, make sure discrete graphics is enabled so the game can use your dedicated GPU. I left my bottle using Windows 10 but it’d probably be the same for Windows 11.
To run any Sims 2 related program with the game installed via Bottles, you have to run the program inside the same Bottles which translates to copying the program’s folder to the C drive in the bottle. This will be at a location like /home/<user-name>/.var/app/com.usebottles.bottles/data/bottles/bottles/the-sims-2/drive_c/ where “the-sims-2” is the name of the bottle in lower case with spaces replaced by hyphens.
Once the program is in there, you can click “Add a Shortcut” in Bottles to add shortcuts to the executables so you don’t have to locate the program each time you want to run it.
Note that I used the no install versions for all programs demonstrated here, the installer versions may work differently.
How to make a shortcut for BodyShop is explained in step 10 of the install instructions. There’s no special handling for BodyShop as the program is already part of the game’s files so it is already in the Bottle’s C drive.
Download the Hoodchecker and extract it from the zip archive, which will result in a folder containing the HoodChecker.exe. Move/copy this folder to the C drive of the bottle which looks like /home/<user-name>/.var/app/com.usebottles.bottles/data/bottles/bottles/the-sims-2/drive_c/ - you can put it in a subfolder in here if you prefer or just leave it in drive_c, it doesn’t matter.
In Bottles, click the Run Executable button in the Sims 2 bottle and navigate to the folder containing Hoodchecker.exe in drive_c. Select this executable to run the program just like on Windows. Use the “Add a shortcut” option in Bottles to avoid having to find this executable each time you want to use it.
Download SimPE - I recommend using the no-install version, i.e. the download without Installer in the name, in this case SimPe_0_77_69.zip. Unzip it and you’ll see the SimPE.exe file inside the folder. In Bottles, click the Run Executable button in the Sims 2 bottle and navigate to the folder containing SimPE.exe in drive_c. Select this executable to run the program just like on Windows. Use the “Add a shortcut” option in Bottles to avoid having to find this executable each time you want to use it. Note that for some reason, Plugin view will show as empty unless you middle or right click the resource (instead of left click like on Windows).
Download the Sims2Pack Clean Installer - I recommend using the no-install version, i.e. the download called Sims2PackInstaller_NoInstall.zip. Unzip it and you’ll see the Sims2Pack Clean Installer.exe inside the folder.
Update the save game path for the program by opening the S2PCI.ini file in this folder and modifying the SaveGamePath like so:
SaveGamePath=“/home/<user-name>/.var/app/com.usebottles.bottles/data/bottles/bottles/the-sims-2/drive_c/users/steamuser/Documents/EA Games/The Sims 2"”
Make sure to actually put in your user name, bottle name, and that the save game folder is correct (The Sims 2 is correct for the MagiPack repack).
In Bottles, click the Run Executable button in the Sims 2 bottle and navigate to the folder containing Sims2Pack Clean Installer.exe in drive_c. Select this executable to run the program just like on Windows. Use the “Add a shortcut” option in Bottles to avoid having to find this executable each time you want to use it.
Note that this not how you install sims2pack files, the program does not function this way on any OS which many players find confusing. To install a sims2pack file, you have to “open with” the Clean Installer. On Windows that’s done via the ‘open with’ context menu option or by setting up a file association so you can double click the sims2pack file to install with the Clean Pack installer automatically.
How to do this on Linux is detailed below.
In terminal, run the commands below one at a time, pressing enter in between each one. Make sure that you enter your actual user name wherever <user-name> is used.
cd /home/<user-name>/.local/share/applications/ nano CleanInstaller.desktop
Copy and paste the following into the file - make sure that you enter your actual user name wherever <user-name> is used, and make sure to change the bottle name if yours is not the-sims-2. Also note you probably need to use a different command under exec if you didn’t install bottles via flatpak.
[Desktop Entry] Type=Application Name=CleanInstaller Exec=flatpak run --command=bash com.usebottles.bottles -c ‘wine “/home/<user-name>/.var/app/com.usebottles.bottles/data/bottles/bottles/the-sims-2/drive_c/MTS_Mootilda_1164470_Sims2PackInstaller_NoInstall/Sims2Pack Clean Installer/Sims2Pack Clean Installer.exe” “$@”’ dummy %U Terminal=false Categories=Game; MimeType=application/x-sims2pack;
You may need to make the file executable for it to show up in the context menu
chmod +x /home/<user-name>/.local/share/applications/CleanInstaller.desktop
You can now right click on a .sims2pack, choose “Open with” and select “CleanInstaller” in the window that pops up (note that my example image has a bunch of these because I created one for each Linux install method! You only need one) - make sure to click the toggle at the bottom to “always use for this file type” which will then allow you to double click to install sims2pack files in future.
However, with Bottles the file must be in the Bottle (i.e. put it somewhere in/under the drive_c folder) for double click install to work with this method.
If you install the game via the EA App, double click to ‘open with’ for Clean Installer works fine (though clean installer and any sims2pack files must be physically inside drive_c prefix of the EA App) with one issue if you’re using the Ultimate Collection. The UC from the EA App contains a TM symbol in the name and there’s no way to get the Clean Installer to recognise this folder via Bottles.
On Windows, Clean Installer auto finds the correct UC folder with hardcoded TM symbol but on Linux, the folder it defaults to is incorrect and is just The Sims 2. When you set the correct folder with TM symbol “/home/<user-name>/.var/app/com.usebottles.bottles/data/bottles/bottles/EA-App/drive_c/users/steamuser/Documents/EA Games/The Sims™ 2 Ultimate Collection” the symbol will show up incorrectly in the app and so it will install in a different folder under EA Games with the messed up name (The Simsâ„¢ 2 Ultimate Collection).
You can copy the files to the correct Teleport folder under the UC folder with the TM but you would have to do this every time you install files via the Clean Installer. To resolve this permanently you can remove the TM symbol from the registry in the prefix. In Bottles with EA App bottle open, scroll down to Tools section and click Registry Editor, then follow comment #8 in this thread to remove the TM symbol.

Average university student
Average university student

cross-posted from: lemmy.world/post/16641712
Sulsul Simmers, MarviSims here! I recently started a new website called RetroSimsMods, where you can download new houses and (soon) objects for TS1 and TS2. With this little website, I just want to keep these awesome games alive and well. Feel free to take a look if that sounds fun! 😁
cross-posted from: lemmy.world/post/16641712
Sulsul Simmers, MarviSims here! I recently started a new website called RetroSimsMods, where you can download new houses and (soon) objects for TS1 and TS2. With this little website, I just want to keep these awesome games alive and well. Feel free to take a look if that sounds fun! 😁

Catch BINGO for the Sims 2, I hope you enjoy it :D
Catch BINGO for the Sims 2, I hope you enjoy it :D
I already posted this on Reddit but I feel like Lemmy deserves this.
I am currently working on an “Ultimate Pleasantview” that contains sims related to the Pleasantview sims from previous and future games, even spin-offs! I’m adding forgotten sims and extending the families are current sims.
I feel Pleasantview is very empty, obviously because of the time the game came out. But I’m aiming to add to it like many simmers have before me!
I already posted this on Reddit but I feel like Lemmy deserves this.
I am currently working on an “Ultimate Pleasantview” that contains sims related to the Pleasantview sims from previous and future games, even spin-offs! I’m adding forgotten sims and extending the families are current sims.
I feel Pleasantview is very empty, obviously because of the time the game came out. But I’m aiming to add to it like many simmers have before me!


Sometimes between getting the game to work just right , modding the game just right , default replaceming just how i like it and genetically correcting sims ; it gets me all.
P.S. I still love it to bits. I am control freak about my game.
Sometimes between getting the game to work just right , modding the game just right , default replaceming just how i like it and genetically correcting sims ; it gets me all.
P.S. I still love it to bits. I am control freak about my game.


I saw this pic on the reddit community a while back and yes.
I saw this pic on the reddit community a while back and yes.
I think I’m in the heavy minority because I really dislike the whole having children thing (maybe that’s me projecting lol). I’d rather focus on my adult sims and usually adopt an older child and then age them up to a teenager if I want a new character. I like starting from scratch in different neighborhoods and stuff, but it’s hard to stay engaged with one specific sim for very long. You can only get divorced so many times ya know?
I think I’m in the heavy minority because I really dislike the whole having children thing (maybe that’s me projecting lol). I’d rather focus on my adult sims and usually adopt an older child and then age them up to a teenager if I want a new character. I like starting from scratch in different neighborhoods and stuff, but it’s hard to stay engaged with one specific sim for very long. You can only get divorced so many times ya know?
So happy to see a Sims 2 sub!! I’m really hoping to see r/sims2help migrate over here at some point. Chances this community will include the link they have in their wiki to download the game?
So happy to see a Sims 2 sub!! I’m really hoping to see r/sims2help migrate over here at some point. Chances this community will include the link they have in their wiki to download the game?
As above, let’s discuss!
As above, let’s discuss!


