0

What's the best way to sketch a shape like this outline?

preview

I’ve tried using a B-Spline, using eliptical arcs, and making a polygonal approximation and then filleting it but none of them worked well and both were very hard to figure out how to measure for.

I’ve tried using a B-Spline, using eliptical arcs, and making a polygonal approximation and then filleting it but none of them worked well and both were very hard to figure out how to measure for.

0

Equivalent to Solidworks "rollback" in FreeCAD?

preview

Hello, Solidworks refugee here, with some questions on navigating FreeCAD’s feature tree.

Example: I want to make this:

Step 1: Sketch on XY, draw rectangle, pad

Step 2: New sketch, draw rectangle, pad

Accidentally forget Step 3, which would have been to sketch and pad another rectangle

Step 4: New body, sketch on XZ, draw circle (or whatever), pad

Step 5: Cut 1st body minus 2nd body.

Step 6: Explode the resulting compound.

Step 7: Realize that I forgot to do Step 3.

What should I do at this point?

In Solidworks, the standard workflow would be to use the “rollback” tool to suppress the boolean operation, add the missing Step 3, then “roll forward” to reapply the boolean operation.

What is the equivalent “best practice” workflow in FreeCAD?

Hello, Solidworks refugee here, with some questions on navigating FreeCAD’s feature tree.

Example: I want to make this:

Step 1: Sketch on XY, draw rectangle, pad

Step 2: New sketch, draw rectangle, pad

Accidentally forget Step 3, which would have been to sketch and pad another rectangle

Step 4: New body, sketch on XZ, draw circle (or whatever), pad

Step 5: Cut 1st body minus 2nd body.

Step 6: Explode the resulting compound.

Step 7: Realize that I forgot to do Step 3.

What should I do at this point?

In Solidworks, the standard workflow would be to use the “rollback” tool to suppress the boolean operation, add the missing Step 3, then “roll forward” to reapply the boolean operation.

What is the equivalent “best practice” workflow in FreeCAD?

0

How to manipulate individual vertices?

preview

Newbie here. FreeCAD is v1.1.1

Is there really no way to do simple manual vertices manipulation?

Coming from Wings3D. Found the Fase feature (PartDesign_Chamfer) which is a good start for my usual extrude/bevel workflow but I can not for my life find out how to manually select and move vertexes manually / individually.

I learned about converting a part into a mesh but even here I seem to not have the option to move vertices around freely?

Do I really have to go down to a 2D drawing first and work from there?

Newbie here. FreeCAD is v1.1.1

Is there really no way to do simple manual vertices manipulation?

Coming from Wings3D. Found the Fase feature (PartDesign_Chamfer) which is a good start for my usual extrude/bevel workflow but I can not for my life find out how to manually select and move vertexes manually / individually.

I learned about converting a part into a mesh but even here I seem to not have the option to move vertices around freely?

Do I really have to go down to a 2D drawing first and work from there?

0

I'm sorry for bashing you, FreeCAD. My opinion has flipped after 1.1

preview

I have been playing with FreeCAD since before 1.0, but I couldn’t say when I started. I hated it. I come from Siemens NX, and the workflow made no sense at all. It couldn’t do what I considered simple tasks I use all the time for work. I want to make one base sketch that I can make multiple features or bodies from, it was super frustrating not to be able to do that. Arrays didn’t make sense. I needed to 3D print a replacement part for something of my daughter’s, and didn’t have my work computer with me. It took me 2 hours to make this part that would have taken about 10 minutes in NX. Or even SolidWorks (which I am also not a fan of, but used it professionally for several years). I could have driven to my office, picked up my laptop, come home, and designed it faster than FreeCAD 1.0.

I tried 1.1 yesterday after watching some videos on it recently, and most of the major problems I had with it seem to have been addressed. Sketching was better, making features from those sketches was better, things just seemed to make more sense. I made another rather simple part in about half an hour, and I think that time will come down as I get more familiar with it. I wish I had my SpacePilot Pro hooked up for it, it’s been a while since I’ve had to rotate things with my mouse. But I have previously had the 3DConnexion driver working with FreeCAD, so I’ll be doing that in the future. Fun fact, you can also do anaglyph 3D with FreeCAD if you want do design with those old-school red/blue glasses.

Anyway, here’s what I made. It’s a base for a Lundby doll house chair for my mom. Originally, it would have had an Eames style base, with a central metal post and legs coming out like a desk chair. I made a tulip-style base, and inserted a metal pin down the center for stability. It was super easy to design and modify in 1.1, with one main sketch revolved. Then, I created a second sketch for the angled top, extruded that, and did a boolean subtract. Super easy, and actually pretty fun to make. Completely different from my previous FreeCAD experiences. I will be coming back to it again, for sure.

Here’s what the original would have looked. She doesn’t have the footstool, so I figured I could take some design liberties. The Eames’s work is fantastic, so is Eero Saarinen’s. Why not mash them up?

I have been playing with FreeCAD since before 1.0, but I couldn’t say when I started. I hated it. I come from Siemens NX, and the workflow made no sense at all. It couldn’t do what I considered simple tasks I use all the time for work. I want to make one base sketch that I can make multiple features or bodies from, it was super frustrating not to be able to do that. Arrays didn’t make sense. I needed to 3D print a replacement part for something of my daughter’s, and didn’t have my work computer with me. It took me 2 hours to make this part that would have taken about 10 minutes in NX. Or even SolidWorks (which I am also not a fan of, but used it professionally for several years). I could have driven to my office, picked up my laptop, come home, and designed it faster than FreeCAD 1.0.

I tried 1.1 yesterday after watching some videos on it recently, and most of the major problems I had with it seem to have been addressed. Sketching was better, making features from those sketches was better, things just seemed to make more sense. I made another rather simple part in about half an hour, and I think that time will come down as I get more familiar with it. I wish I had my SpacePilot Pro hooked up for it, it’s been a while since I’ve had to rotate things with my mouse. But I have previously had the 3DConnexion driver working with FreeCAD, so I’ll be doing that in the future. Fun fact, you can also do anaglyph 3D with FreeCAD if you want do design with those old-school red/blue glasses.

Anyway, here’s what I made. It’s a base for a Lundby doll house chair for my mom. Originally, it would have had an Eames style base, with a central metal post and legs coming out like a desk chair. I made a tulip-style base, and inserted a metal pin down the center for stability. It was super easy to design and modify in 1.1, with one main sketch revolved. Then, I created a second sketch for the angled top, extruded that, and did a boolean subtract. Super easy, and actually pretty fun to make. Completely different from my previous FreeCAD experiences. I will be coming back to it again, for sure.

Here’s what the original would have looked. She doesn’t have the footstool, so I figured I could take some design liberties. The Eames’s work is fantastic, so is Eero Saarinen’s. Why not mash them up?

0

FreeCAD 1.1 is Finally HERE — It’s a GAME CHANGER ! (Major Updates you missed)

play · youtube.com
YouTube FreeCAD 1.1 is Finally HERE — It’s a GAME CHANGER ! (Major Updates you missed) www.youtube.com
preview

Video by Deltahedra on novelties in FreeCAD 1.1. I’m really excited to see the tool grow so quickly and can only recommend this and all his other FreeCAD videos to anyone interested in upping their skills.

Video by Deltahedra on novelties in FreeCAD 1.1. I’m really excited to see the tool grow so quickly and can only recommend this and all his other FreeCAD videos to anyone interested in upping their skills.

0

FreeCAD 1.1 is released!

play · youtube.com
YouTube FreeCAD 1.1 is released! www.youtube.com
preview
References

1. Type: Video. Title: “FreeCAD 1.1 is released!”. Author: “FreeCAD”. Publisher: “YouTube”. Published: “2026-03-24T19:19:57Z”. Accessed: 2026-03-26T05:53Z. Location (URI): www.youtube.com/watch?v=a9biWv_M8p8.

References

1. Type: Video. Title: “FreeCAD 1.1 is released!”. Author: “FreeCAD”. Publisher: “YouTube”. Published: “2026-03-24T19:19:57Z”. Accessed: 2026-03-26T05:53Z. Location (URI): www.youtube.com/watch?v=a9biWv_M8p8.

0

If there's a way to round exact corners of figures in FreeCAD?

preview

Hello!

Is there a way in FreeCAD to round off the corners of shapes specifically like this? Without rounding the edges themselves (i.e., the rounded corner tapering off to “zero” at the edges).
Thank you

Hello!

Is there a way in FreeCAD to round off the corners of shapes specifically like this? Without rounding the edges themselves (i.e., the rounded corner tapering off to “zero” at the edges).

Thank you

0

Coordinate system planes not visible

preview

I just downloaded FreeCAD to build a simple part and was following this tutorial to learn my way through the basics. Unfortunately I got stuck pretty quickly around the 2:38 part where I need to select a plane to start a drawing in. For some reason, the coordinate system planes don’t show up even if the eye icon is lit up. Can someone tell me what I’m doing wrong here?

Upon posting a screenshot here, I think my CachyOS KDE theme might have something to do with the display as I view a mostly blank white screen while the screenshot is showing black for some reason. I’ve already tried changing the theme under Preferences but it seemed to make things worse, with some parts of the Start tab being unreadable.

EDIT: I should also point out that the FreeCAD client was downloaded via the CachyOS Package Manager. I heard sometimes using software from Flatpaks and other similar sources clashes with system themes. Should I use a different installation method?

How it’s supposed to look like:

How my setup looks like:

I just downloaded FreeCAD to build a simple part and was following this tutorial to learn my way through the basics. Unfortunately I got stuck pretty quickly around the 2:38 part where I need to select a plane to start a drawing in. For some reason, the coordinate system planes don’t show up even if the eye icon is lit up. Can someone tell me what I’m doing wrong here?

Upon posting a screenshot here, I think my CachyOS KDE theme might have something to do with the display as I view a mostly blank white screen while the screenshot is showing black for some reason. I’ve already tried changing the theme under Preferences but it seemed to make things worse, with some parts of the Start tab being unreadable.

EDIT: I should also point out that the FreeCAD client was downloaded via the CachyOS Package Manager. I heard sometimes using software from Flatpaks and other similar sources clashes with system themes. Should I use a different installation method?

How it’s supposed to look like:

How my setup looks like:

0

I Put GitHub Inside FreeCAD | GitPDM

play · youtube.com
YouTube I Put GitHub Inside FreeCAD | GitPDM www.youtube.com
preview

GitPDM is an open-source beginner-friendly FreeCAD addon. It connects your Github Account with your FreeCAD files with a single click.

Repo: github.com/nerd-sniped/GitPDM
Website: nerd-sniped.com

GitPDM is an open-source beginner-friendly FreeCAD addon. It connects your Github Account with your FreeCAD files with a single click.

Repo: github.com/nerd-sniped/GitPDM
Website: nerd-sniped.com

0

Why am I unable to create this pocket in 1.1beta like shown in this tutorial?

preview

www.youtube.com/watch?v=bzf1yP6HUmY

I’m getting errors trying to create a pocket (2:25) because one of the edges of the inner rectangle is right on top of the outer rectangle, and I can’t select just the inner rectangle

www.youtube.com/watch?v=bzf1yP6HUmY

I’m getting errors trying to create a pocket (2:25) because one of the edges of the inner rectangle is right on top of the outer rectangle, and I can’t select just the inner rectangle

0

3D-printed PLA "dial wheel" to manually brute-force a combination lock-box

preview

cross-posted from: sh.itjust.works/post/50842014

When I moved into my home many years ago, there was this lock-box mounted to the water main on the side of the house. I figured it was one of those used by real-estate agents to store the house key for viewings, but months passed and it still remained there. No one from my buyer’s agent’s office had a clue what this was, and the seller of the house had already moved out-of-state.

Recently, I had some plumbing work done, and that also included replacing the main water valve for the house, allowing this lock box to come free from the plumbing. Now inspecting it up close, and looking up the model online, I realized that it has an alphabet wheel and uses a three-letter combination.

As it happens, Thanksgiving weekend was upon me, and since I was bored, I figured I’d try all the possible combinations. Just 17,576 possible combinations, how bad could it be?

The most immediate problem was that due to being out in the elements, the dial did not turn easily. It would move, but was rather rough. And since the knob is only ~1 cm diameter, this is an incredibly un-ergonomic endeavor. I had to stop after the first 100 tries, due to the finger exhaustion.

Knowing this would be untenable for the long-run, I decided to build my way out of this problem. Since a combo lock involves making rotations that almost go all the way around, I drew inspiration from rotary telephone dials, where one’s finger starts with the intended number and then swivels the dial around.

But whereas a rotary telephone dial only needs 10 positions, I needed to fit 26 positions, one for each letter. I decided on each hole being 17 mm to comfortably fit any of my fingers, but that also dictated the overall diameter of the wheel. But that’s good, since a larger diameter wheel means more leverage to overcome the rough lock movement. It also happens to be that this wheel has a diameter of 180 mm, which is just enough to fit in the 200 mm bed of my 3d printer.

Using FreeCAD, I designed this wheel so that it fits around the splines of the lockbox dial, which held remarkably well. I had thought I would need Blu Tack or something to keep it together.

CAD design for lockbox dial wheel

Using this wheel, I’m able to “dial” combinations much quicker using one hand, while holding the lockbox with my other hand to press the lever down to test the combination. This should be good.

(note: some parts of this story were altered to not give away identifying details)

cross-posted from: sh.itjust.works/post/50842014

When I moved into my home many years ago, there was this lock-box mounted to the water main on the side of the house. I figured it was one of those used by real-estate agents to store the house key for viewings, but months passed and it still remained there. No one from my buyer’s agent’s office had a clue what this was, and the seller of the house had already moved out-of-state.

Recently, I had some plumbing work done, and that also included replacing the main water valve for the house, allowing this lock box to come free from the plumbing. Now inspecting it up close, and looking up the model online, I realized that it has an alphabet wheel and uses a three-letter combination.

As it happens, Thanksgiving weekend was upon me, and since I was bored, I figured I’d try all the possible combinations. Just 17,576 possible combinations, how bad could it be?

The most immediate problem was that due to being out in the elements, the dial did not turn easily. It would move, but was rather rough. And since the knob is only ~1 cm diameter, this is an incredibly un-ergonomic endeavor. I had to stop after the first 100 tries, due to the finger exhaustion.

Knowing this would be untenable for the long-run, I decided to build my way out of this problem. Since a combo lock involves making rotations that almost go all the way around, I drew inspiration from rotary telephone dials, where one’s finger starts with the intended number and then swivels the dial around.

But whereas a rotary telephone dial only needs 10 positions, I needed to fit 26 positions, one for each letter. I decided on each hole being 17 mm to comfortably fit any of my fingers, but that also dictated the overall diameter of the wheel. But that’s good, since a larger diameter wheel means more leverage to overcome the rough lock movement. It also happens to be that this wheel has a diameter of 180 mm, which is just enough to fit in the 200 mm bed of my 3d printer.

Using FreeCAD, I designed this wheel so that it fits around the splines of the lockbox dial, which held remarkably well. I had thought I would need Blu Tack or something to keep it together.

CAD design for lockbox dial wheel

Using this wheel, I’m able to “dial” combinations much quicker using one hand, while holding the lockbox with my other hand to press the lever down to test the combination. This should be good.

(note: some parts of this story were altered to not give away identifying details)

0

[Guide] Optimizing Expanded Metal Mesh in FreeCAD

Eco-Libre Optimizing Expanded Metal Mesh in FreeCAD - eco-libre.org
preview

This article will show how to model sheets of Expanded Metal in FreeCAD, without slowing (or killing) FreeCAD.

Troubleshooting Large File Sizes in FreeCAD

Who is Eco-Libre?

Eco-Libre is a volunteer-run project that designs libre technology for sustainable communities.

Eco-Libre’s mission is to research, develop, document, teach, build, and distribute open-source technology that sustainably enfranchises communities’ human rights.

We aim to provide clear documentation to build low-cost machines, tools, and infrastructure for people all over the world who wish to live in sustainable communities with others.

Contribute to Eco-Libre

If you’d like to help Eco-Libre reach our mission to enfranchise sustainable communities’ human rights with libre tech, please contact us to get involved :)

Join Us
eco-libre.org/join

Cheers,
The Eco-Libre Team
www.eco-libre.org

This article will show how to model sheets of Expanded Metal in FreeCAD, without slowing (or killing) FreeCAD.

Troubleshooting Large File Sizes in FreeCAD

Who is Eco-Libre?

Eco-Libre is a volunteer-run project that designs libre technology for sustainable communities.

Eco-Libre’s mission is to research, develop, document, teach, build, and distribute open-source technology that sustainably enfranchises communities’ human rights.

We aim to provide clear documentation to build low-cost machines, tools, and infrastructure for people all over the world who wish to live in sustainable communities with others.

Contribute to Eco-Libre

If you’d like to help Eco-Libre reach our mission to enfranchise sustainable communities’ human rights with libre tech, please contact us to get involved :)

Join Us
eco-libre.org/join

Cheers,
The Eco-Libre Team
www.eco-libre.org

0

Identifying root cause of FreeCAD file size bloat

Eco-Libre Troubleshooting Large FreeCAD File Sizes - eco-libre.org
preview

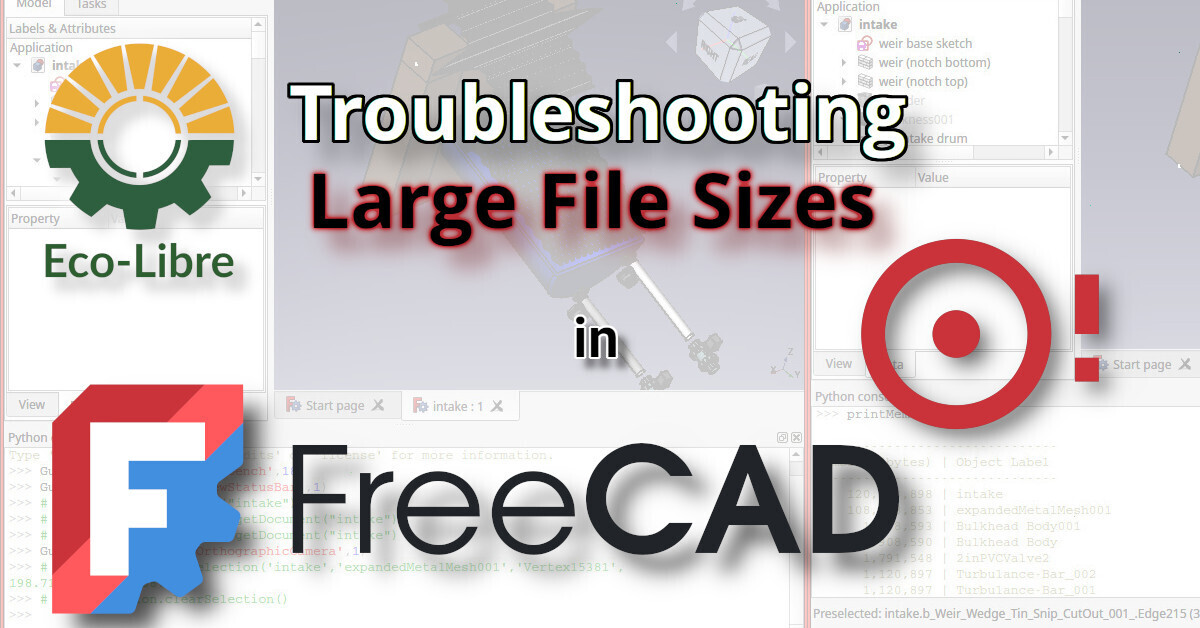
This article will show you how to find out exactly which layer is causing your FreeCAD file to balloon in size, by getting a granular list of all of the layers in your document tree, sorted by size.

Troubleshooting Large File Sizes in FreeCAD

Who is Eco-Libre?

Eco-Libre is a volunteer-run project that designs libre technology for sustainable communities.

Eco-Libre’s mission is to research, develop, document, teach, build, and distribute open-source technology that sustainably enfranchises communities’ human rights.

We aim to provide clear documentation to build low-cost machines, tools, and infrastructure for people all over the world who wish to live in sustainable communities with others.

Contribute to Eco-Libre

If you’d like to help Eco-Libre reach our mission to enfranchise sustainable communities’ human rights with libre tech, please contact us to get involved :)

Join Us
eco-libre.org/join

Cheers,
The Eco-Libre Team
www.eco-libre.org

This article will show you how to find out exactly which layer is causing your FreeCAD file to balloon in size, by getting a granular list of all of the layers in your document tree, sorted by size.

Troubleshooting Large File Sizes in FreeCAD

Who is Eco-Libre?

Eco-Libre is a volunteer-run project that designs libre technology for sustainable communities.

Eco-Libre’s mission is to research, develop, document, teach, build, and distribute open-source technology that sustainably enfranchises communities’ human rights.

We aim to provide clear documentation to build low-cost machines, tools, and infrastructure for people all over the world who wish to live in sustainable communities with others.

Contribute to Eco-Libre

If you’d like to help Eco-Libre reach our mission to enfranchise sustainable communities’ human rights with libre tech, please contact us to get involved :)

Join Us
eco-libre.org/join

Cheers,
The Eco-Libre Team
www.eco-libre.org

0

I finished my 3D Printable screw design! Excellent print ability, reliable for simple use, though the head is prone to strip... can't win them all. (FreeCAD file on Printables)

preview

If you wanna print it yourself, the model is here: printables.com/…/1348194-4n-threaded-flat-head-sc…

Design to be a drop in replacement for 10-32 screws with a much, much higher pitch. These screws are extremely easy to print, is reliable enough that it can hold some weight.

If you wanna print this yourself, you need to make sure that the screw is sideways, so if it breaks it’s no on the layer lines.

Using them in my own prints which had metal screws and they are holding quiet well.

If you wanna print it yourself, the model is here: printables.com/…/1348194-4n-threaded-flat-head-sc…

Design to be a drop in replacement for 10-32 screws with a much, much higher pitch. These screws are extremely easy to print, is reliable enough that it can hold some weight.

If you wanna print this yourself, you need to make sure that the screw is sideways, so if it breaks it’s no on the layer lines.

Using them in my own prints which had metal screws and they are holding quiet well.

0

Can Freecad help me for an assembly?

preview

I have to design several wood boxes who will be bases for acrylic showcase boxes. They have all different sizes but the construction is the same and quite simple. So what I’m looking to do is to design a generic construction with constraints once, and then be able to change a few variables like the boards thickness, the thickness of the acrylic and the width height length of the box and I would get the dimensions of my wood boards to do the cutting.

I never used the assembly workbenches, can they be useful in my cases?

I have to design several wood boxes who will be bases for acrylic showcase boxes. They have all different sizes but the construction is the same and quite simple. So what I’m looking to do is to design a generic construction with constraints once, and then be able to change a few variables like the boards thickness, the thickness of the acrylic and the width height length of the box and I would get the dimensions of my wood boards to do the cutting.

I never used the assembly workbenches, can they be useful in my cases?

0

FreeCAD Appreciation

preview

I would just like to say thanks to all the devs and users giving feedback for making FreeCAD such a great tool.

I’ve been using CAD professionally for 25 years, mainly AutoCAD and Solidworks, but have been a Liinux user at home for about 20. As an engineer I’ve always been looking for a solution for home use, but nothing has ever come close to what I’m looking for. Closest was possibly Onshape, but the public file limitation on the free tier has always rubbed me the wrong way. I would also much rather prefer an FOSS solution.

I’ve tried FreeCAD on and off over the last couple of years, but just couldn’t get the hang of it, until now. It being Easter weekend I had a couple of days off and decided to follow a couple of tutorials on Youtube. Mostly Deltahedra and MangoJelly. It has finally clicked. Yes, it’s different to how I’m used to working, but it works. My biggest pain point is probably assemblies.

There is obviously still some pain points, but compared to even just a year ago it feels like a completely different program.

I’m seriously considering starting a monthly donation to the FreeCAD devs as a way to show my gratitude.

I would just like to say thanks to all the devs and users giving feedback for making FreeCAD such a great tool.

I’ve been using CAD professionally for 25 years, mainly AutoCAD and Solidworks, but have been a Liinux user at home for about 20. As an engineer I’ve always been looking for a solution for home use, but nothing has ever come close to what I’m looking for. Closest was possibly Onshape, but the public file limitation on the free tier has always rubbed me the wrong way. I would also much rather prefer an FOSS solution.

I’ve tried FreeCAD on and off over the last couple of years, but just couldn’t get the hang of it, until now. It being Easter weekend I had a couple of days off and decided to follow a couple of tutorials on Youtube. Mostly Deltahedra and MangoJelly. It has finally clicked. Yes, it’s different to how I’m used to working, but it works. My biggest pain point is probably assemblies.

There is obviously still some pain points, but compared to even just a year ago it feels like a completely different program.

I’m seriously considering starting a monthly donation to the FreeCAD devs as a way to show my gratitude.

0

Getting the hang of the CAM workbench

preview

Finally managed to actually design, CAM, and post process something all with just FreeCAD! Just a simple sign for a library patron. This finished item obviously still has lots of issues but they’re mostly user error and I think I know how to fix them. HUGGGEEE thanks to clsergent for designing a postprocessor for Snapmaker machines, since the company hasn’t bothered to maintain theirs for like years and years lol.

Overall couldn’t be more satisfied, 10/10, FreeCAD is amazing 🔥

Finally managed to actually design, CAM, and post process something all with just FreeCAD! Just a simple sign for a library patron. This finished item obviously still has lots of issues but they’re mostly user error and I think I know how to fix them. HUGGGEEE thanks to clsergent for designing a postprocessor for Snapmaker machines, since the company hasn’t bothered to maintain theirs for like years and years lol.

Overall couldn’t be more satisfied, 10/10, FreeCAD is amazing 🔥

0

Is there a better way to do the kinds of grooves?

preview

I mean those like that, i did this one manually, but it was quite an annoying process, is there any tool in freecad that can help with these situations?

I have equality between all these lines, but it was still not so pleasant

I mean those like that, i did this one manually, but it was quite an annoying process, is there any tool in freecad that can help with these situations?

I have equality between all these lines, but it was still not so pleasant

0

Still pretty new to FreeCAD (and CAD in general), any advice on my design before I 3d print it?

preview

The .stl and .fcstd files are at the link. All the test joints I printed fit together really nicely, but I’m worried the overall design might have issues that I’m too much of an amateur to identify. It’ll need a LOT of filament… Good wooden marudai cost hundreds of dollars, whereas 1500g of my preferred filament is only like $45, but I’d still hate to waste that much of it. The printing itself I’m not too concerned about, it’s easy stuff. Just a little bridging and no support. Of course, that doesn’t necessarily mean the finished/assembled object will be functional. Thanks in advance if you have any tips!

PS: This is also my first use of the spreadsheet function, I usually just rely on named constraints from prior sketches. It’s really neat. FreeCAD rules!

The .stl and .fcstd files are at the link. All the test joints I printed fit together really nicely, but I’m worried the overall design might have issues that I’m too much of an amateur to identify. It’ll need a LOT of filament… Good wooden marudai cost hundreds of dollars, whereas 1500g of my preferred filament is only like $45, but I’d still hate to waste that much of it. The printing itself I’m not too concerned about, it’s easy stuff. Just a little bridging and no support. Of course, that doesn’t necessarily mean the finished/assembled object will be functional. Thanks in advance if you have any tips!

PS: This is also my first use of the spreadsheet function, I usually just rely on named constraints from prior sketches. It’s really neat. FreeCAD rules!

0

Made my first parametric model in freecad!

preview

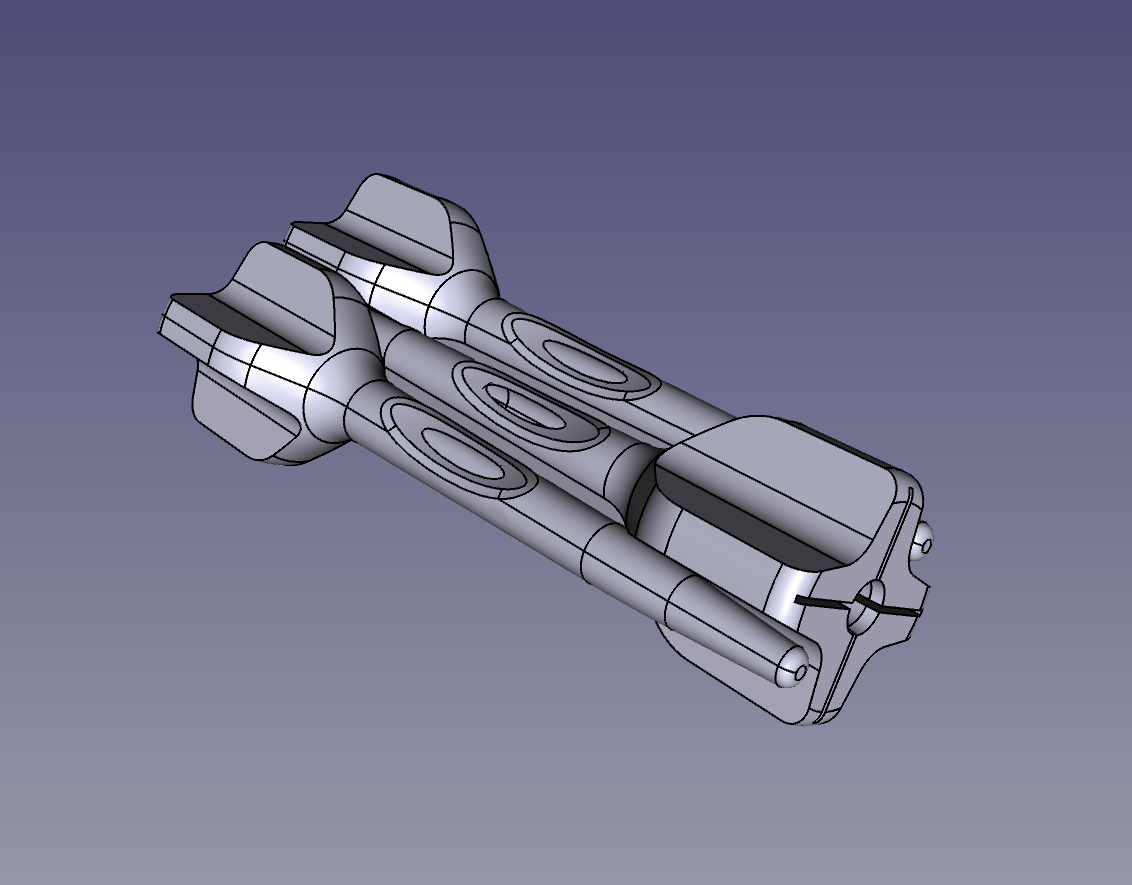
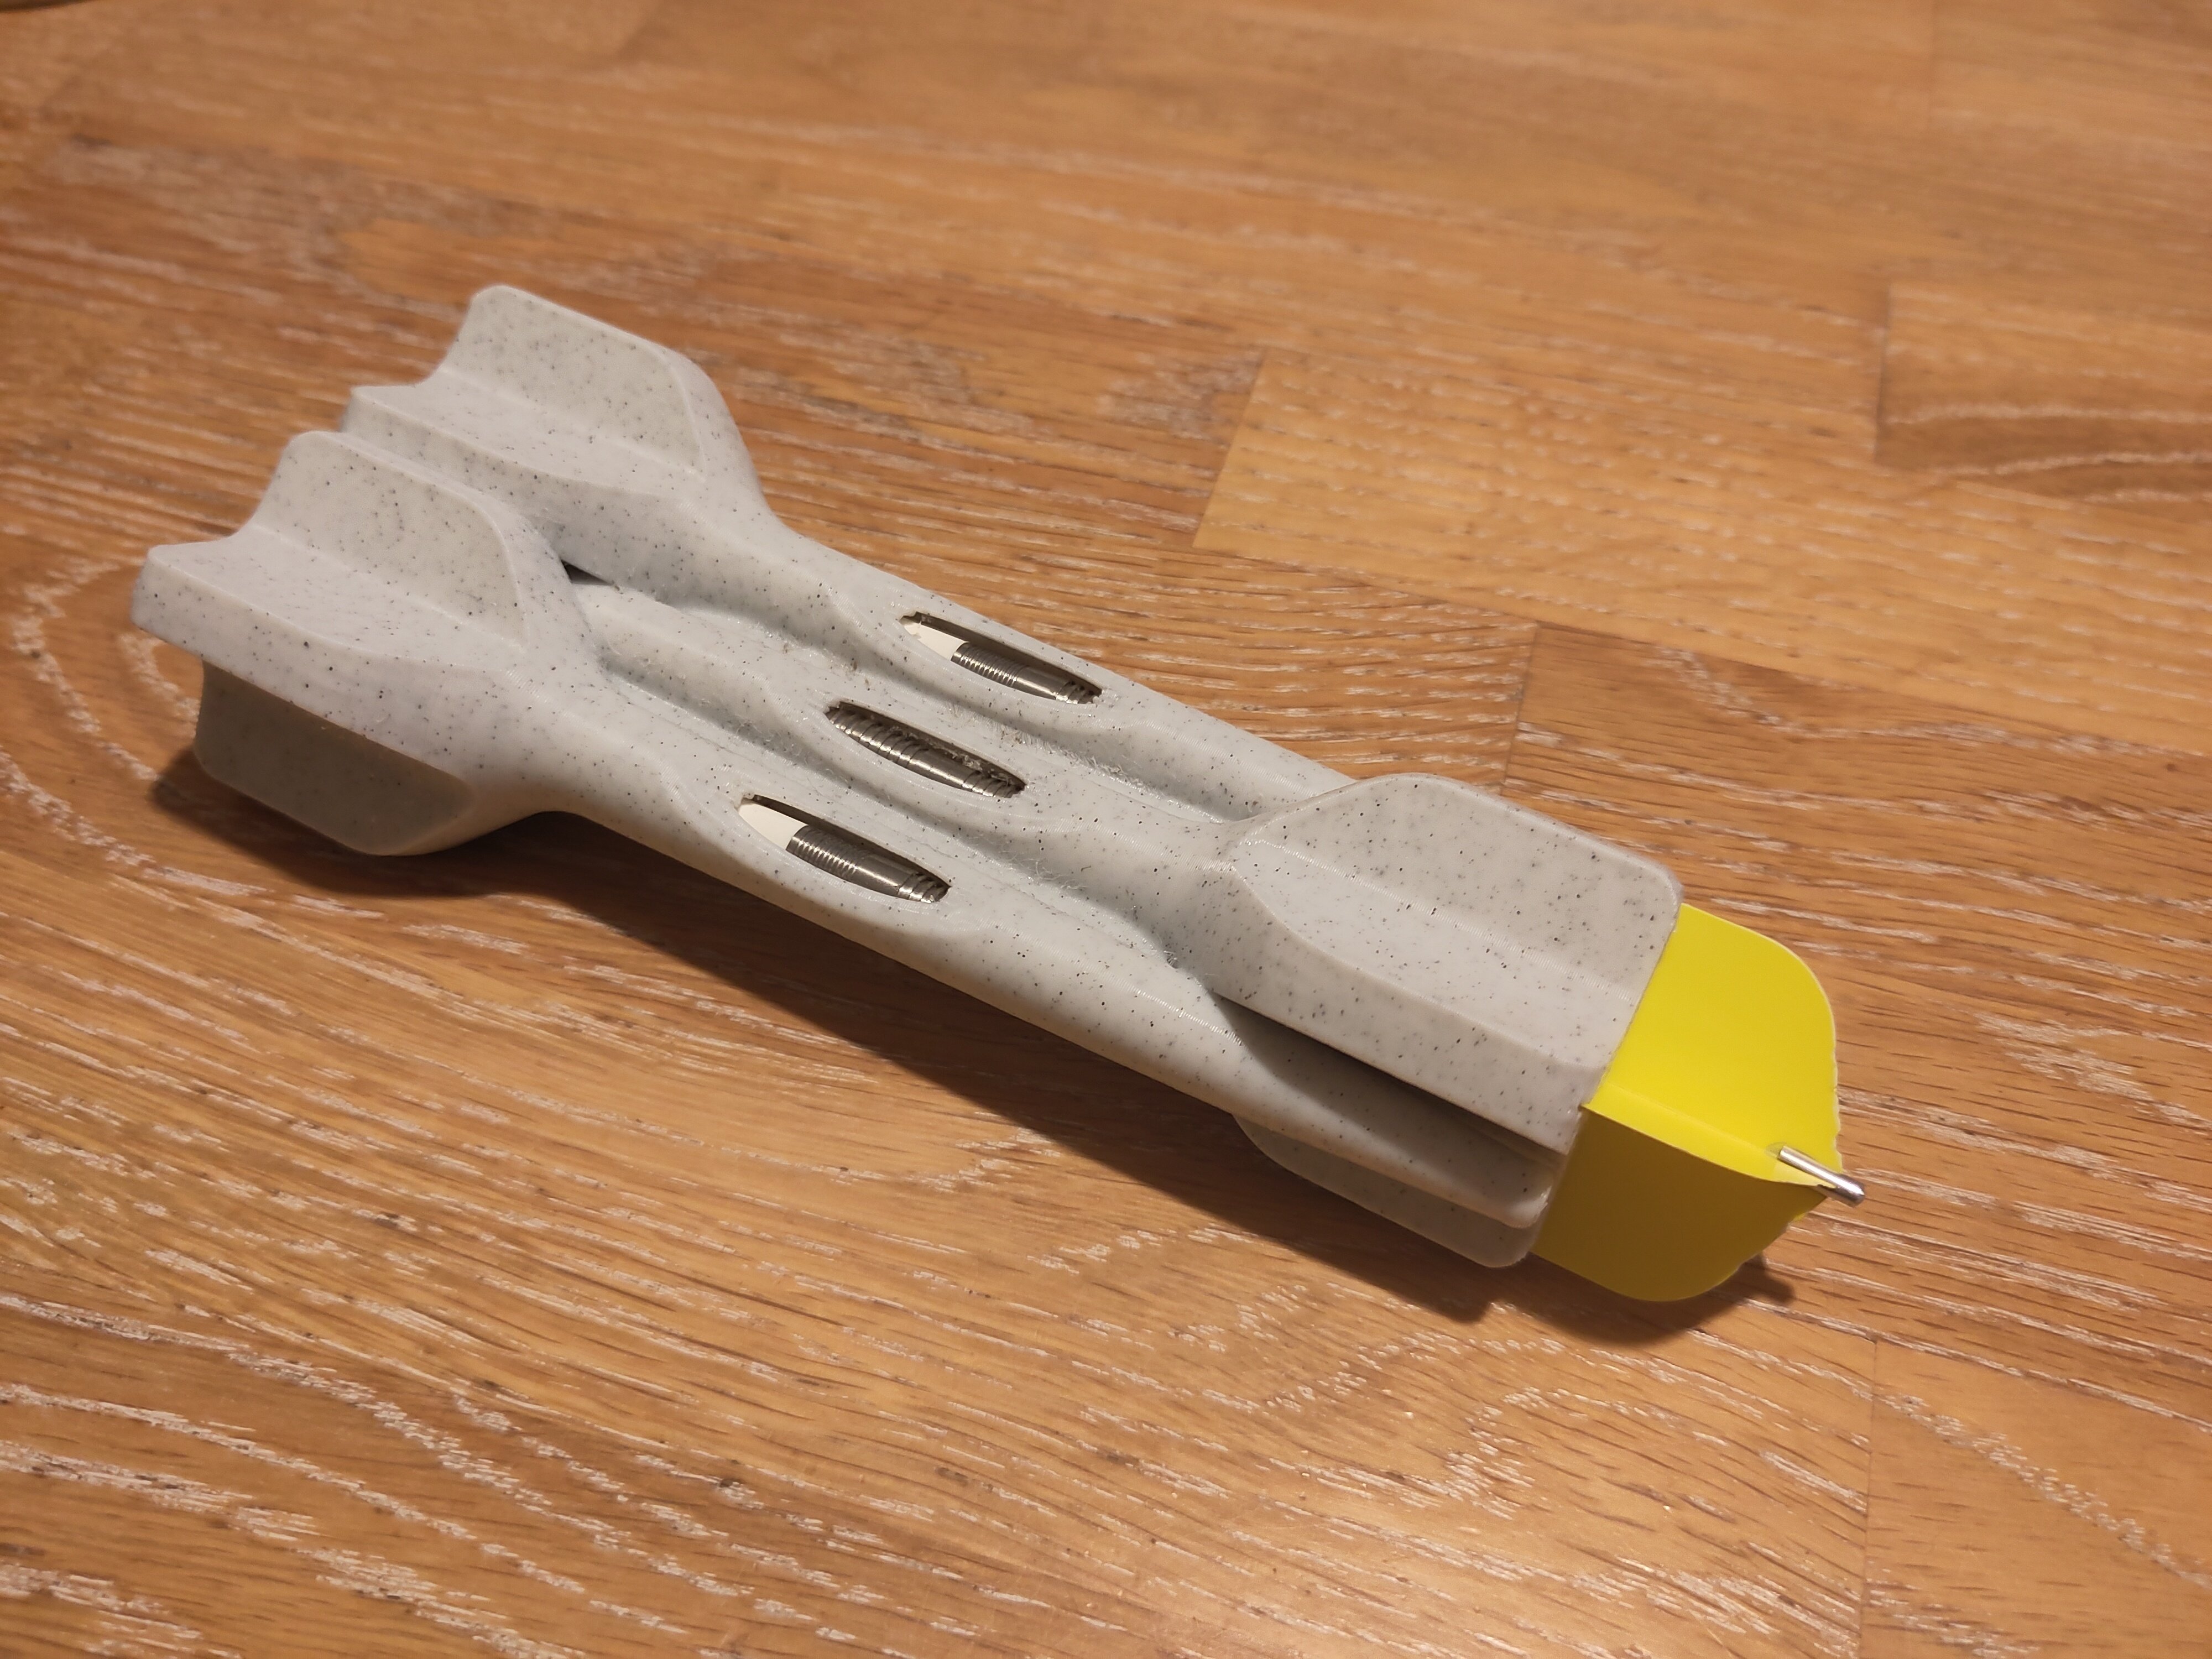
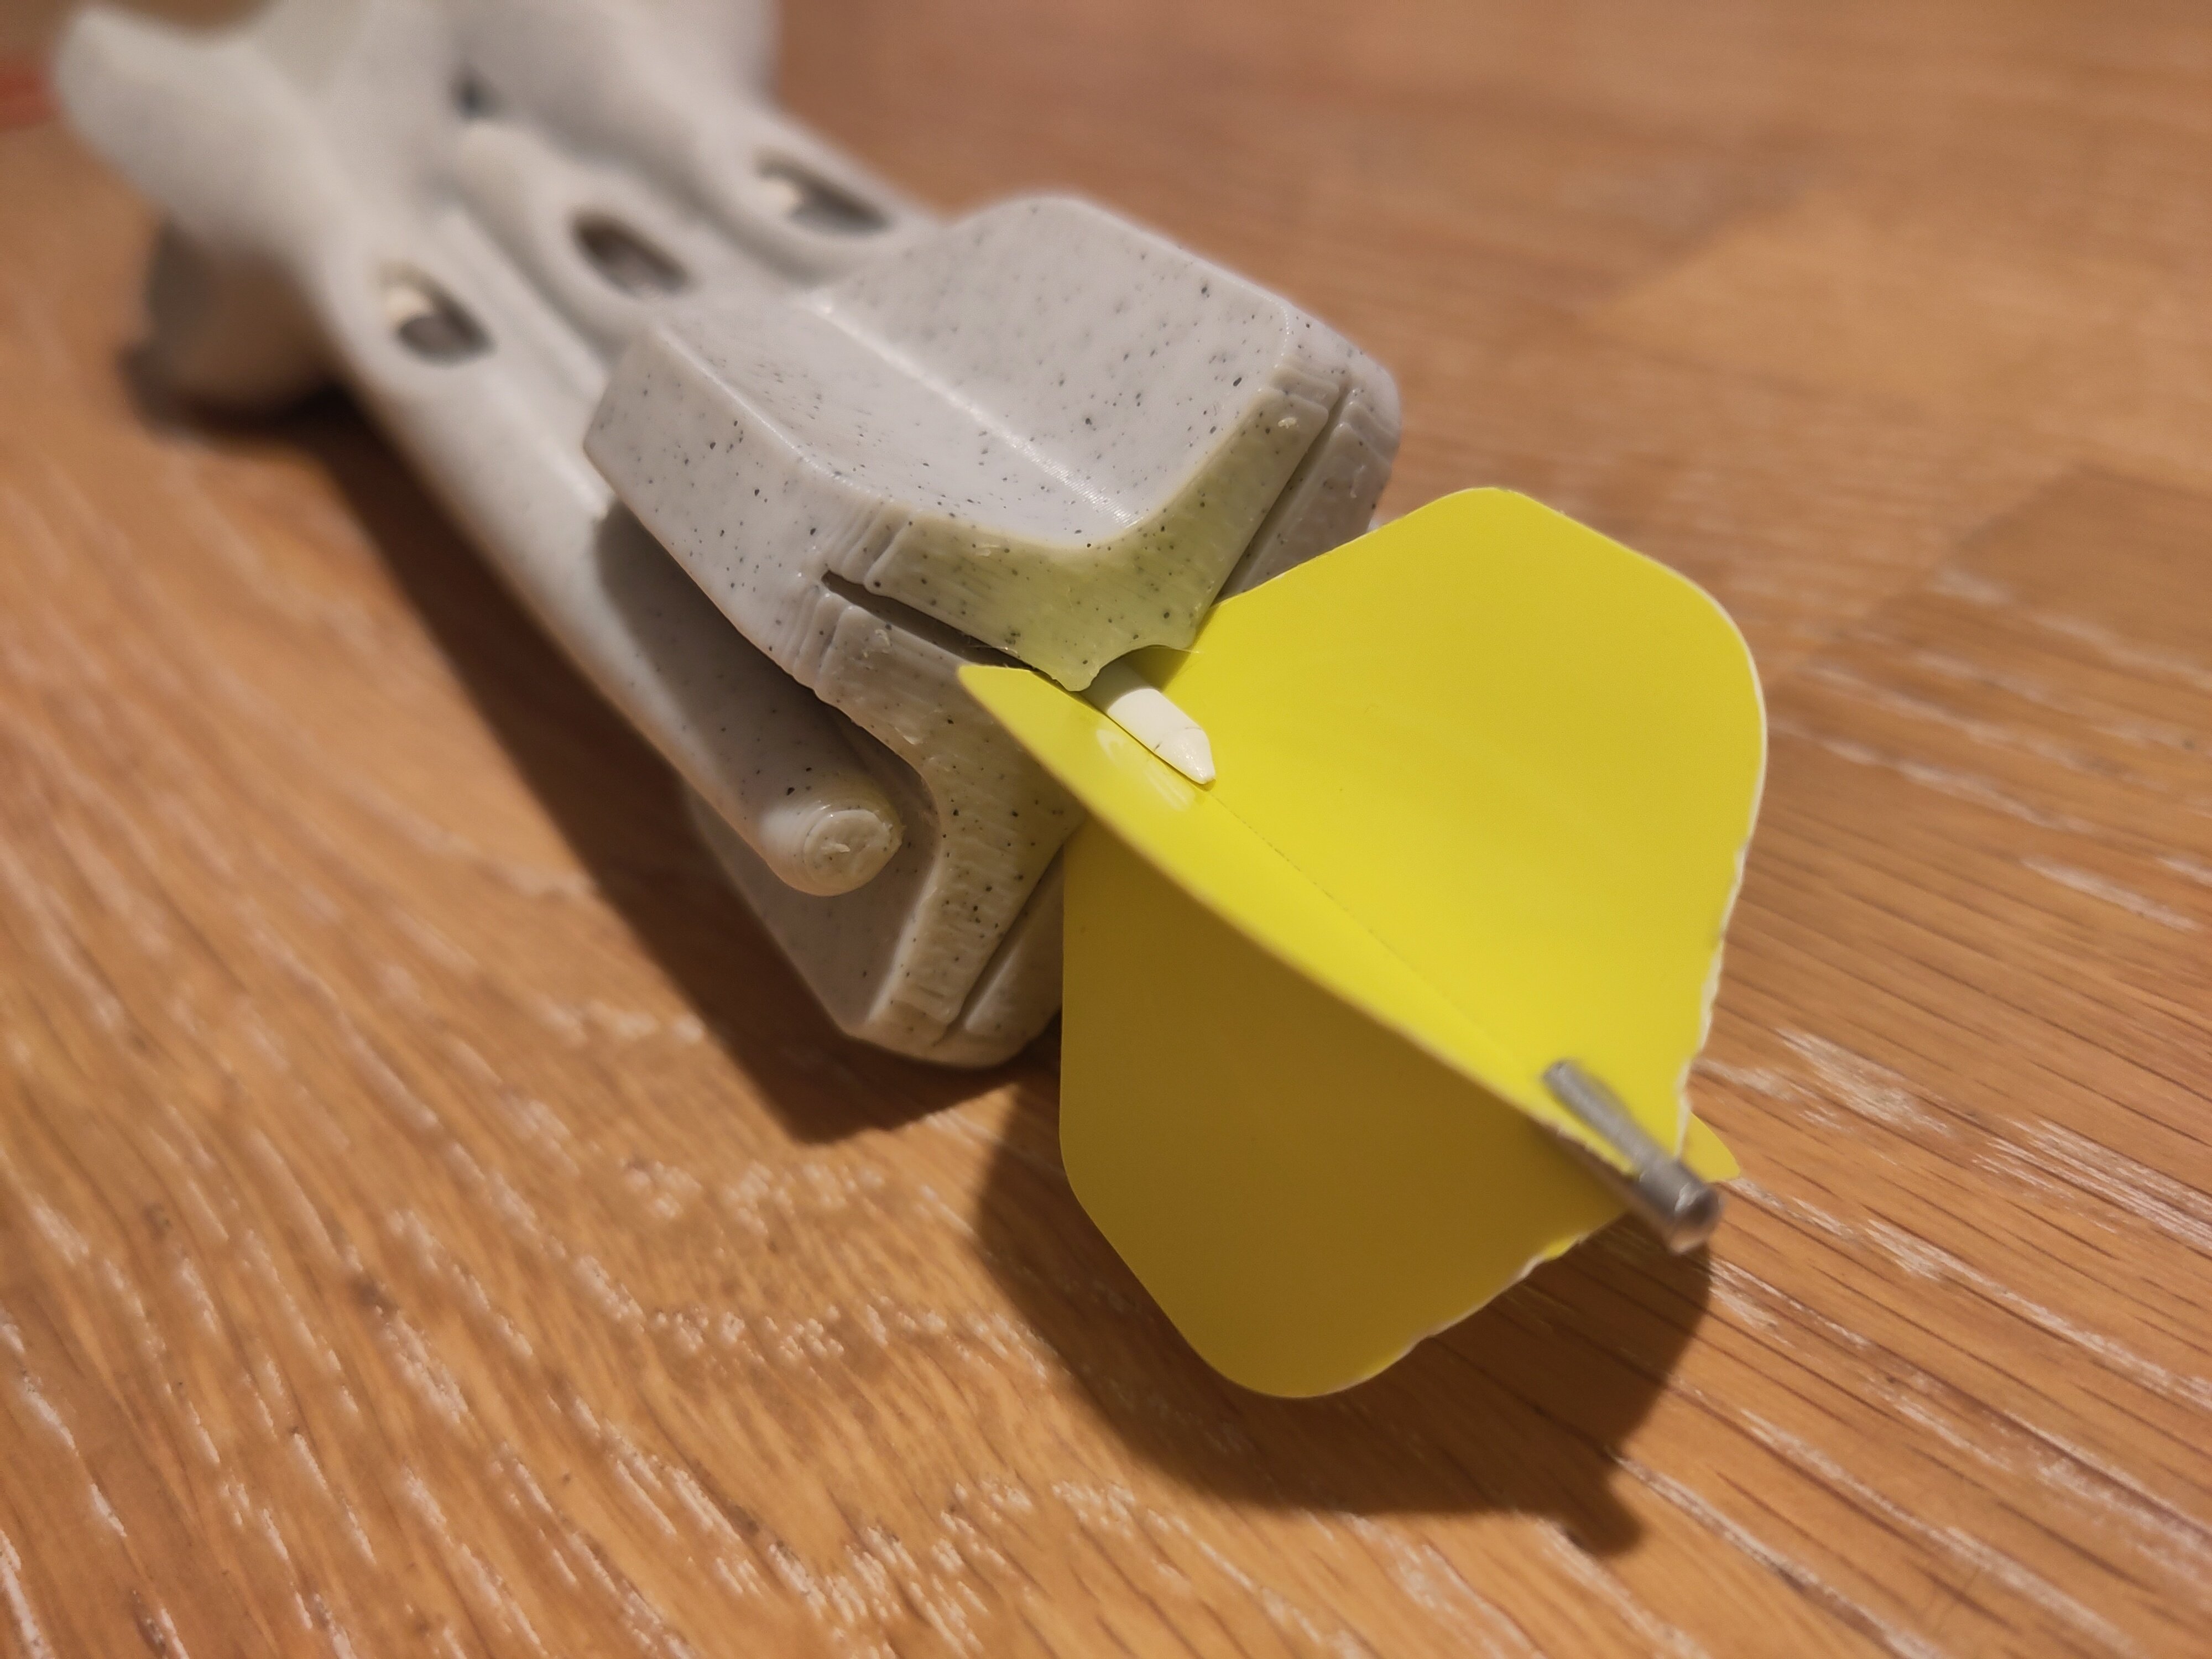
after bashing my head in my table for a bit, i finally managed to make something “salvagable”… i think.

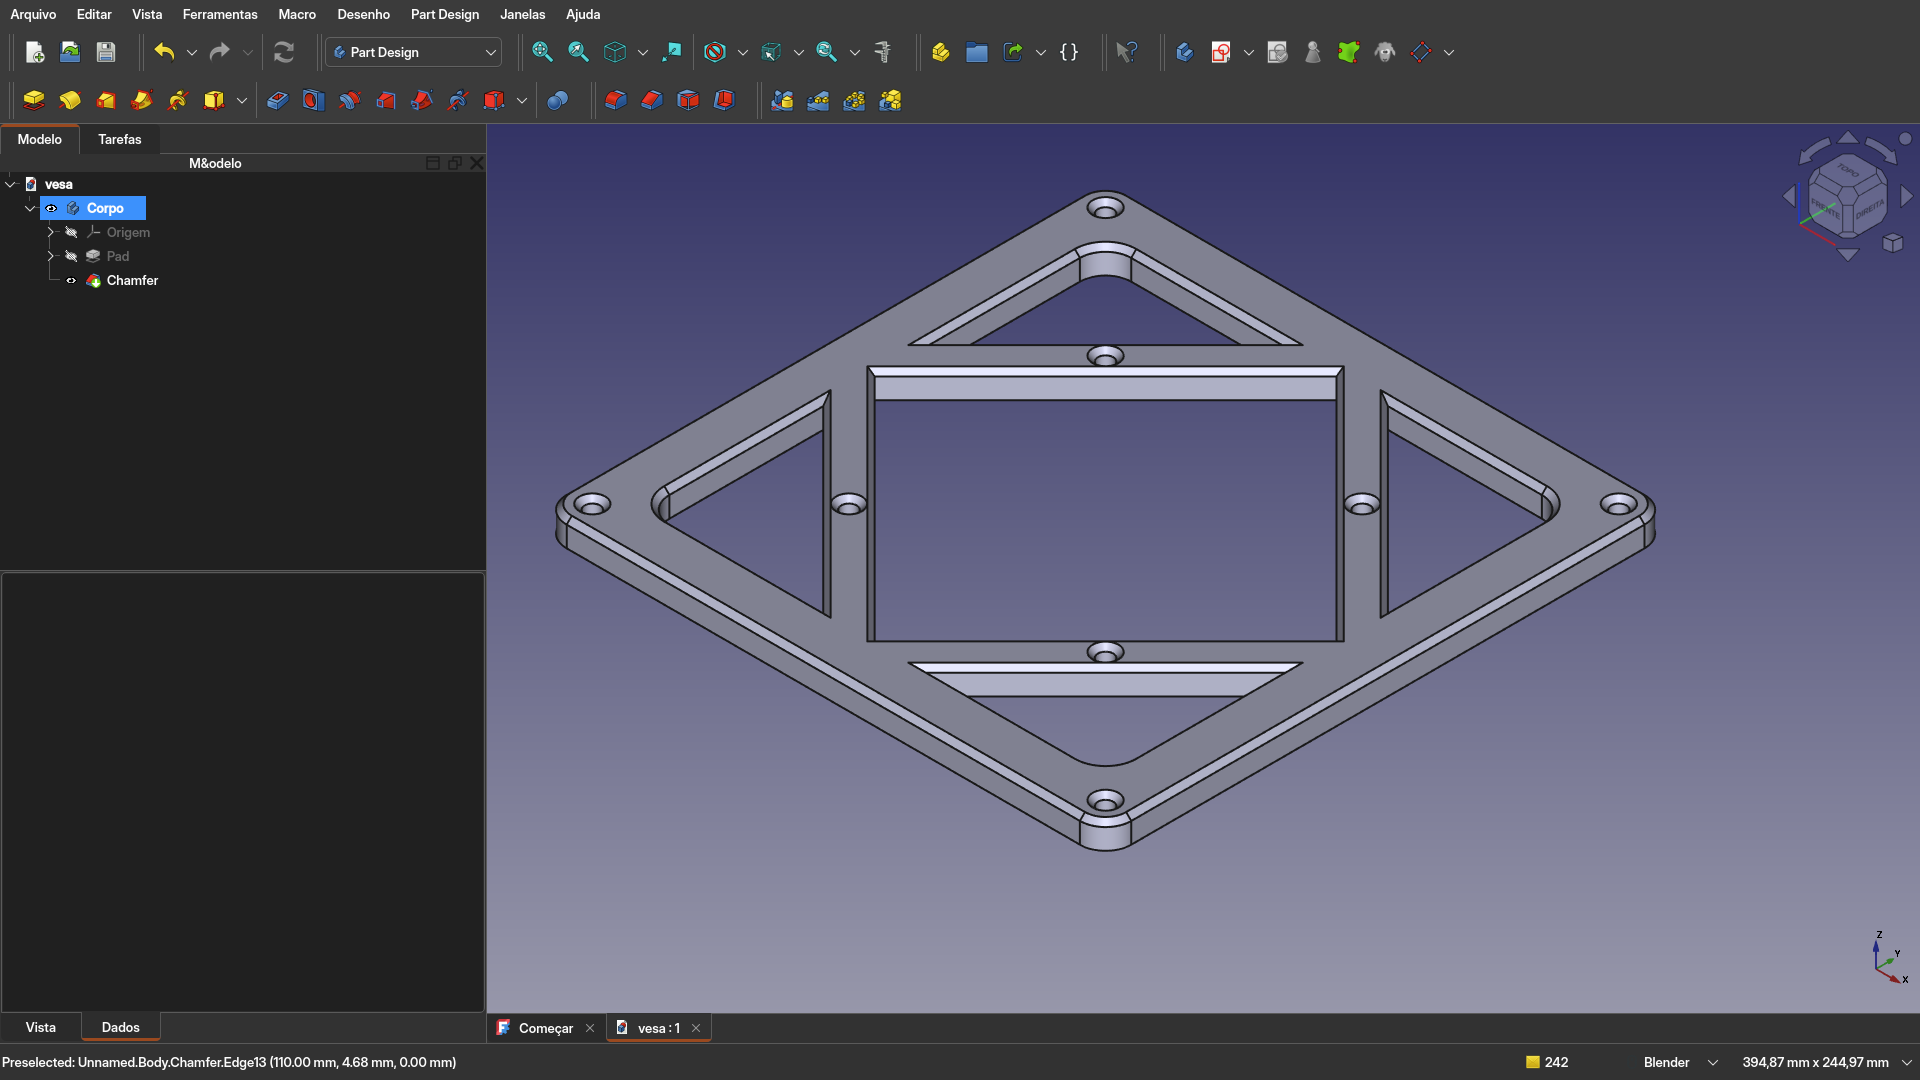
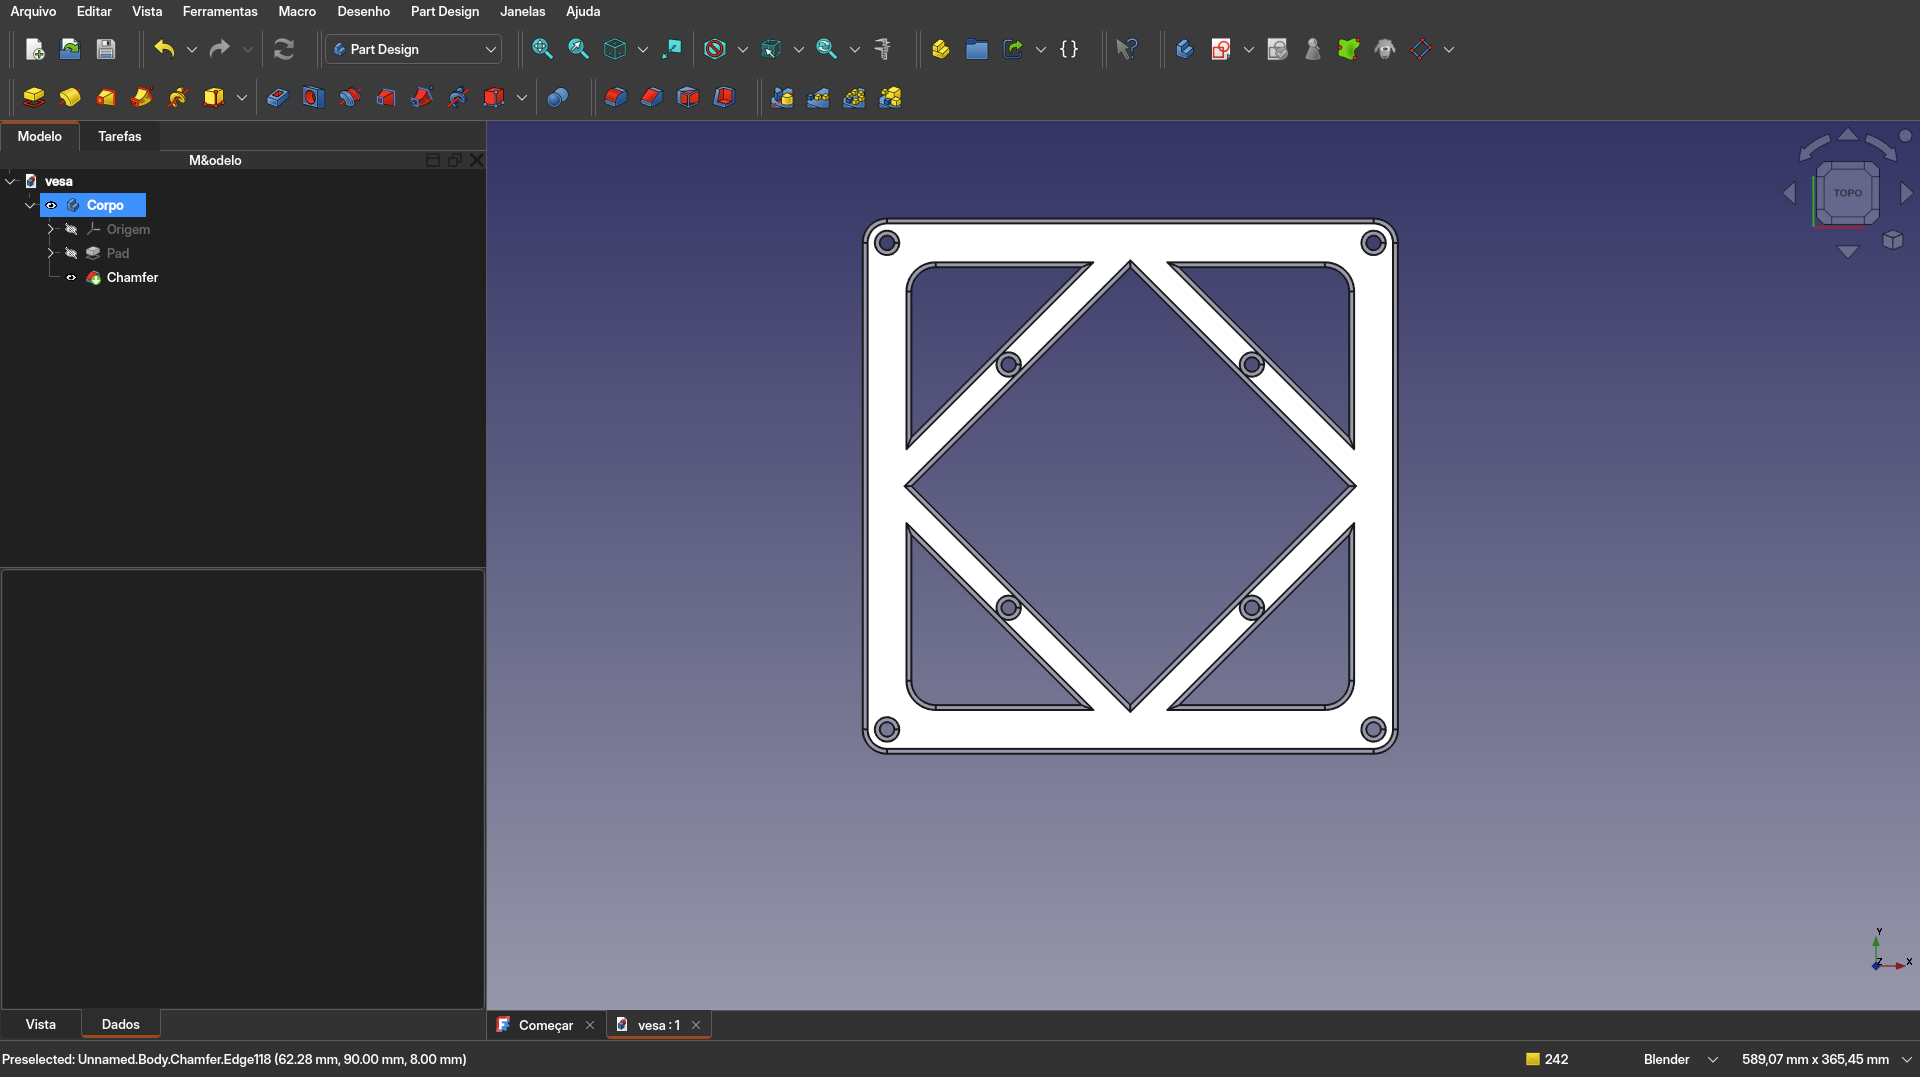
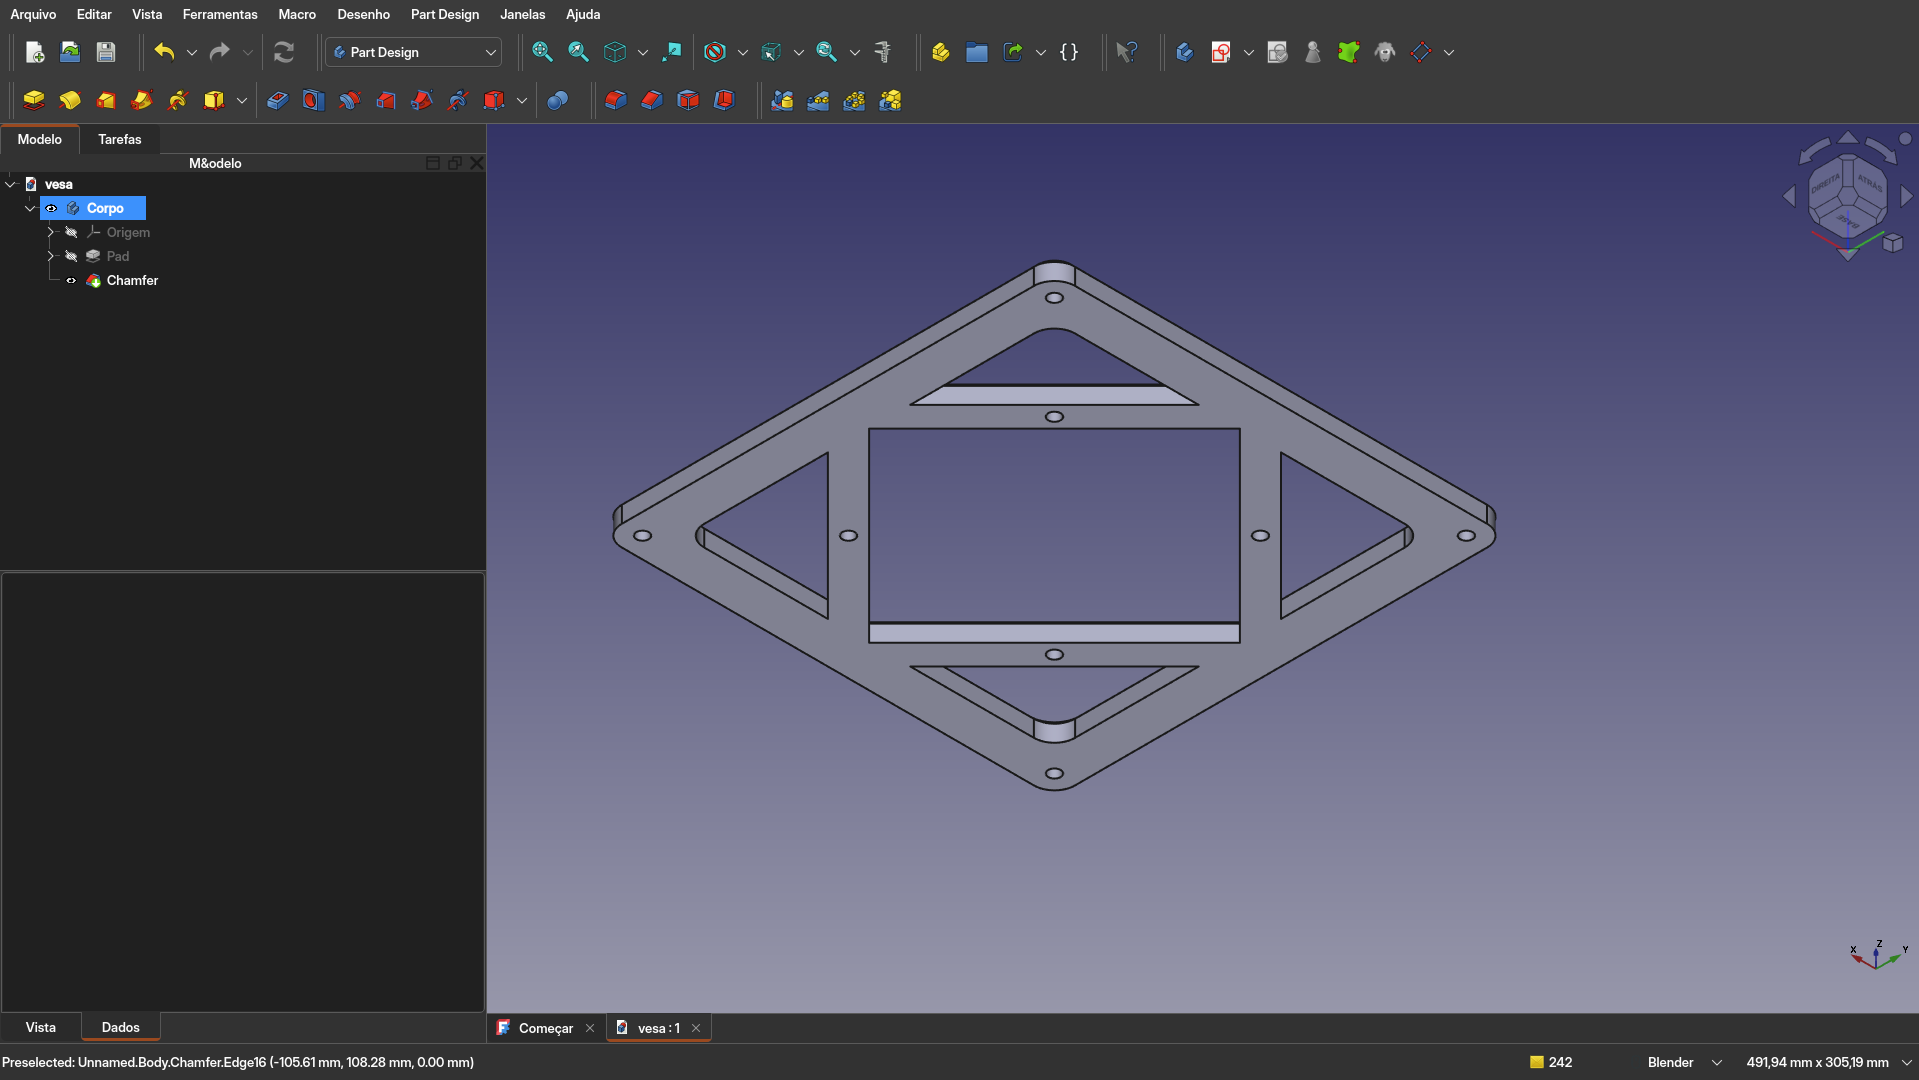
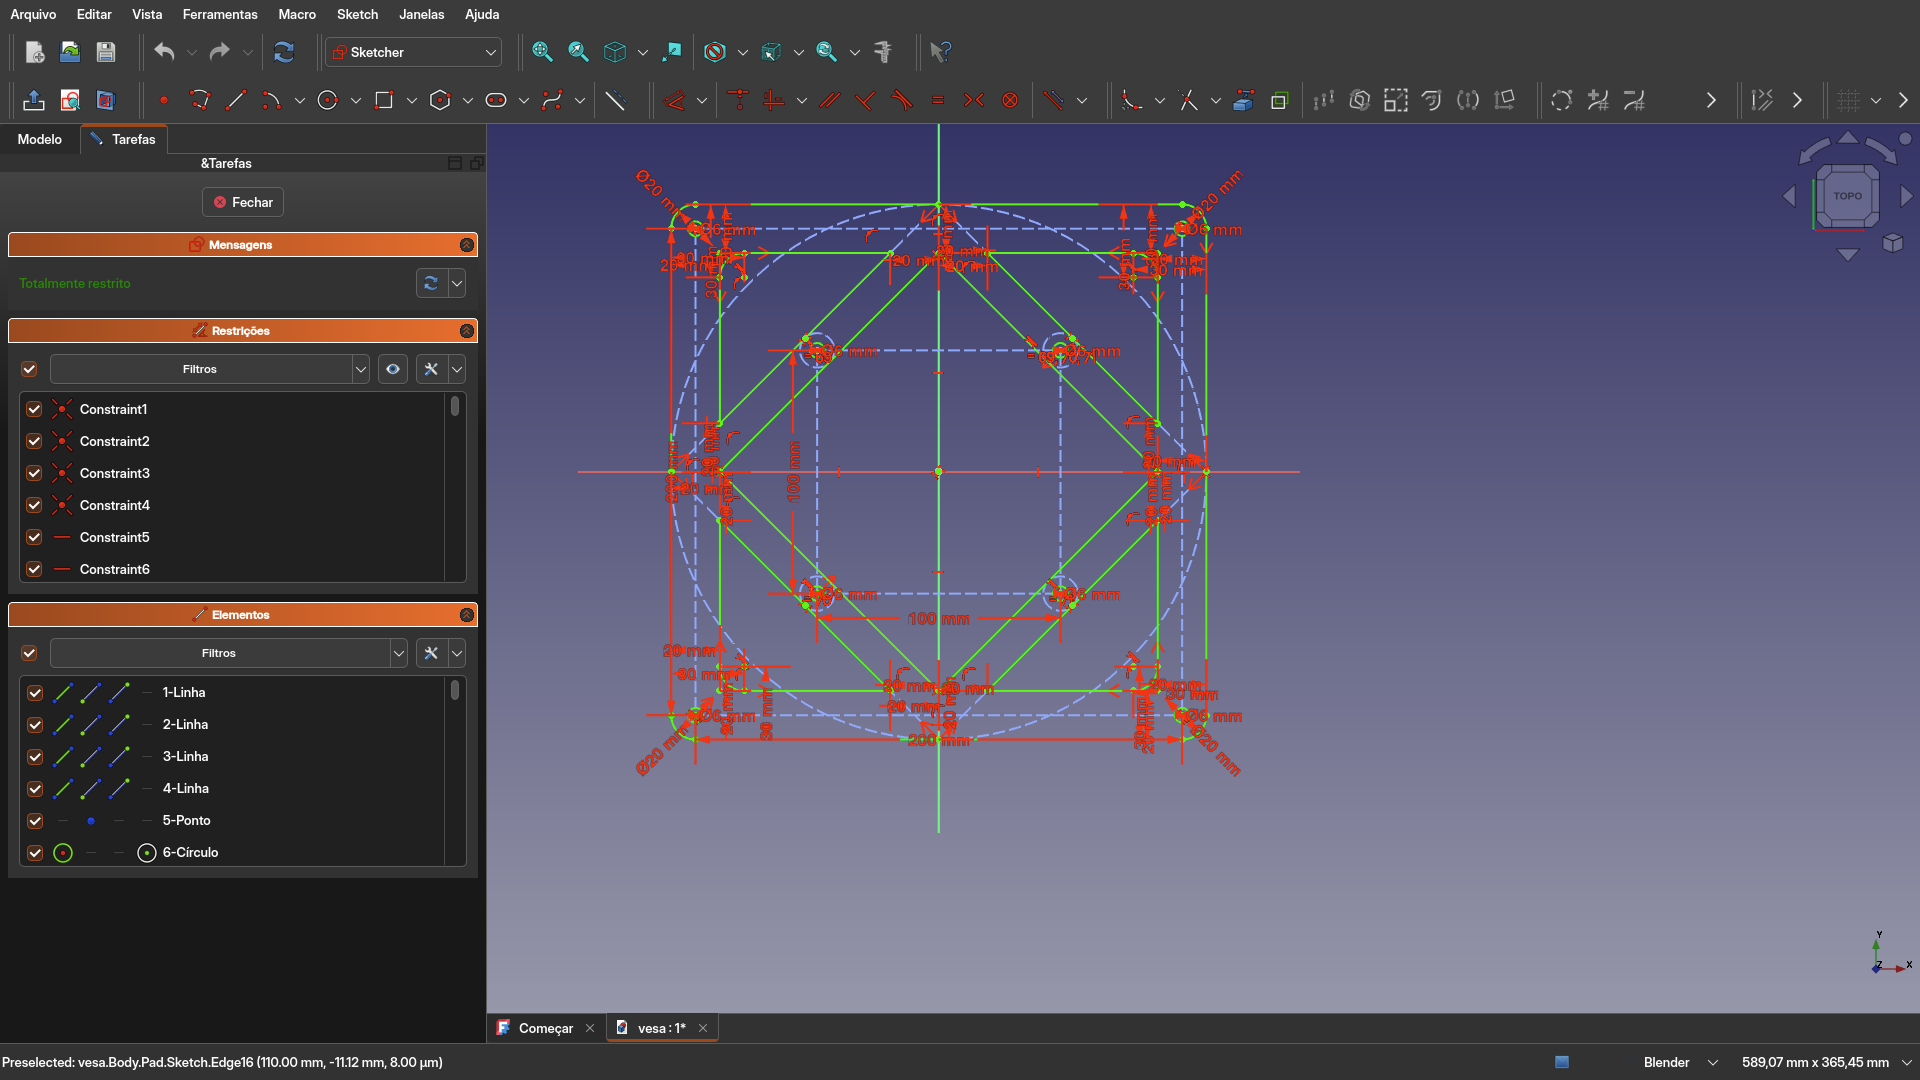
this is meant to be a vesa adapter, from 200mm to 100mm; the idea is that 6mm metal screw-posts are melted into the holes

the sketch is quite a bit of a hellscape… i will see if i can figure out symmetry on the next iteration. Do you have any advice on how i can use better this program? it’s been quite a bit since i haven’t seen such a steep learning curve on a piece of software

after bashing my head in my table for a bit, i finally managed to make something “salvagable”… i think.

this is meant to be a vesa adapter, from 200mm to 100mm; the idea is that 6mm metal screw-posts are melted into the holes

the sketch is quite a bit of a hellscape… i will see if i can figure out symmetry on the next iteration. Do you have any advice on how i can use better this program? it’s been quite a bit since i haven’t seen such a steep learning curve on a piece of software

0

Finally tried my hand at FreeCAD RC2... what an improvement

preview

I’ve tried the dev branch of FreeCAD for a while now, but backed off due to how unpolished it felt. But when I saw FreeCAD V1 RC2 pre-release on GitHub Id thought to try it out.

My first impressions didn’t blow me away, sure there were nice UI touches here and there. But nothing really stood out to me. But that changed when I started cading.

It’s not a major overhaul to my eyes. But the nice touches are everywhere. Like adding a TinkerCAD navigation controls option for beginners, and smart snapping and auto constraints enabled by default. So, so nice especially for noobs who don’t know that >.< is a centre constraint in the tool bar.

But I had a quick project, tonight. Redesign an older model from scratch to add in new parts. My original designs were some of the first real work I did in FreeCAD so it was nice to see the improvements. Out side of legacy bugs like attaching a 3 point arc to a line still being present, the process was smooth, not as pain free as Fusion, but better.

Then at the end when I was adding text to my part. I got to see the best update of them all. If you aren’t aware, adding text to a model is annoying. Especially if you want it a distance from a side or in the middle. You needed to use the measuring tool to get deltas and re measure after every change. I was using the new measuring tool like that too, and thank you devs for adding manual controls and deltas. But at the end, I left the measurements on the text, updated the values, and noticed the numbers updated on me… OMG best feature of all time 10/10 best CAD software in the world. This makes my life soooooo much easier now.

If you haven’t already try the RC versions of FreeCAD do so. Sure there is still some open source jank in it, but it’s so much more polished than before that I feel this upcoming release deserves the V1 moniker.

I’ve tried the dev branch of FreeCAD for a while now, but backed off due to how unpolished it felt. But when I saw FreeCAD V1 RC2 pre-release on GitHub Id thought to try it out.

My first impressions didn’t blow me away, sure there were nice UI touches here and there. But nothing really stood out to me. But that changed when I started cading.

It’s not a major overhaul to my eyes. But the nice touches are everywhere. Like adding a TinkerCAD navigation controls option for beginners, and smart snapping and auto constraints enabled by default. So, so nice especially for noobs who don’t know that >.< is a centre constraint in the tool bar.

But I had a quick project, tonight. Redesign an older model from scratch to add in new parts. My original designs were some of the first real work I did in FreeCAD so it was nice to see the improvements. Out side of legacy bugs like attaching a 3 point arc to a line still being present, the process was smooth, not as pain free as Fusion, but better.

Then at the end when I was adding text to my part. I got to see the best update of them all. If you aren’t aware, adding text to a model is annoying. Especially if you want it a distance from a side or in the middle. You needed to use the measuring tool to get deltas and re measure after every change. I was using the new measuring tool like that too, and thank you devs for adding manual controls and deltas. But at the end, I left the measurements on the text, updated the values, and noticed the numbers updated on me… OMG best feature of all time 10/10 best CAD software in the world. This makes my life soooooo much easier now.

If you haven’t already try the RC versions of FreeCAD do so. Sure there is still some open source jank in it, but it’s so much more polished than before that I feel this upcoming release deserves the V1 moniker.

0

Case for dew-point ventilator

preview

I’m designing a case for a dew-point ventilator controller to be 3d printed. The controller is implemented using arduino on an esp32. The project is based off of the code and HW implementation by Make Magazine Germany: github.com/MakeMagazinDE/Taupunktluefter. When starting out I was thinking this would be an easy project but it turned out that especially the lid with its lip and groove design and the parts fixations were not that easy. I’m excited to finally print it.

The file is parametric to some extent and the main footprint is based off of a master sketch. Many parts were imported as step files from grabcad. I used FreeCAD 1.0-rc1 which works like a charm for many things. Next thing I would like to do is to use the new assembly workbench. What do you think?

Manual “Exploded view”,

Opaque view.

I’m designing a case for a dew-point ventilator controller to be 3d printed. The controller is implemented using arduino on an esp32. The project is based off of the code and HW implementation by Make Magazine Germany: github.com/MakeMagazinDE/Taupunktluefter. When starting out I was thinking this would be an easy project but it turned out that especially the lid with its lip and groove design and the parts fixations were not that easy. I’m excited to finally print it.

The file is parametric to some extent and the main footprint is based off of a master sketch. Many parts were imported as step files from grabcad. I used FreeCAD 1.0-rc1 which works like a charm for many things. Next thing I would like to do is to use the new assembly workbench. What do you think?

Manual “Exploded view”,

Opaque view.

0

Anyone here ever tried to make material patterns for textiles using FreeCAD or other FOSS tools?

preview

I was thinking about trying some sewing for headphone covers and a strap. I can easily disassemble the existing materials and reverse engineer them. I would rather try to learn parametric iterative design of textiles and alter the fit of the pads based on a pattern. Anyone have any experience with this application?

I was thinking about trying some sewing for headphone covers and a strap. I can easily disassemble the existing materials and reverse engineer them. I would rather try to learn parametric iterative design of textiles and alter the fit of the pads based on a pattern. Anyone have any experience with this application?

0

[SOLVED] Why is FreeCAD symmetry-stupid?

preview

Maybe there’s something I don’t understand here. I’d love it if someone told me how to do the following.

Let’s say I have some really complex shape in a sketch left of the Y axis: it takes me forever to get it just right. Then I need to mirror it on the right side of the Y axis and connect the two halves.

In SolidWorks, it’s trivial: mirror the stuff, done. If you change the master shape on the left, the change is reflected on the right.

In FreeCAD, the best you can do is make a mirror copy of the left-hand side elements - which also makes copies of the constraints which are completely independent from the original constraints on the left-hand side - delete the stupid new right-hand side constraints and slowly, painfully constrain the right-hand side copies to the original left-hand side elements, trying to dodge the dreaded orange over-constraints all the time. It’s long, it’s painful, and the end-result is usually so fragile that if you change anything significant on the left-hand side, the sketch turns orange and then it’s back to hunting broken constraints again.

Surely it can’t be that painful. Am I missing something obvious?

Maybe there’s something I don’t understand here. I’d love it if someone told me how to do the following.

Let’s say I have some really complex shape in a sketch left of the Y axis: it takes me forever to get it just right. Then I need to mirror it on the right side of the Y axis and connect the two halves.

In SolidWorks, it’s trivial: mirror the stuff, done. If you change the master shape on the left, the change is reflected on the right.

In FreeCAD, the best you can do is make a mirror copy of the left-hand side elements - which also makes copies of the constraints which are completely independent from the original constraints on the left-hand side - delete the stupid new right-hand side constraints and slowly, painfully constrain the right-hand side copies to the original left-hand side elements, trying to dodge the dreaded orange over-constraints all the time. It’s long, it’s painful, and the end-result is usually so fragile that if you change anything significant on the left-hand side, the sketch turns orange and then it’s back to hunting broken constraints again.

Surely it can’t be that painful. Am I missing something obvious?

0

Made a wallpaper based off of my FreeCAD Designs

preview

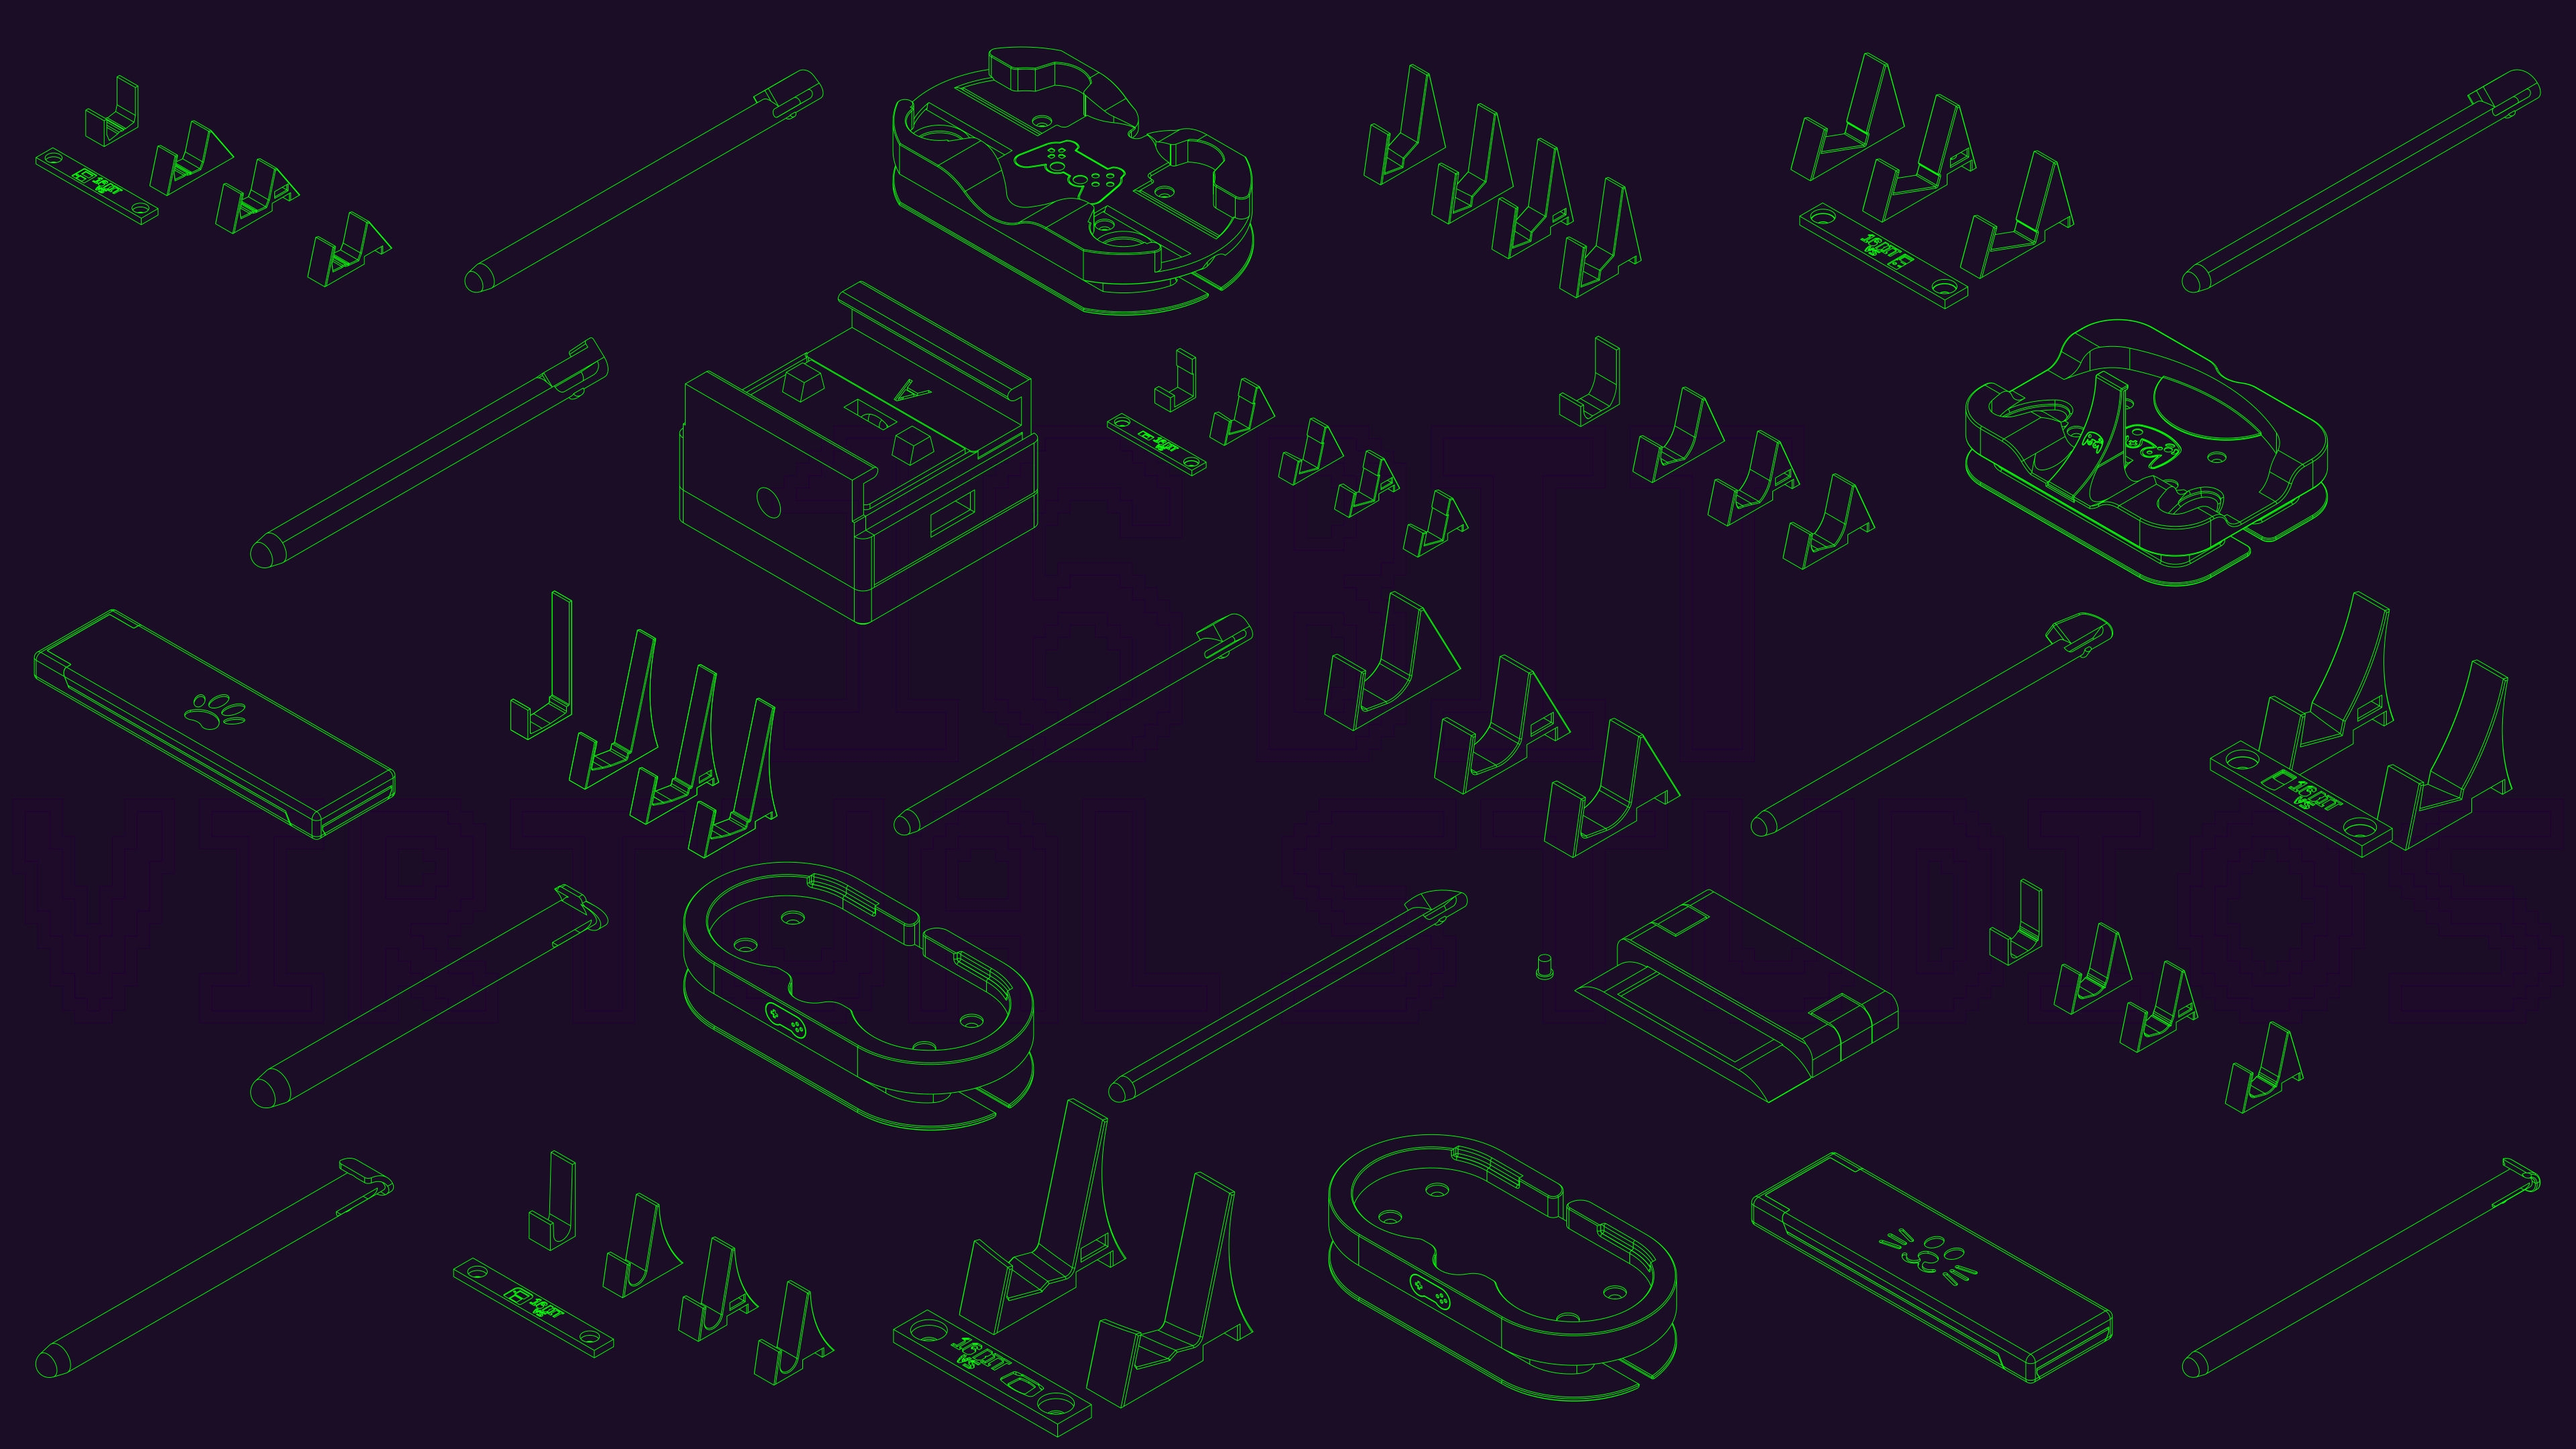
Thank you FreeCAD for not pay walling the ability to create technical drawings.

So what I did to make this was to create a technical drawing of all the designs I wanted and I made this photo in Inkscape.

Was designed to be a banner for my social media, but loved it so much that I’m just using it as my desktop wallpaper.

Thank you FreeCAD for not pay walling the ability to create technical drawings.

So what I did to make this was to create a technical drawing of all the designs I wanted and I made this photo in Inkscape.

Was designed to be a banner for my social media, but loved it so much that I’m just using it as my desktop wallpaper.

0

Rectangular selection in the sketcher in the way of 3D navigation

preview

Hey everybody,

After a few months without using FreeCAD (but keeping up with the daily updates) I need to model a quick something today.

And I realize there seems to be a new feature in the 0.22.0-dev version that prevents me from orbiting around the model when I’m in the sketcher:

I use OpenSCAD-style 3D navigation, which means I left-click to rotate the model. In the sketcher, left-clicking is used to do a rectangular lasso selection, and that prevents me from orbiting around the model. I tried with shift, ctrl, alt and all combinations thereof, but there seems to be no way to disable that selection feature.

Fortunately I also use a 3DConnexion Spacemouse, so I’m not completely stuck, but it’s kind of annoying to have to use that thing when I’d rather not move my hand away from the keyboard.

Anybody knows how to disable the lasso thing?

Hey everybody,

After a few months without using FreeCAD (but keeping up with the daily updates) I need to model a quick something today.

And I realize there seems to be a new feature in the 0.22.0-dev version that prevents me from orbiting around the model when I’m in the sketcher:

I use OpenSCAD-style 3D navigation, which means I left-click to rotate the model. In the sketcher, left-clicking is used to do a rectangular lasso selection, and that prevents me from orbiting around the model. I tried with shift, ctrl, alt and all combinations thereof, but there seems to be no way to disable that selection feature.

Fortunately I also use a 3DConnexion Spacemouse, so I’m not completely stuck, but it’s kind of annoying to have to use that thing when I’d rather not move my hand away from the keyboard.

Anybody knows how to disable the lasso thing?

0

[question] why I can´t loft?

preview

I’m working on a tray drawer (for the curious, it’s for the Tesla Model Y front center box). Using FreeCad 0.22 dev, the model will be 3D printed.

With your help I could made it how I wanted. However as I’m a beginner with FreeCad, there’s a lot of ugly things. So I wanted to work on this new iteration and clean it up as much as possible, mainly to learn the software.

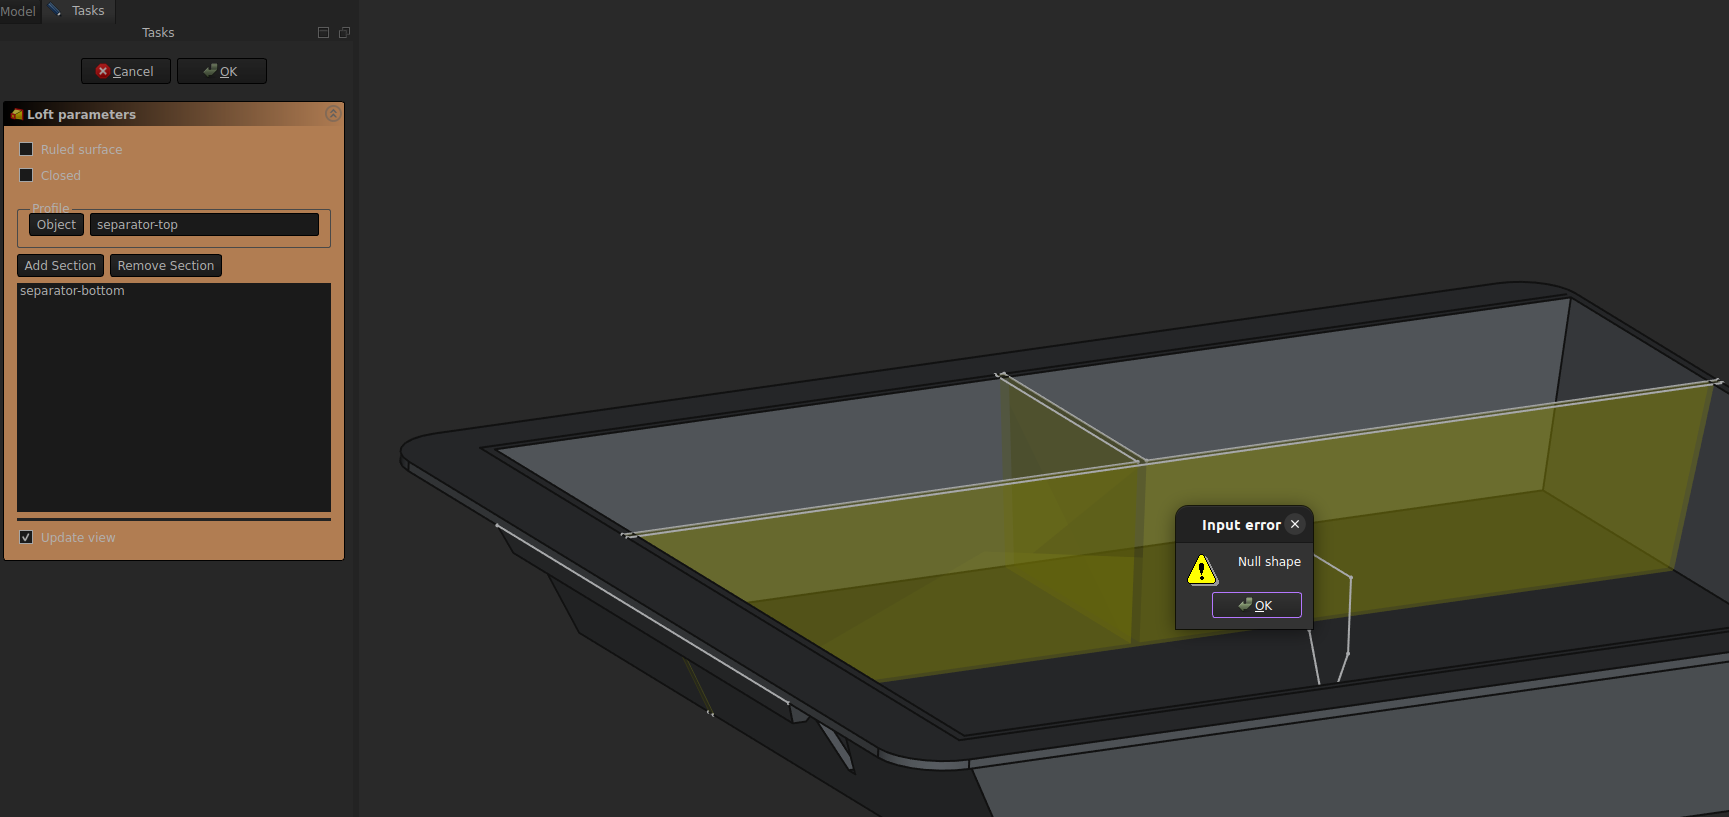
I have 1 major problem: I can’t make a loft between my to sketches to create the separators. And I don’t understand why.

Another point I do not fully understand is the construction lines. Should I use the External Reference or a Carbon Copy ? I don’t really like the carbon copy as there’s to much things displayed and sometimes I’m lost and don’t see my original sketch anymore. For example, my bottom separator sketch must be linked somehow to my bottom box sketch, so if I change the position of the bottom of the box, the separator will adjust automatically.

Here’s an image of how the model should look (my previous iteration) imgur.com/a/H8on1MZ

and here’s he file I’m currently working on. license CC0 1.0 (you can do whatever you want with it) drive.google.com/file/d/…/view?usp=sharing

I’m working on a tray drawer (for the curious, it’s for the Tesla Model Y front center box). Using FreeCad 0.22 dev, the model will be 3D printed.

With your help I could made it how I wanted. However as I’m a beginner with FreeCad, there’s a lot of ugly things. So I wanted to work on this new iteration and clean it up as much as possible, mainly to learn the software.

I have 1 major problem: I can’t make a loft between my to sketches to create the separators. And I don’t understand why.

Another point I do not fully understand is the construction lines. Should I use the External Reference or a Carbon Copy ? I don’t really like the carbon copy as there’s to much things displayed and sometimes I’m lost and don’t see my original sketch anymore. For example, my bottom separator sketch must be linked somehow to my bottom box sketch, so if I change the position of the bottom of the box, the separator will adjust automatically.

Here’s an image of how the model should look (my previous iteration) imgur.com/a/H8on1MZ

and here’s he file I’m currently working on. license CC0 1.0 (you can do whatever you want with it) drive.google.com/file/d/…/view?usp=sharing

0

How would you make this tray?

preview

I’m new to freecad, so far I made it this way :

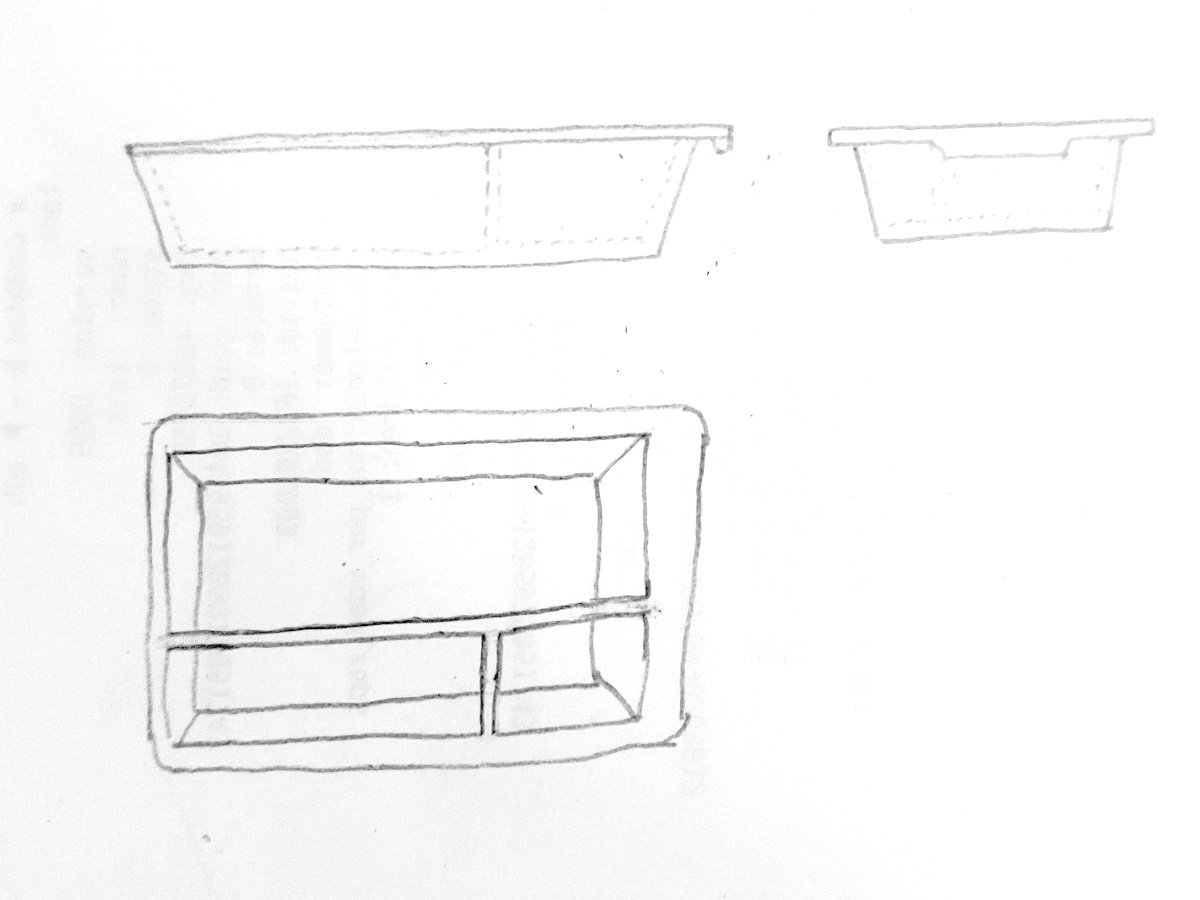
Sketch a rectangle for the top surface, pad it, add filets for the corners. Then select to bottom face, make a new sketch, another rectangle, then a datum plane 40mm below, sketch another smaller rectangle, and make a loft between the two to create the bottom of the tray.

Now for the hole I made a rectangle on the top face and made a pocket with an angle.

Downside of this, the thickness of the walls is not equal. Ideally I’d like a 1.5mm thickness everywhere. And I’m not really sure how to proceed to make the separators inside the tray.

What is the most efficient way to do it? thanks

I’m new to freecad, so far I made it this way :

Sketch a rectangle for the top surface, pad it, add filets for the corners. Then select to bottom face, make a new sketch, another rectangle, then a datum plane 40mm below, sketch another smaller rectangle, and make a loft between the two to create the bottom of the tray.

Now for the hole I made a rectangle on the top face and made a pocket with an angle.

Downside of this, the thickness of the walls is not equal. Ideally I’d like a 1.5mm thickness everywhere. And I’m not really sure how to proceed to make the separators inside the tray.

What is the most efficient way to do it? thanks

0

Solidworks newbie to FreeCAD

preview

Hey, I’ve just finished my diploma of mech eng and them and my new workplace use largely solidworks. Solidworks might have the most annoying subscription service integration I’ve ever seen, but also I’ve clicked with its interface.

Any guides or tips for switching over?

Hey, I’ve just finished my diploma of mech eng and them and my new workplace use largely solidworks. Solidworks might have the most annoying subscription service integration I’ve ever seen, but also I’ve clicked with its interface.

Any guides or tips for switching over?

0

Just an early stage of modeling a sunglasses arm frame

preview

I got sent a bunch of lenses that are too small for the old frames I have. I thought it might be fun to try 3d printing my own frame arms out of ABS.

Modeling a lens is a bit challenging, or I’m just a bit rusty with freecad. I need a way to wrap/unwrap/flatten the curve to create the contours. For my purpose here I can get away with a rough lens shape that is simply mirrored and lacks some of the complex curves. It just bugs me when I can’t model it properly…

The lens is not uniform thickness. The center is 1.8mm thick while the edges where the arms mount are 1.4mm. I want to try and make a nose piece because this is the one part that fails on these cheap glasses.

Anyways, sharing just because I can.

I got sent a bunch of lenses that are too small for the old frames I have. I thought it might be fun to try 3d printing my own frame arms out of ABS.

Modeling a lens is a bit challenging, or I’m just a bit rusty with freecad. I need a way to wrap/unwrap/flatten the curve to create the contours. For my purpose here I can get away with a rough lens shape that is simply mirrored and lacks some of the complex curves. It just bugs me when I can’t model it properly…

The lens is not uniform thickness. The center is 1.8mm thick while the edges where the arms mount are 1.4mm. I want to try and make a nose piece because this is the one part that fails on these cheap glasses.

Anyways, sharing just because I can.

0

FreeCAD gets a logo upgrade

FreeCAD News FreeCAD gets a logo upgrade blog.freecad.org
preview

The contest from last month had established five finalists:

The first row is the new logo that will be used going forward and in version 1.0 of the program!

The contest from last month had established five finalists:

The first row is the new logo that will be used going forward and in version 1.0 of the program!

0

Help with exruding from one to another point on a sketch

preview

In other cad programs i use two points of a sketch to extrude a feature. In freecad it does not seem to be possible. What are your recommended workarounds for that?

I would like to extrude the base not just from the face of the sketch, but from point 1 to point 2 on the side view sketch. This workflow proved very robust in other cad tools, but I cant get it work in freecad.

Thanks a lot in advance!

In other cad programs i use two points of a sketch to extrude a feature. In freecad it does not seem to be possible. What are your recommended workarounds for that?

I would like to extrude the base not just from the face of the sketch, but from point 1 to point 2 on the side view sketch. This workflow proved very robust in other cad tools, but I cant get it work in freecad.

Thanks a lot in advance!

0

I just spent my entire weekend doing my Sketchup 8 keybinds. I just had to share.

preview

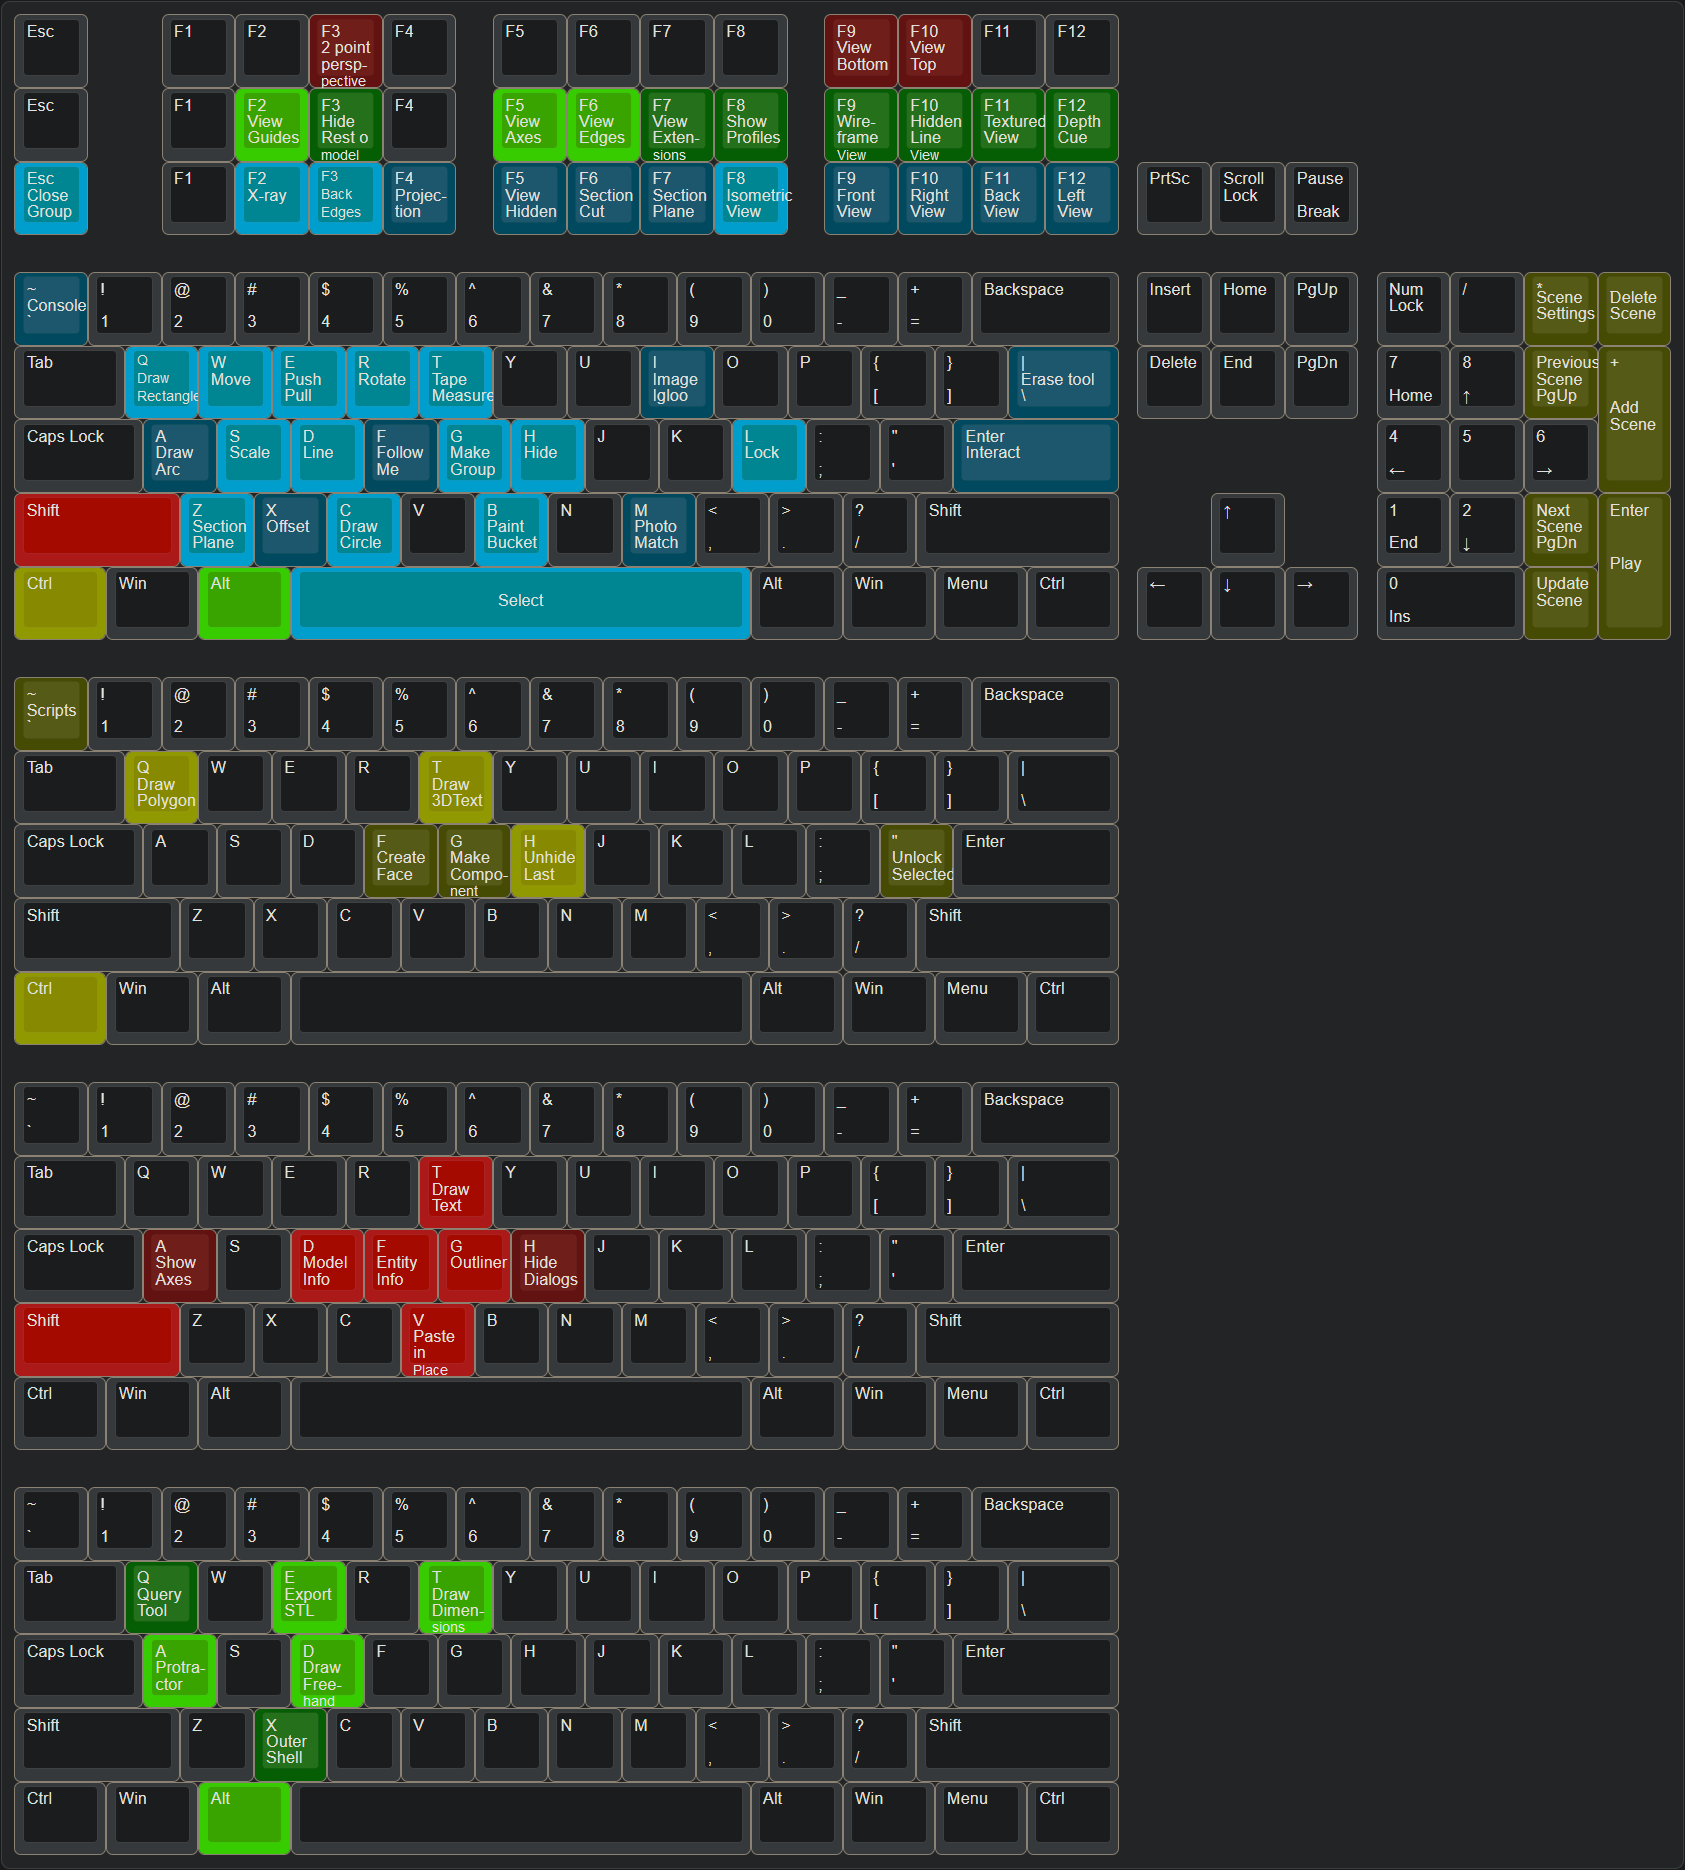
And I’m curious if I could map my keys to make Freecad work this way. I don’t know how many of the these tools don’t exist in Freecad, but if I could one to one make a keybind that works for me, I might start using it instead of sketchup 8

But mostly, this is the because general CAD community on lemmy and I wanted to share, ciao!

And I’m curious if I could map my keys to make Freecad work this way. I don’t know how many of the these tools don’t exist in Freecad, but if I could one to one make a keybind that works for me, I might start using it instead of sketchup 8

But mostly, this is the because general CAD community on lemmy and I wanted to share, ciao!

0

How to make this macro reusable?

preview

Hello,

so i just started to do some macro writing and had to get some help by ChatGPT because i am no programmer. But i made something useful for me.

import FreeCAD
import PartDesignGui
import Draft
import Part
import PartDesign
from FreeCAD import Base

doc_name = App.activeDocument().Label

sels = FreeCADGui.Selection.getSelectionEx('', 0)
facebinder1 = Draft.make_facebinder(sels[0])
facebinder2 = Draft.make_facebinder(sels[1])
Draft.autogroup(facebinder1)
Draft.autogroup(facebinder2)
FreeCAD.ActiveDocument.recompute()
App.getDocument(doc_name).addObject('Part::Loft','Loft')
App.getDocument(doc_name).ActiveObject.Sections=[App.getDocument(doc_name).Facebinder, App.getDocument(doc_name).Facebinder001, ]
App.getDocument(doc_name).ActiveObject.Solid=True
App.getDocument(doc_name).ActiveObject.Ruled=False
App.getDocument(doc_name).ActiveObject.Closed=False

I select two faces from two bodies and it will create two seperate facebinders and performs a loft with those two.

This allows me to make a loft in one fell swoop. However the facebinders created by the

Draft.make_facebinder(sels[X])

will always come out as Facerbinder and Facebinder001 and counting upwards. I don’t see any way to change those names. Yes, i can do something with labels, but the following part of

App.getDocument(doc_name).ActiveObject.Sections=[App.getDocument(doc_name).Facebinder, App.getDocument(doc_name).Facebinder001, ]

doesn’t seem to work with labels… As you can see Facebinder and Facebinder001 are hardcoded in there. Is there any way to either fully rename items so i could go for facebinder_temp1 and _temp2 and then rename them afterwards to make room for another _temp1 and _temp2 again or if i can somehow let the Loft function know what Facebinders were created prior?

Sorry if this is a little bit unstructured i am bashing my head right now… maybe you can help me out here.

Thanks!


EDIT:

Solution was:

# -*- coding: utf-8 -*-

# Macro Begin: /home/frank-garuda/.local/share/Ondsel/Macro/asfasdf.FCMacro +++++++++++++++++++++++++++++++++++++++++++++++++
import FreeCAD
import PartDesignGui
import Draft
import Part
import PartDesign

# Gui.runCommand('Std_DlgMacroRecord',0)
### Begin command Part_Loft
from FreeCAD import Base

# Get document name
doc_name = App.activeDocument().Label

# Gui.runCommand('Std_DlgMacroRecord',0)
### Begin command Std_Workbench
# Gui.activateWorkbench("DraftWorkbench")
### End command Std_Workbench
### Begin command Draft_Facebinder
sels = FreeCADGui.Selection.getSelectionEx('', 0)
facebinder1 = Draft.make_facebinder(sels[0])
facebinder1.Label = "Facebinder_Loft_1"
facebinder2 = Draft.make_facebinder(sels[1])
facebinder2.Label = "Facebinder_Loft_2"
Draft.autogroup(facebinder1)
Draft.autogroup(facebinder2)
FreeCAD.ActiveDocument.recompute()
App.getDocument(doc_name).addObject('Part::Loft','Loft')
App.getDocument(doc_name).ActiveObject.Sections=[facebinder1, facebinder2, ]
App.getDocument(doc_name).ActiveObject.Solid=True
App.getDocument(doc_name).ActiveObject.Ruled=False
App.getDocument(doc_name).ActiveObject.Closed=False

Hello,

so i just started to do some macro writing and had to get some help by ChatGPT because i am no programmer. But i made something useful for me.

import FreeCAD
import PartDesignGui
import Draft
import Part
import PartDesign
from FreeCAD import Base

doc_name = App.activeDocument().Label

sels = FreeCADGui.Selection.getSelectionEx('', 0)
facebinder1 = Draft.make_facebinder(sels[0])
facebinder2 = Draft.make_facebinder(sels[1])
Draft.autogroup(facebinder1)
Draft.autogroup(facebinder2)
FreeCAD.ActiveDocument.recompute()
App.getDocument(doc_name).addObject('Part::Loft','Loft')
App.getDocument(doc_name).ActiveObject.Sections=[App.getDocument(doc_name).Facebinder, App.getDocument(doc_name).Facebinder001, ]
App.getDocument(doc_name).ActiveObject.Solid=True
App.getDocument(doc_name).ActiveObject.Ruled=False
App.getDocument(doc_name).ActiveObject.Closed=False

I select two faces from two bodies and it will create two seperate facebinders and performs a loft with those two.

This allows me to make a loft in one fell swoop. However the facebinders created by the

Draft.make_facebinder(sels[X])

will always come out as Facerbinder and Facebinder001 and counting upwards. I don’t see any way to change those names. Yes, i can do something with labels, but the following part of

App.getDocument(doc_name).ActiveObject.Sections=[App.getDocument(doc_name).Facebinder, App.getDocument(doc_name).Facebinder001, ]

doesn’t seem to work with labels… As you can see Facebinder and Facebinder001 are hardcoded in there. Is there any way to either fully rename items so i could go for facebinder_temp1 and _temp2 and then rename them afterwards to make room for another _temp1 and _temp2 again or if i can somehow let the Loft function know what Facebinders were created prior?

Sorry if this is a little bit unstructured i am bashing my head right now… maybe you can help me out here.

Thanks!


EDIT:

Solution was:

# -*- coding: utf-8 -*-

# Macro Begin: /home/frank-garuda/.local/share/Ondsel/Macro/asfasdf.FCMacro +++++++++++++++++++++++++++++++++++++++++++++++++
import FreeCAD
import PartDesignGui
import Draft
import Part
import PartDesign

# Gui.runCommand('Std_DlgMacroRecord',0)
### Begin command Part_Loft
from FreeCAD import Base

# Get document name
doc_name = App.activeDocument().Label

# Gui.runCommand('Std_DlgMacroRecord',0)
### Begin command Std_Workbench
# Gui.activateWorkbench("DraftWorkbench")
### End command Std_Workbench
### Begin command Draft_Facebinder
sels = FreeCADGui.Selection.getSelectionEx('', 0)
facebinder1 = Draft.make_facebinder(sels[0])
facebinder1.Label = "Facebinder_Loft_1"
facebinder2 = Draft.make_facebinder(sels[1])
facebinder2.Label = "Facebinder_Loft_2"
Draft.autogroup(facebinder1)
Draft.autogroup(facebinder2)
FreeCAD.ActiveDocument.recompute()
App.getDocument(doc_name).addObject('Part::Loft','Loft')
App.getDocument(doc_name).ActiveObject.Sections=[facebinder1, facebinder2, ]
App.getDocument(doc_name).ActiveObject.Solid=True
App.getDocument(doc_name).ActiveObject.Ruled=False
App.getDocument(doc_name).ActiveObject.Closed=False
0

Is freecad so difficult due to design decisions or are they technical limitations?

preview

Hi! I started to fiddle around with freecad a little again tonight. I still find many things unintuitive. And I just watched a video about master sketches, because they are essential in my workflow on other programs. It makes it soo much easier to keep the overview and change little things quickly because I don’t have to search for the responsible sketch.

In this video the person demonstrates at around 9:15 how to use the master sketch as a reference in the sub bodies. I can get used to only get one body from a sketch, but man, how many steps does it take to just reference a sketch?! You even need to use a differen workbech, use the clone tool, but not this one and then drag and drop the duplicate into the same body you are working on? Why?! I mean the sketch is right there, just let me click it!!

This got me wondering it those rough workflows are just designed badly or if this is a limitation of the engine or whstevery it’s called, that freecad is based on? Because in my limited programming mind it does not make a difference what file is referenced. If it is some file on a directory above, just use something like “./” Before to go up one directory.

And I think those little things that just work in other cad software, makes freecad so much less approcavhabel and so much harder to jump in.

If I want to make a complicated part, that is not just a box with a hole, I don’t want to Google around until I found a solution, I want the intuitive solution to work without 3 extra steps. This just hinders my design process a lot.

Maybe someone knows how freecad works on the background and can explain why freecad works like that.

Thanks!

Hi! I started to fiddle around with freecad a little again tonight. I still find many things unintuitive. And I just watched a video about master sketches, because they are essential in my workflow on other programs. It makes it soo much easier to keep the overview and change little things quickly because I don’t have to search for the responsible sketch.

In this video the person demonstrates at around 9:15 how to use the master sketch as a reference in the sub bodies. I can get used to only get one body from a sketch, but man, how many steps does it take to just reference a sketch?! You even need to use a differen workbech, use the clone tool, but not this one and then drag and drop the duplicate into the same body you are working on? Why?! I mean the sketch is right there, just let me click it!!

This got me wondering it those rough workflows are just designed badly or if this is a limitation of the engine or whstevery it’s called, that freecad is based on? Because in my limited programming mind it does not make a difference what file is referenced. If it is some file on a directory above, just use something like “./” Before to go up one directory.

And I think those little things that just work in other cad software, makes freecad so much less approcavhabel and so much harder to jump in.

If I want to make a complicated part, that is not just a box with a hole, I don’t want to Google around until I found a solution, I want the intuitive solution to work without 3 extra steps. This just hinders my design process a lot.

Maybe someone knows how freecad works on the background and can explain why freecad works like that.

Thanks!

0

How can we help FreeCad?

preview

Hey there! I love the idea of freecad. But I have so many troubls learning it. I started with fusion360, used solidworks for some time, used inventor a bit and use onshape mostly now. So I think I know how to navigate and learn new cad software. But its not as easy with freecad sadly.

I Would love this product to be more accessable and easier to use and undertand. What can we do besides jumping in on developing ourselves?

Switching form fusion or onshape to freecad feels like switching from python to assamlby.

So how can we help to improve freecad and make it a more usable program? It seems as if the devs try to reinvent everything and every menue compared to all other cad programs i have used. I am totaly fine with some issues or bugs, but i feel like its not up for success currently.

Thanks a lot, I hope you have some ideas

Hey there! I love the idea of freecad. But I have so many troubls learning it. I started with fusion360, used solidworks for some time, used inventor a bit and use onshape mostly now. So I think I know how to navigate and learn new cad software. But its not as easy with freecad sadly.

I Would love this product to be more accessable and easier to use and undertand. What can we do besides jumping in on developing ourselves?

Switching form fusion or onshape to freecad feels like switching from python to assamlby.

So how can we help to improve freecad and make it a more usable program? It seems as if the devs try to reinvent everything and every menue compared to all other cad programs i have used. I am totaly fine with some issues or bugs, but i feel like its not up for success currently.

Thanks a lot, I hope you have some ideas