#3dprinting

posts tagged #3dprinting

0

Cool feature I didn't even know I had until I needed it

preview

I recently upgraded to a Snapmaker U1, though I think other modern printers have this feature as well. I was just printing a plate with multiple objects on it. Specifically I was printing a big squarish body of a tank, a few small pieces, and the tank cannon which was tall and skinny.

Mid-print, the cannon fell over - which was my own fault for not adding supports to it. The printer detected the print failure and stopped it, but that’s not the cool part. It allowed me to remove the object from the plate and continue printing the remaining objects! I figured I would have had to start the whole thing over again - wasting a ton of filament on the half completed tank body. Was super impressed!

I recently upgraded to a Snapmaker U1, though I think other modern printers have this feature as well. I was just printing a plate with multiple objects on it. Specifically I was printing a big squarish body of a tank, a few small pieces, and the tank cannon which was tall and skinny.

Mid-print, the cannon fell over - which was my own fault for not adding supports to it. The printer detected the print failure and stopped it, but that’s not the cool part. It allowed me to remove the object from the plate and continue printing the remaining objects! I figured I would have had to start the whole thing over again - wasting a ton of filament on the half completed tank body. Was super impressed!

0

Artifacts on printed bins

preview

I’m printing these small bins for a advent calendar and seeing that some of the bins have these squiggly bits on the inside. They’re wildly inconsistent. You can see this bin doesn’t have them until a certain height and other bins that printed at the same time have them at different heights. Happening across different filaments. I ran a calibration cycle because I hadn’t lubed and calibrated in a while, but it’s still happening.

Any thoughts on what else I should be looking at?

Edit: Forgot to mention I’m printing on a Bambu Lab A1 (sorry got it before they went mad)

I’m printing these small bins for a advent calendar and seeing that some of the bins have these squiggly bits on the inside. They’re wildly inconsistent. You can see this bin doesn’t have them until a certain height and other bins that printed at the same time have them at different heights. Happening across different filaments. I ran a calibration cycle because I hadn’t lubed and calibrated in a while, but it’s still happening.

Any thoughts on what else I should be looking at?

Edit: Forgot to mention I’m printing on a Bambu Lab A1 (sorry got it before they went mad)

0

I made a little desk screen for my four Flashforge printers

preview

I got tired of tabbing out of my games to check Flash Studio, so I made a little touchscreen for my desk. It shows my two AD5Xs, my Creator 5, and my 5M Pro on one screen. I can check what’s printing or what filament is loaded, and it plays a little jingle when a print is done.

The case and stand are printed. The files and setup guide are free if anyone wants to make one.

MakerWorld | Printables

Front of the monitor with the four-printer dashboard on screen

Rear of the printed case in its stand

I got tired of tabbing out of my games to check Flash Studio, so I made a little touchscreen for my desk. It shows my two AD5Xs, my Creator 5, and my 5M Pro on one screen. I can check what’s printing or what filament is loaded, and it plays a little jingle when a print is done.

The case and stand are printed. The files and setup guide are free if anyone wants to make one.

MakerWorld | Printables

Front of the monitor with the four-printer dashboard on screen

Rear of the printed case in its stand

0

upgrading creality k1 -> snapmaker u1

preview

Hey everyone,

I’m thinking of upgrading from a creality k1 to a snapmaker u1. Partly for the multicolour printing with the toolhead system, but also because of a few frustrations with the k1.

Before I make the jump, Can anyone comment on what the general print quality is like with the U1?

Cheers

Hey everyone,

I’m thinking of upgrading from a creality k1 to a snapmaker u1. Partly for the multicolour printing with the toolhead system, but also because of a few frustrations with the k1.

Before I make the jump, Can anyone comment on what the general print quality is like with the U1?

Cheers

0

Bubbles in molten filament?

preview

Hey everyone, I am trying to get my piece of junk Tiertime UP Mini 2 printer to work somewhat reliably, but it also is my first printer, so I don’t have a lot of practice with debugging these things. While flushing some PLA through the Hot End (without a nozzle) I noticed that it looks very bubbly at temperatures between 195°C and 210°C (see picture above) and I wondered if this should tell me that I have been printing too hot. With lower temperature (160°C) the film looks pretty smooth (see second picture below) but that sounds way too low to actually print PLA with. I now tried printing with my 0.4mm nozzle at 190°C, but had no adhesion on the bed. It was no better at 200°C. Both times the bed was at about 55°C. Is there something I do fundamentally wrong or is that a normal texture for PLA after heating? I would have printed a temperature tower, but firstly I have no adhesion on the first layer and secondly I do not think I can set different temperatures for different regions in the Tiertime slicer I have to use with this printer. Usually I would like to try out a bunch of things, but before I sink hours into this and clog my nozzle really badly again, I wondered if any of you has some suggestions.

Context: I am working on this on and off for the last year, but it is quite frustrating, because with each clogging I need so much time to get the nozzle and hot end free again. I got the printer for free and its form factor fits perfectly into one space I have free in my apartment. The printer came loaded with ABS, but I didn’t like the smell in combination with air filter, that has never been changed. So I figured PLA would be better for a beginner. Maybe my problems started there, because I didn’t consider that cleaning might be necessary for the switch. I was able to get a fine benchy out of there a couple of times but usually after 3 or four prints, I get clogging in the heating element (I suspect heat creep being an issue). So right now I have some flow through the hot end again after I cleaned it over a couple of days with cycles of soaking in acetone and picking out softened PLA. When doing a couple of cold pulls with a cleaning filment by eSun at 110°C, I noticed the behaviour described above. I also exchanged the nozzle once although that one might be messed up now as well. A couple of times the prints failed by not extruding anything anymore and liquid PLA coming out between hot end and nozzle. But last time, I am pretty sure the clog was higher, somewhere inside the hot end, which is why I did this long solvent cleaning.

I am happy about any help and tips you might have!

Hey everyone, I am trying to get my piece of junk Tiertime UP Mini 2 printer to work somewhat reliably, but it also is my first printer, so I don’t have a lot of practice with debugging these things. While flushing some PLA through the Hot End (without a nozzle) I noticed that it looks very bubbly at temperatures between 195°C and 210°C (see picture above) and I wondered if this should tell me that I have been printing too hot. With lower temperature (160°C) the film looks pretty smooth (see second picture below) but that sounds way too low to actually print PLA with. I now tried printing with my 0.4mm nozzle at 190°C, but had no adhesion on the bed. It was no better at 200°C. Both times the bed was at about 55°C. Is there something I do fundamentally wrong or is that a normal texture for PLA after heating? I would have printed a temperature tower, but firstly I have no adhesion on the first layer and secondly I do not think I can set different temperatures for different regions in the Tiertime slicer I have to use with this printer. Usually I would like to try out a bunch of things, but before I sink hours into this and clog my nozzle really badly again, I wondered if any of you has some suggestions.

Context: I am working on this on and off for the last year, but it is quite frustrating, because with each clogging I need so much time to get the nozzle and hot end free again. I got the printer for free and its form factor fits perfectly into one space I have free in my apartment. The printer came loaded with ABS, but I didn’t like the smell in combination with air filter, that has never been changed. So I figured PLA would be better for a beginner. Maybe my problems started there, because I didn’t consider that cleaning might be necessary for the switch. I was able to get a fine benchy out of there a couple of times but usually after 3 or four prints, I get clogging in the heating element (I suspect heat creep being an issue). So right now I have some flow through the hot end again after I cleaned it over a couple of days with cycles of soaking in acetone and picking out softened PLA. When doing a couple of cold pulls with a cleaning filment by eSun at 110°C, I noticed the behaviour described above. I also exchanged the nozzle once although that one might be messed up now as well. A couple of times the prints failed by not extruding anything anymore and liquid PLA coming out between hot end and nozzle. But last time, I am pretty sure the clog was higher, somewhere inside the hot end, which is why I did this long solvent cleaning.

I am happy about any help and tips you might have!

0

My linocut block printing experiment with PLA

Imgur 3d printed stamps /linocut imgur.com
preview

imgur.com/a/oGgJsQq (Photos)

So firstly I’ll explain the photos then the process.

The molotov cocktail was basic PLA. The ink was printed on printer paper with speedball fabric block ink.

The cat stamp. There are 3 versions. The small one (with a missing line on the teeth) was tpu glued to pla backing.

I tried both stamp ink (teal) and speedball ink (black).

The two larger ones printed in lime green are both PLA. I just tried one with ironing on and ironing off and slightly adjusted the design to remove smooth edges because traditional lino carving has sharper edges on the positive parts.

Okay so now I’ll explain my method.

I sketched both design ideas on paper and scanned them. I then used Adobe illustrator to make a vector drawing.

I imported into Blender but the vector was all messed up. Artifacts and such.

So I went back to illustrator. Exported the vector image as a png file. Loaded that into a vector tracer program. Had a new vector svg file made.

Loaded that into blender. That worked. Extruded (as a curve object). Then converted to mesh object.

The molotov needed additional work to prepare for printing. I used Photoshop to help divide and make masks for the areas that would be printed with different colors. Determined the appropriate order.

Decided to print them all with the same size backplate for easy positioning.

When I imported the svg files into Blender and made the “stamp” I added ovals to the ends of the plates with excess negative space to make them balanced when pressing down on the paper.

Mounted to a surface. Oval for cats. Rectangle for molotov.

I made it so the extruded pattern was 2mm thick and the bottom 1mm for the TPU print (one of the cats) and 1.5mm-2mm thick for the full PLA prints. (Ish). I can’t remember the exact thicknesses.

Total thickness for molotov (full PLA) was ~3.5mm.

The one cat I printed in TPU (95a) was glued to an oval of PLA for support.

All 3d prints were solid. No infill. 3 walls. Both for pla and tpu.

All surfaces of the stamp / linocut were sanded. The regular PLA sanded down easy with 220m The TPU was harder to smooth. I used 100 to start with and it still took forever. And then a little with 220 once I was satisfied.

As mentioned, I tried both stamp ink and block printing ink on the cats.

Usually with linocut printing the paper goes on to the stamp/block/linocut, but I did this old school stamp style. Putting the stamp on the paper and pressing down. I used a hard brayer to help with this part.

For the molotov, I used a pencil to trace a rectangle on the paper and used this as a guide to position the stamp plate from each color. I also let each color dry for 2 hours between them.

It seemed like the block ink looked considerably better on the TPU (the tooth missing cat stamp) but I also did make another TPU print of a different design (not in photos) and the quality was not better with the TPU for block ink (speedball). So I no longer am experimenting with it. Though I do plan to try Petg since it’s more flexible than pla.

TPU is better with stamp ink than PLA but I’m not planning on using stamp ink. That was just to see if it worked. But if that’s what you plan to use, make the stamps out of TPU.

The speedball inks aren’t the best but I only use my good expensive inks on “prints”.

So you will notice the quality isn’t super great. Plus my old blue was nearly dried up.

The black usually prints decent but didn’t look great on the molotov.

Anyway. I think that’s all the details.

I have experience in the arts and do make actual linocut prints. So I already had all of those tools and some printing ink.

I think there are limits on 3d printing linocut designs. But honestly it was considerably less time than making real ones. And since I made uniform rectangles for the molotov , I was able to get pretty good alignment without a bunch of additional work that is usually required for multicolor prints.

I do have a rolling press, and I’m sure I could get better results with that.

I’d also like to try 3d printing the designs in a smaller nozzle for better detail.
imgur.com/a/oGgJsQq (Photos)

So firstly I’ll explain the photos then the process.

The molotov cocktail was basic PLA. The ink was printed on printer paper with speedball fabric block ink.

The cat stamp. There are 3 versions. The small one (with a missing line on the teeth) was tpu glued to pla backing.

I tried both stamp ink (teal) and speedball ink (black).

The two larger ones printed in lime green are both PLA. I just tried one with ironing on and ironing off and slightly adjusted the design to remove smooth edges because traditional lino carving has sharper edges on the positive parts.

Okay so now I’ll explain my method.

I sketched both design ideas on paper and scanned them. I then used Adobe illustrator to make a vector drawing.

I imported into Blender but the vector was all messed up. Artifacts and such.

So I went back to illustrator. Exported the vector image as a png file. Loaded that into a vector tracer program. Had a new vector svg file made.

Loaded that into blender. That worked. Extruded (as a curve object). Then converted to mesh object.

The molotov needed additional work to prepare for printing. I used Photoshop to help divide and make masks for the areas that would be printed with different colors. Determined the appropriate order.

Decided to print them all with the same size backplate for easy positioning.

When I imported the svg files into Blender and made the “stamp” I added ovals to the ends of the plates with excess negative space to make them balanced when pressing down on the paper.

Mounted to a surface. Oval for cats. Rectangle for molotov.

I made it so the extruded pattern was 2mm thick and the bottom 1mm for the TPU print (one of the cats) and 1.5mm-2mm thick for the full PLA prints. (Ish). I can’t remember the exact thicknesses.

Total thickness for molotov (full PLA) was ~3.5mm.

The one cat I printed in TPU (95a) was glued to an oval of PLA for support.

All 3d prints were solid. No infill. 3 walls. Both for pla and tpu.

All surfaces of the stamp / linocut were sanded. The regular PLA sanded down easy with 220m The TPU was harder to smooth. I used 100 to start with and it still took forever. And then a little with 220 once I was satisfied.

As mentioned, I tried both stamp ink and block printing ink on the cats.

Usually with linocut printing the paper goes on to the stamp/block/linocut, but I did this old school stamp style. Putting the stamp on the paper and pressing down. I used a hard brayer to help with this part.

For the molotov, I used a pencil to trace a rectangle on the paper and used this as a guide to position the stamp plate from each color. I also let each color dry for 2 hours between them.

It seemed like the block ink looked considerably better on the TPU (the tooth missing cat stamp) but I also did make another TPU print of a different design (not in photos) and the quality was not better with the TPU for block ink (speedball). So I no longer am experimenting with it. Though I do plan to try Petg since it’s more flexible than pla.

TPU is better with stamp ink than PLA but I’m not planning on using stamp ink. That was just to see if it worked. But if that’s what you plan to use, make the stamps out of TPU.

The speedball inks aren’t the best but I only use my good expensive inks on “prints”.

So you will notice the quality isn’t super great. Plus my old blue was nearly dried up.

The black usually prints decent but didn’t look great on the molotov.

Anyway. I think that’s all the details.

I have experience in the arts and do make actual linocut prints. So I already had all of those tools and some printing ink.

I think there are limits on 3d printing linocut designs. But honestly it was considerably less time than making real ones. And since I made uniform rectangles for the molotov , I was able to get pretty good alignment without a bunch of additional work that is usually required for multicolor prints.

I do have a rolling press, and I’m sure I could get better results with that.

I’d also like to try 3d printing the designs in a smaller nozzle for better detail.

0

Orca Slicer v2.5

GitHub Release OrcaSlicer V2.5.0 Official Release · OrcaSlicer/OrcaSlicer github.com
preview

OrcaSlicer 2.5.0 is here, the biggest update in OrcaSlicer’s history, built from nearly 1,300 pull requests by more than 180 contributors.

You can now add features with Python plugins, print on belt printers, mix new colors from the filaments you have loaded with color mixing, give surfaces real 3D texture with Texture Displacement, design parametric parts in the experimental Design tab, and print two to four parts at once on IDEX and IQEX printers.

Toolhead collision volumes keep Arrange, brims and travel moves clear of bed clips, tool docks and other obstacles. Smarter travel planning cuts unneeded moves with nothing to turn on, and OrcaSlicer starts, slices and exports noticeably faster.

It also supports the Bambu Lab H2C and A2L, with mixed nozzle sizes on the H2D and X2D, and brings the new Speed Dial, Precise Seam modifiers, new infill options and hundreds of fixes.

OrcaSlicer 2.5.0 is here, the biggest update in OrcaSlicer’s history, built from nearly 1,300 pull requests by more than 180 contributors.

You can now add features with Python plugins, print on belt printers, mix new colors from the filaments you have loaded with color mixing, give surfaces real 3D texture with Texture Displacement, design parametric parts in the experimental Design tab, and print two to four parts at once on IDEX and IQEX printers.

Toolhead collision volumes keep Arrange, brims and travel moves clear of bed clips, tool docks and other obstacles. Smarter travel planning cuts unneeded moves with nothing to turn on, and OrcaSlicer starts, slices and exports noticeably faster.

It also supports the Bambu Lab H2C and A2L, with mixed nozzle sizes on the H2D and X2D, and brings the new Speed Dial, Precise Seam modifiers, new infill options and hundreds of fixes.

0

Should I get a b*mbulab printer? + More newbie questions

preview

Hey guys, I’ve got little to no knowledge on 3D printing and even less experience, so go easy on me. I will most likely be using words I don’t understand.

I live in a hot and humid country in the EU, and given my circumstances and the aforementioned lack of knowledge, I’m considering a closed enclosure model from the company everyone hates because it’s cheap, available, and famed for its ease of use.

I’m no stranger to tinkering with everything, but I do want to get started with something that’s just plug and play (or close enough to it). And even after I jailbreak it (which I assume is possible?), I really don’t want the tinkering to be part of the hobby itself.

My questions are: Size: Would I regret getting a 256x256x256 mm^3 sized one? Most prints I’ve seen fit easily, but there are a few that require more space.

Filaments: Where to buy, how to store, are all of them compatible with extruder-type printers? How do I check?

Accessories: I’ve seen nozzles and accessory packs being sold but I have no idea what they’re for. Can I print upgrades? Also what the heck does the Combo printer add-on do?

Alternatives: I’m not married to the P2S. Feel free to suggest alternatives. Thanks!

Hey guys, I’ve got little to no knowledge on 3D printing and even less experience, so go easy on me. I will most likely be using words I don’t understand.

I live in a hot and humid country in the EU, and given my circumstances and the aforementioned lack of knowledge, I’m considering a closed enclosure model from the company everyone hates because it’s cheap, available, and famed for its ease of use.

I’m no stranger to tinkering with everything, but I do want to get started with something that’s just plug and play (or close enough to it). And even after I jailbreak it (which I assume is possible?), I really don’t want the tinkering to be part of the hobby itself.

My questions are: Size: Would I regret getting a 256x256x256 mm^3 sized one? Most prints I’ve seen fit easily, but there are a few that require more space.

Filaments: Where to buy, how to store, are all of them compatible with extruder-type printers? How do I check?

Accessories: I’ve seen nozzles and accessory packs being sold but I have no idea what they’re for. Can I print upgrades? Also what the heck does the Combo printer add-on do?

Alternatives: I’m not married to the P2S. Feel free to suggest alternatives. Thanks!

0

What extruder to choose for a replacement for a broken Afterburner on a Voron 2.4?

preview

Hey everyone,

Perhaps I’m just needing a nudge to get out of decision paralysis. I had a toolhead breakdown due to a hardware failure and decided to rebuild as a A4T V2 because why not? I wanted to upgrade from the old Afterburner anyway at some time so now might be perfect!

But now I have to choose … Orbiter 2.5 and Sherpa Mini are the options supported from the get-go. But for either I found “for sure that one!” voices.

For the hotend l go with the rapido X.

Or do I even go with a different toolhead all together?

I can’t simply print a stealthburner anyway because the backup printer I have available only has a print area of 115x115 so I couldn’t make the front plate fit anyway. And I really don’t feel like printing a new.

Any voice of reason, experience or opinion is very welcome - I literally just need to stop staring at websites and … Decide.

Hey everyone,

Perhaps I’m just needing a nudge to get out of decision paralysis. I had a toolhead breakdown due to a hardware failure and decided to rebuild as a A4T V2 because why not? I wanted to upgrade from the old Afterburner anyway at some time so now might be perfect!

But now I have to choose … Orbiter 2.5 and Sherpa Mini are the options supported from the get-go. But for either I found “for sure that one!” voices.

For the hotend l go with the rapido X.

Or do I even go with a different toolhead all together?

I can’t simply print a stealthburner anyway because the backup printer I have available only has a print area of 115x115 so I couldn’t make the front plate fit anyway. And I really don’t feel like printing a new.

Any voice of reason, experience or opinion is very welcome - I literally just need to stop staring at websites and … Decide.

0

Bambu Labs H3C embargo dropped, so many reviews

preview

Feel free to add links in the comments

Uncle Jesse youtu.be/EIgitsJ9n0U Made with layers youtu.be/y_8CPStxy7g Cnc kitchen youtu.be/V3X8Xe5W04g Clough42 youtu.be/N2hF4Bx8YAk

Feel free to add links in the comments

Uncle Jesse youtu.be/EIgitsJ9n0U Made with layers youtu.be/y_8CPStxy7g Cnc kitchen youtu.be/V3X8Xe5W04g Clough42 youtu.be/N2hF4Bx8YAk

0

Is the RocketChat down?

preview

For some reason the “Login with GitLab” button isn’t showing up in my browser (Opera GX). I’ve tried disabling extensions, using an Incognito window, all sorts of different things and the button doesn’t appear for me. Any idea why?

If I try to hit create account I just get this, but there’s no button.

For some reason the “Login with GitLab” button isn’t showing up in my browser (Opera GX). I’ve tried disabling extensions, using an Incognito window, all sorts of different things and the button doesn’t appear for me. Any idea why?

If I try to hit create account I just get this, but there’s no button.

0

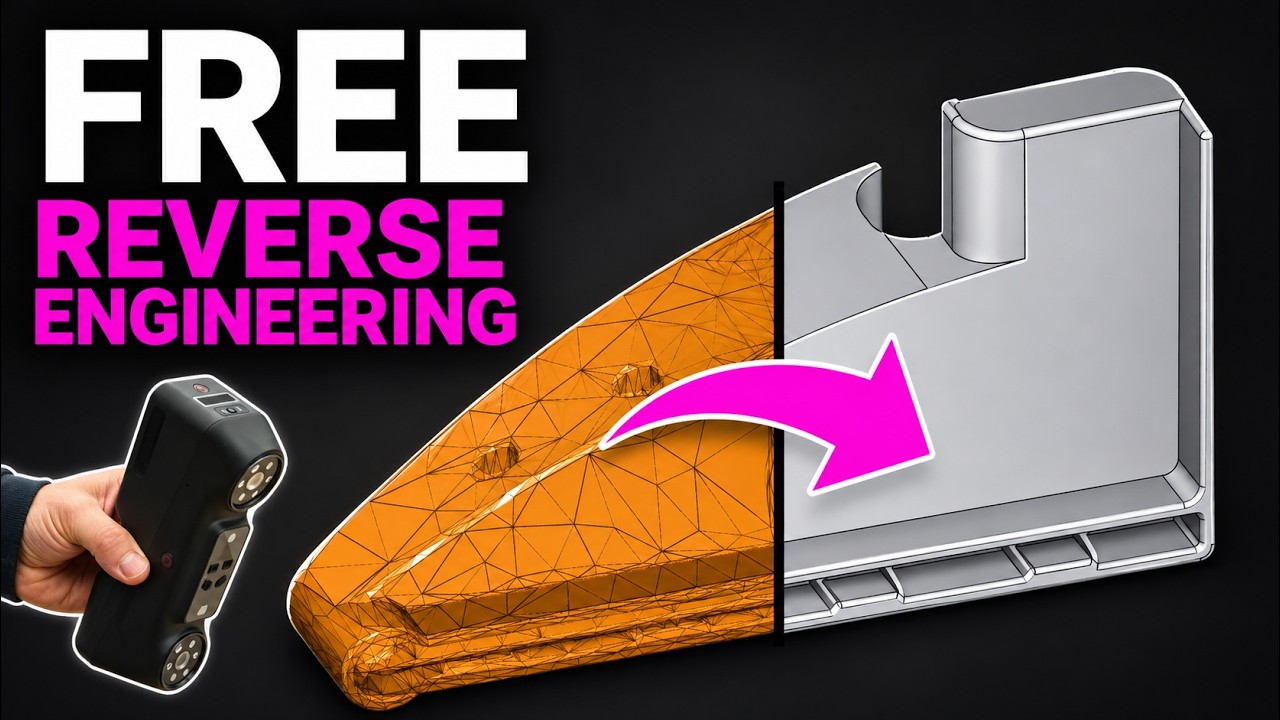
Stefan (CNC Kitchen) has released a mesh to parametric model too

play · youtube.com
YouTube 3D Scanning Will Never Be the Same Again! (feat. Elegoo M1 Ultra) youtu.be
preview

Caveat it’s AI coded

It’s much more than I put in the title but the video does a better job of explaining it. It’s also an ad for a 3D scanner

Caveat it’s AI coded

It’s much more than I put in the title but the video does a better job of explaining it. It’s also an ad for a 3D scanner

0

Your favorite slicer

preview

I have been a long time Prusaslicer user but lately I’m running into a limitation. Hole XY size compensation is a big missing feature which I have seen in Cura. Also Cura handles lithophanes really well.

I do not like the UI of Cura but do like the Prusaslicer one.

What slicer do you prefer?

I have been a long time Prusaslicer user but lately I’m running into a limitation. Hole XY size compensation is a big missing feature which I have seen in Cura. Also Cura handles lithophanes really well.

I do not like the UI of Cura but do like the Prusaslicer one.

What slicer do you prefer?

0

Clearing broken filament from Prusa core one+

preview

I bought the assembled version of the Prusa core one+ (gen 2). Got through the setup and calibration until hitting a (literal) snag when attempting to calibrate the filament sensors.

The assembled printer is supposed to come with a bit of orange PLA filament already loaded, sticking out of the end near the spool holder. I can see the orange filament in the PTFE tube, but the bit that’s supposed to stick out seems to have snapped off. Telling the printer to unload the filament doesn’t do anything.

I’m coming from a BambuLab A1 Mini, so I’m very much in the printing side of the hobby and not the printer side of the hobby, and I get a bit lost when the first step seems to be to completely disassemble the business end of the printer.

I bought the assembled version of the Prusa core one+ (gen 2). Got through the setup and calibration until hitting a (literal) snag when attempting to calibrate the filament sensors.

The assembled printer is supposed to come with a bit of orange PLA filament already loaded, sticking out of the end near the spool holder. I can see the orange filament in the PTFE tube, but the bit that’s supposed to stick out seems to have snapped off. Telling the printer to unload the filament doesn’t do anything.

I’m coming from a BambuLab A1 Mini, so I’m very much in the printing side of the hobby and not the printer side of the hobby, and I get a bit lost when the first step seems to be to completely disassemble the business end of the printer.

0

UPDATE: Much improvement to printing fine details with .2mm nozz, still more to do

preview

I’ve posted previously to the saga, and I have some updates. My prints are getting better, but still have room to grow. Thus far I have:

  • Updated my printer’s firmware from 2019 -> 2023 (latest) because pause commands (G4) was not being respected. That was an ordeal since it’s only supported to be done on windows/mac…I nearly bricked it doing it on linux, then spun up a windows VM and got it done. Took 3 days.
  • Changed the orientation of the prints so the stem points down.
  • Lifted the print so everything prints on supports, about 1/16 inch

It’s looking MUCH better, but I’m having a stringing issue which is preventing the keycap from installing. I think this is a much easier fix, and I have knobs to turn on this:

I’ve posted previously to the saga, and I have some updates. My prints are getting better, but still have room to grow. Thus far I have:

  • Updated my printer’s firmware from 2019 -> 2023 (latest) because pause commands (G4) was not being respected. That was an ordeal since it’s only supported to be done on windows/mac…I nearly bricked it doing it on linux, then spun up a windows VM and got it done. Took 3 days.
  • Changed the orientation of the prints so the stem points down.
  • Lifted the print so everything prints on supports, about 1/16 inch

It’s looking MUCH better, but I’m having a stringing issue which is preventing the keycap from installing. I think this is a much easier fix, and I have knobs to turn on this:

0

Pressure advance with BTT SmartFilamentSensor v2

preview

I have a somewhat interesting issue.

Recently I’ve installed the BTT SFS v2 filament sensor, which detects both if filament is present and if there is a jam or not. The jam detection works with an encoder that spins whenever filament is running through it.

Pressure advance however works by slowing down and speeding up extrusion based on motion of the nozzle to prevent bulging and oozing.

This however triggers false positives in the jam detection. Without pressure advance it works fine.

Does anyone have experience with this? Below is example code of my Klipper config related to the jam sensor. Raising the detection length from 2.88 to 10 did not solve it and I don’t want to put excessive numbers there.

[filament_motion_sensor encoder_sensor]
switch_pin: i forgot lol
detection_length: 10
extruder: extruder
pause_on_runout: False
runout_gcode:
  PAUSE # [pause_resume] is required in printer.cfg
  M117 Filament encoder runout
#insert_gcode:
  #M117 Filament encoder inserted

I have a somewhat interesting issue.

Recently I’ve installed the BTT SFS v2 filament sensor, which detects both if filament is present and if there is a jam or not. The jam detection works with an encoder that spins whenever filament is running through it.

Pressure advance however works by slowing down and speeding up extrusion based on motion of the nozzle to prevent bulging and oozing.

This however triggers false positives in the jam detection. Without pressure advance it works fine.

Does anyone have experience with this? Below is example code of my Klipper config related to the jam sensor. Raising the detection length from 2.88 to 10 did not solve it and I don’t want to put excessive numbers there.

[filament_motion_sensor encoder_sensor]
switch_pin: i forgot lol
detection_length: 10
extruder: extruder
pause_on_runout: False
runout_gcode:
  PAUSE # [pause_resume] is required in printer.cfg
  M117 Filament encoder runout
#insert_gcode:
  #M117 Filament encoder inserted
0

Looking to choose a new printer

preview

I’m considering a new printer this winter. I’m looking to replace my trusted Prusa Mk3S. And I’ve whittled it down to 2.

First is the Qidi Q2. I’ve been eyeing Qidi printers for a couple of years now. I like the enclosure and the high temp printing ability. The heated chamber works well for engineering filaments by all accounts. And it comes with MET certified filtration system already installed. I would buy it without the Qidi box because my A1 Mini has taught me that I just don’t do a ton of color prints much beyond some signage. And I’m unsure of just how much I would be using high temp filaments beyond PETG and ABS/ASA due to the costs.

The contender is the Elegoo Centauri Carbon 2. I like the price, even with their Canvas 4 color printing, it’s still $100US cheaper than the Qidi. But it doesn’t have a dedicated chamber heater or air filer system as standard installed either. Both can be worked around as dyi add-ons though with extra effort and money required.

While things like how much and what filaments I would use that require heated chambers and fancy air filters is something only I can decide, there is the matter of reliability and repair ability.

As someone who had to design and build machines and then often needing to be the one that has to fix things when it all goes bad, I value reliability and repairability very highly.

So which printer can be relied upon to just work and is easiest to maintain and repair when needed in your opinion. How is manufacturer support? Is the Carbon 2 really as quiet as advertised?

I’m considering a new printer this winter. I’m looking to replace my trusted Prusa Mk3S. And I’ve whittled it down to 2.

First is the Qidi Q2. I’ve been eyeing Qidi printers for a couple of years now. I like the enclosure and the high temp printing ability. The heated chamber works well for engineering filaments by all accounts. And it comes with MET certified filtration system already installed. I would buy it without the Qidi box because my A1 Mini has taught me that I just don’t do a ton of color prints much beyond some signage. And I’m unsure of just how much I would be using high temp filaments beyond PETG and ABS/ASA due to the costs.

The contender is the Elegoo Centauri Carbon 2. I like the price, even with their Canvas 4 color printing, it’s still $100US cheaper than the Qidi. But it doesn’t have a dedicated chamber heater or air filer system as standard installed either. Both can be worked around as dyi add-ons though with extra effort and money required.

While things like how much and what filaments I would use that require heated chambers and fancy air filters is something only I can decide, there is the matter of reliability and repair ability.

As someone who had to design and build machines and then often needing to be the one that has to fix things when it all goes bad, I value reliability and repairability very highly.

So which printer can be relied upon to just work and is easiest to maintain and repair when needed in your opinion. How is manufacturer support? Is the Carbon 2 really as quiet as advertised?

0

zits and bubbles on large layers

preview

I’m printing some trays that are thin on the bottom maybe 2mm. Not enough for there to be infill. I’m having the same issue on two completely different printers with different filament and different files. I’m using the same Orca profile for both of them though so it has to be a setting, maybe bed temperature? The sides of the trays are perfect.

I’m printing some trays that are thin on the bottom maybe 2mm. Not enough for there to be infill. I’m having the same issue on two completely different printers with different filament and different files. I’m using the same Orca profile for both of them though so it has to be a setting, maybe bed temperature? The sides of the trays are perfect.

0

Hotend mount 90 degree angle

preview

I’ve designed a new toolhead a while ago and the hotend, a Phaetus Rapido UHF v2, is mounted using a small aluminum bracket meant for an E3D hotend.

The bracket is mounted to the toolhead using brass insert nuts that were pressed into the plastic using a soldering iron.

The picture is the side view of the toolhead. It’s currently missing the bottom half.

The hotend ends up not entirety vertical.

How bad is this? Ideally it’s perfectly vertical but is it worth the effort of straightening this out?

I’ve designed a new toolhead a while ago and the hotend, a Phaetus Rapido UHF v2, is mounted using a small aluminum bracket meant for an E3D hotend.

The bracket is mounted to the toolhead using brass insert nuts that were pressed into the plastic using a soldering iron.

The picture is the side view of the toolhead. It’s currently missing the bottom half.

The hotend ends up not entirety vertical.

How bad is this? Ideally it’s perfectly vertical but is it worth the effort of straightening this out?

0

Small lines differences, is this normal?

preview

Hey! I noticed big prints have a somewhat imperfect look between layers, is this normal? My printer is a Qidi Q2C that I used for about 1000 hours. No maintenance has ever been done. Should I add some grease? Retention the strings?

Hey! I noticed big prints have a somewhat imperfect look between layers, is this normal? My printer is a Qidi Q2C that I used for about 1000 hours. No maintenance has ever been done. Should I add some grease? Retention the strings?

0

UPDATE - Improving fine details with a .2mm nozzle.

preview

First, thanks for all the feedback and suggestions, I’ve been going through and looking for areas to tweak. I decided, in the interim, to print a bigger model to see if I can expose the issues more, and I think I accomplished that. This is the snail from Adventure Time, and I’m mostly very happy with this print; I could have added a tree support under the lower arm, but the detail is great and the layer lines are barely visible…until you get to the raised hand a bit, and to the eye stalks. Looking at what’s going on, it looks pretty clear the layers are NOT getting enough time to cool and harden before the next starts.

I thought I had that accounted for with the following settings, but as far as I can tell, these settings are not being respected:

I would expect the printer to slow down a bit to its minimum, then when the minimum layer time is reached, it would go off to the side…but I think instead it’s hovering close to the print and not giving it space to cool down.

I don’t really want to switch slicers, but I am wondering if there’s some Cura tip to uncover what I’m doing wrong here; I’ve read a ton but I am just not understanding how to get the printer to take its time on these tiny objects.

Here is a video of it printing, it’s clearly not respecting the minimum layer time: photos.app.goo.gl/nhE7LjvDH9avutxd7

First, thanks for all the feedback and suggestions, I’ve been going through and looking for areas to tweak. I decided, in the interim, to print a bigger model to see if I can expose the issues more, and I think I accomplished that. This is the snail from Adventure Time, and I’m mostly very happy with this print; I could have added a tree support under the lower arm, but the detail is great and the layer lines are barely visible…until you get to the raised hand a bit, and to the eye stalks. Looking at what’s going on, it looks pretty clear the layers are NOT getting enough time to cool and harden before the next starts.

I thought I had that accounted for with the following settings, but as far as I can tell, these settings are not being respected:

I would expect the printer to slow down a bit to its minimum, then when the minimum layer time is reached, it would go off to the side…but I think instead it’s hovering close to the print and not giving it space to cool down.

I don’t really want to switch slicers, but I am wondering if there’s some Cura tip to uncover what I’m doing wrong here; I’ve read a ton but I am just not understanding how to get the printer to take its time on these tiny objects.

Here is a video of it printing, it’s clearly not respecting the minimum layer time: photos.app.goo.gl/nhE7LjvDH9avutxd7

0

strange top layer

preview

Hi,

I’ve just swapped to a new PLA (Sunlu wood filled) and I’m getting strange lines in my top layer.

It is like some areas are just not being extruded at all.

Any ideas how I go about finding the cause of this?

Hi,

I’ve just swapped to a new PLA (Sunlu wood filled) and I’m getting strange lines in my top layer.

It is like some areas are just not being extruded at all.

Any ideas how I go about finding the cause of this?

0

Making PLA 0.15mm smooth, glossy and safer. How well will just resin work?

preview

A friend of a friend makes some useful equipment, and after ordering one of their items, I realized I have some concerns.

  1. This is a tool that will be breathed through (like a short tube, just for regular air) and PLA microplastics are microplastics. I assume coating with a food-safe craft resin should minimize the risk of deterioration or leaching of any additives/dyes if the filament isn’t food-safe. Let me know if that assumption has problems.

  2. Ideally, the appearance would be midnight black and highly glossy, at least from a metre away. That said, I don’t want to sand it because I don’t have access to a workspace, I don’t feel comfortable releasing microplastic debris into the air or water just for a small tool, I’m not contaminating my living space with it, and a respirator is an additional cost for a small, one-time project. Will glossy resin alone give a decently smooth appearance on top of unsanded 0.15mm?

A friend of a friend makes some useful equipment, and after ordering one of their items, I realized I have some concerns.

  1. This is a tool that will be breathed through (like a short tube, just for regular air) and PLA microplastics are microplastics. I assume coating with a food-safe craft resin should minimize the risk of deterioration or leaching of any additives/dyes if the filament isn’t food-safe. Let me know if that assumption has problems.

  2. Ideally, the appearance would be midnight black and highly glossy, at least from a metre away. That said, I don’t want to sand it because I don’t have access to a workspace, I don’t feel comfortable releasing microplastic debris into the air or water just for a small tool, I’m not contaminating my living space with it, and a respirator is an additional cost for a small, one-time project. Will glossy resin alone give a decently smooth appearance on top of unsanded 0.15mm?

0

Stumped - Improving fine detail prints with a .2mm nozzle?

preview

I’m a bit stumped, and am looking for advice. I have an extremely old (Circa 2015) Craftbot Plus. It’s hardly any parts of the original unit, kept alive with custom parts out of just spite. I use cura as my slicer, and it works fine for my needs. Recently, my kids have wanted to print custom keycaps. This is a difficult FDM print to begin with, and my old hardware isn’t doing me any favors; it might be impossible. That being said, my prints turn out good, except for the tiny details in the actual stem. The picture is attached of various settings; I’ve tried a ton of stuff. I can share a cura profile, but the gist is I’m printing in PLA and have experimented with 195-210 degrees, .1mm layer height, line widths between .175-.2mm, various speeds, minimum speed and minimum layer duration, I’ve disabled ironing, and I’ve played with retraction. I’m kind of stumped, and am wondering if anyone has things I should try.

I’m a bit stumped, and am looking for advice. I have an extremely old (Circa 2015) Craftbot Plus. It’s hardly any parts of the original unit, kept alive with custom parts out of just spite. I use cura as my slicer, and it works fine for my needs. Recently, my kids have wanted to print custom keycaps. This is a difficult FDM print to begin with, and my old hardware isn’t doing me any favors; it might be impossible. That being said, my prints turn out good, except for the tiny details in the actual stem. The picture is attached of various settings; I’ve tried a ton of stuff. I can share a cura profile, but the gist is I’m printing in PLA and have experimented with 195-210 degrees, .1mm layer height, line widths between .175-.2mm, various speeds, minimum speed and minimum layer duration, I’ve disabled ironing, and I’ve played with retraction. I’m kind of stumped, and am wondering if anyone has things I should try.

0

Stumped - Improving fine detail prints with a .2mm nozzle?

preview

I’m a bit stumped, and am looking for advice. I have an extremely old (Circa 2015) Craftbot Plus. It’s hardly any parts of the original unit, kept alive with custom parts out of just spite. I use cura as my slicer, and it works fine for my needs. Recently, my kids have wanted to print custom keycaps. This is a difficult FDM print to begin with, and my old hardware isn’t doing me any favors; it might be impossible. That being said, my prints turn out good, except for the tiny details in the actual stem. The picture is attached of various settings; I’ve tried a ton of stuff. I can share a cura profile, but the gist is I’m printing in PLA and have experimented with 195-210 degrees, .1mm layer height, line widths between .175-.2mm, various speeds, minimum speed and minimum layer duration, I’ve disabled ironing, and I’ve played with retraction. I’m kind of stumped, and am wondering if anyone has things I should try.

I’m a bit stumped, and am looking for advice. I have an extremely old (Circa 2015) Craftbot Plus. It’s hardly any parts of the original unit, kept alive with custom parts out of just spite. I use cura as my slicer, and it works fine for my needs. Recently, my kids have wanted to print custom keycaps. This is a difficult FDM print to begin with, and my old hardware isn’t doing me any favors; it might be impossible. That being said, my prints turn out good, except for the tiny details in the actual stem. The picture is attached of various settings; I’ve tried a ton of stuff. I can share a cura profile, but the gist is I’m printing in PLA and have experimented with 195-210 degrees, .1mm layer height, line widths between .175-.2mm, various speeds, minimum speed and minimum layer duration, I’ve disabled ironing, and I’ve played with retraction. I’m kind of stumped, and am wondering if anyone has things I should try.

0

VSO: Thicker Clamp for Ruixin RX-009 Shapening Jig

preview

Heyo.

It’s that time again: Time to crow about modeling something which took mere moments to knock together and if we’re lucky as many as four other people on Earth might care about. That’s the Very Specific Object way.

The other day I found myself with two problems. The first was that I wanted to sharpen some of my rather famously thick slabs of steel, and the other is that I am, as ever, lazy. I have a Ruixin RX-009 sharpening jig and I’m quite pleased with it, but its major shortcoming is that it can’t clamp any knife thicker than 4mm. (This whole thing is just completely on brand for me, by the way. Top to bottom.)

The stock clamps in this jig are single aluminum part which I’m pretty sure is cast. This should be a doddle to recreate in plastic, so I did. And surprisingly, it works great.

It requires a couple of commodity metric screws and nuts, but that’s to be expected. Otherwise, it works just like the original clamps. Only… thicker.

Printables link: printables.com/…/1876370-thick-clamp-for-ruixin-r…

If you have a use for this, knock yourself out.

Heyo.

It’s that time again: Time to crow about modeling something which took mere moments to knock together and if we’re lucky as many as four other people on Earth might care about. That’s the Very Specific Object way.

The other day I found myself with two problems. The first was that I wanted to sharpen some of my rather famously thick slabs of steel, and the other is that I am, as ever, lazy. I have a Ruixin RX-009 sharpening jig and I’m quite pleased with it, but its major shortcoming is that it can’t clamp any knife thicker than 4mm. (This whole thing is just completely on brand for me, by the way. Top to bottom.)

The stock clamps in this jig are single aluminum part which I’m pretty sure is cast. This should be a doddle to recreate in plastic, so I did. And surprisingly, it works great.

It requires a couple of commodity metric screws and nuts, but that’s to be expected. Otherwise, it works just like the original clamps. Only… thicker.

Printables link: printables.com/…/1876370-thick-clamp-for-ruixin-r…

If you have a use for this, knock yourself out.

0

sovol.eu any good?

preview

Might be a stupid question but there a very little information on sovol.eu, have anyone bought from there and is it a good seller?

sovol.eu/products/sovol-sv08-3d-printer

I am looking into buying a sovol sv08 and they are sold there pretty cheap.

Thanks in advance

Might be a stupid question but there a very little information on sovol.eu, have anyone bought from there and is it a good seller?

sovol.eu/products/sovol-sv08-3d-printer

I am looking into buying a sovol sv08 and they are sold there pretty cheap.

Thanks in advance

0

3D printing for beginners

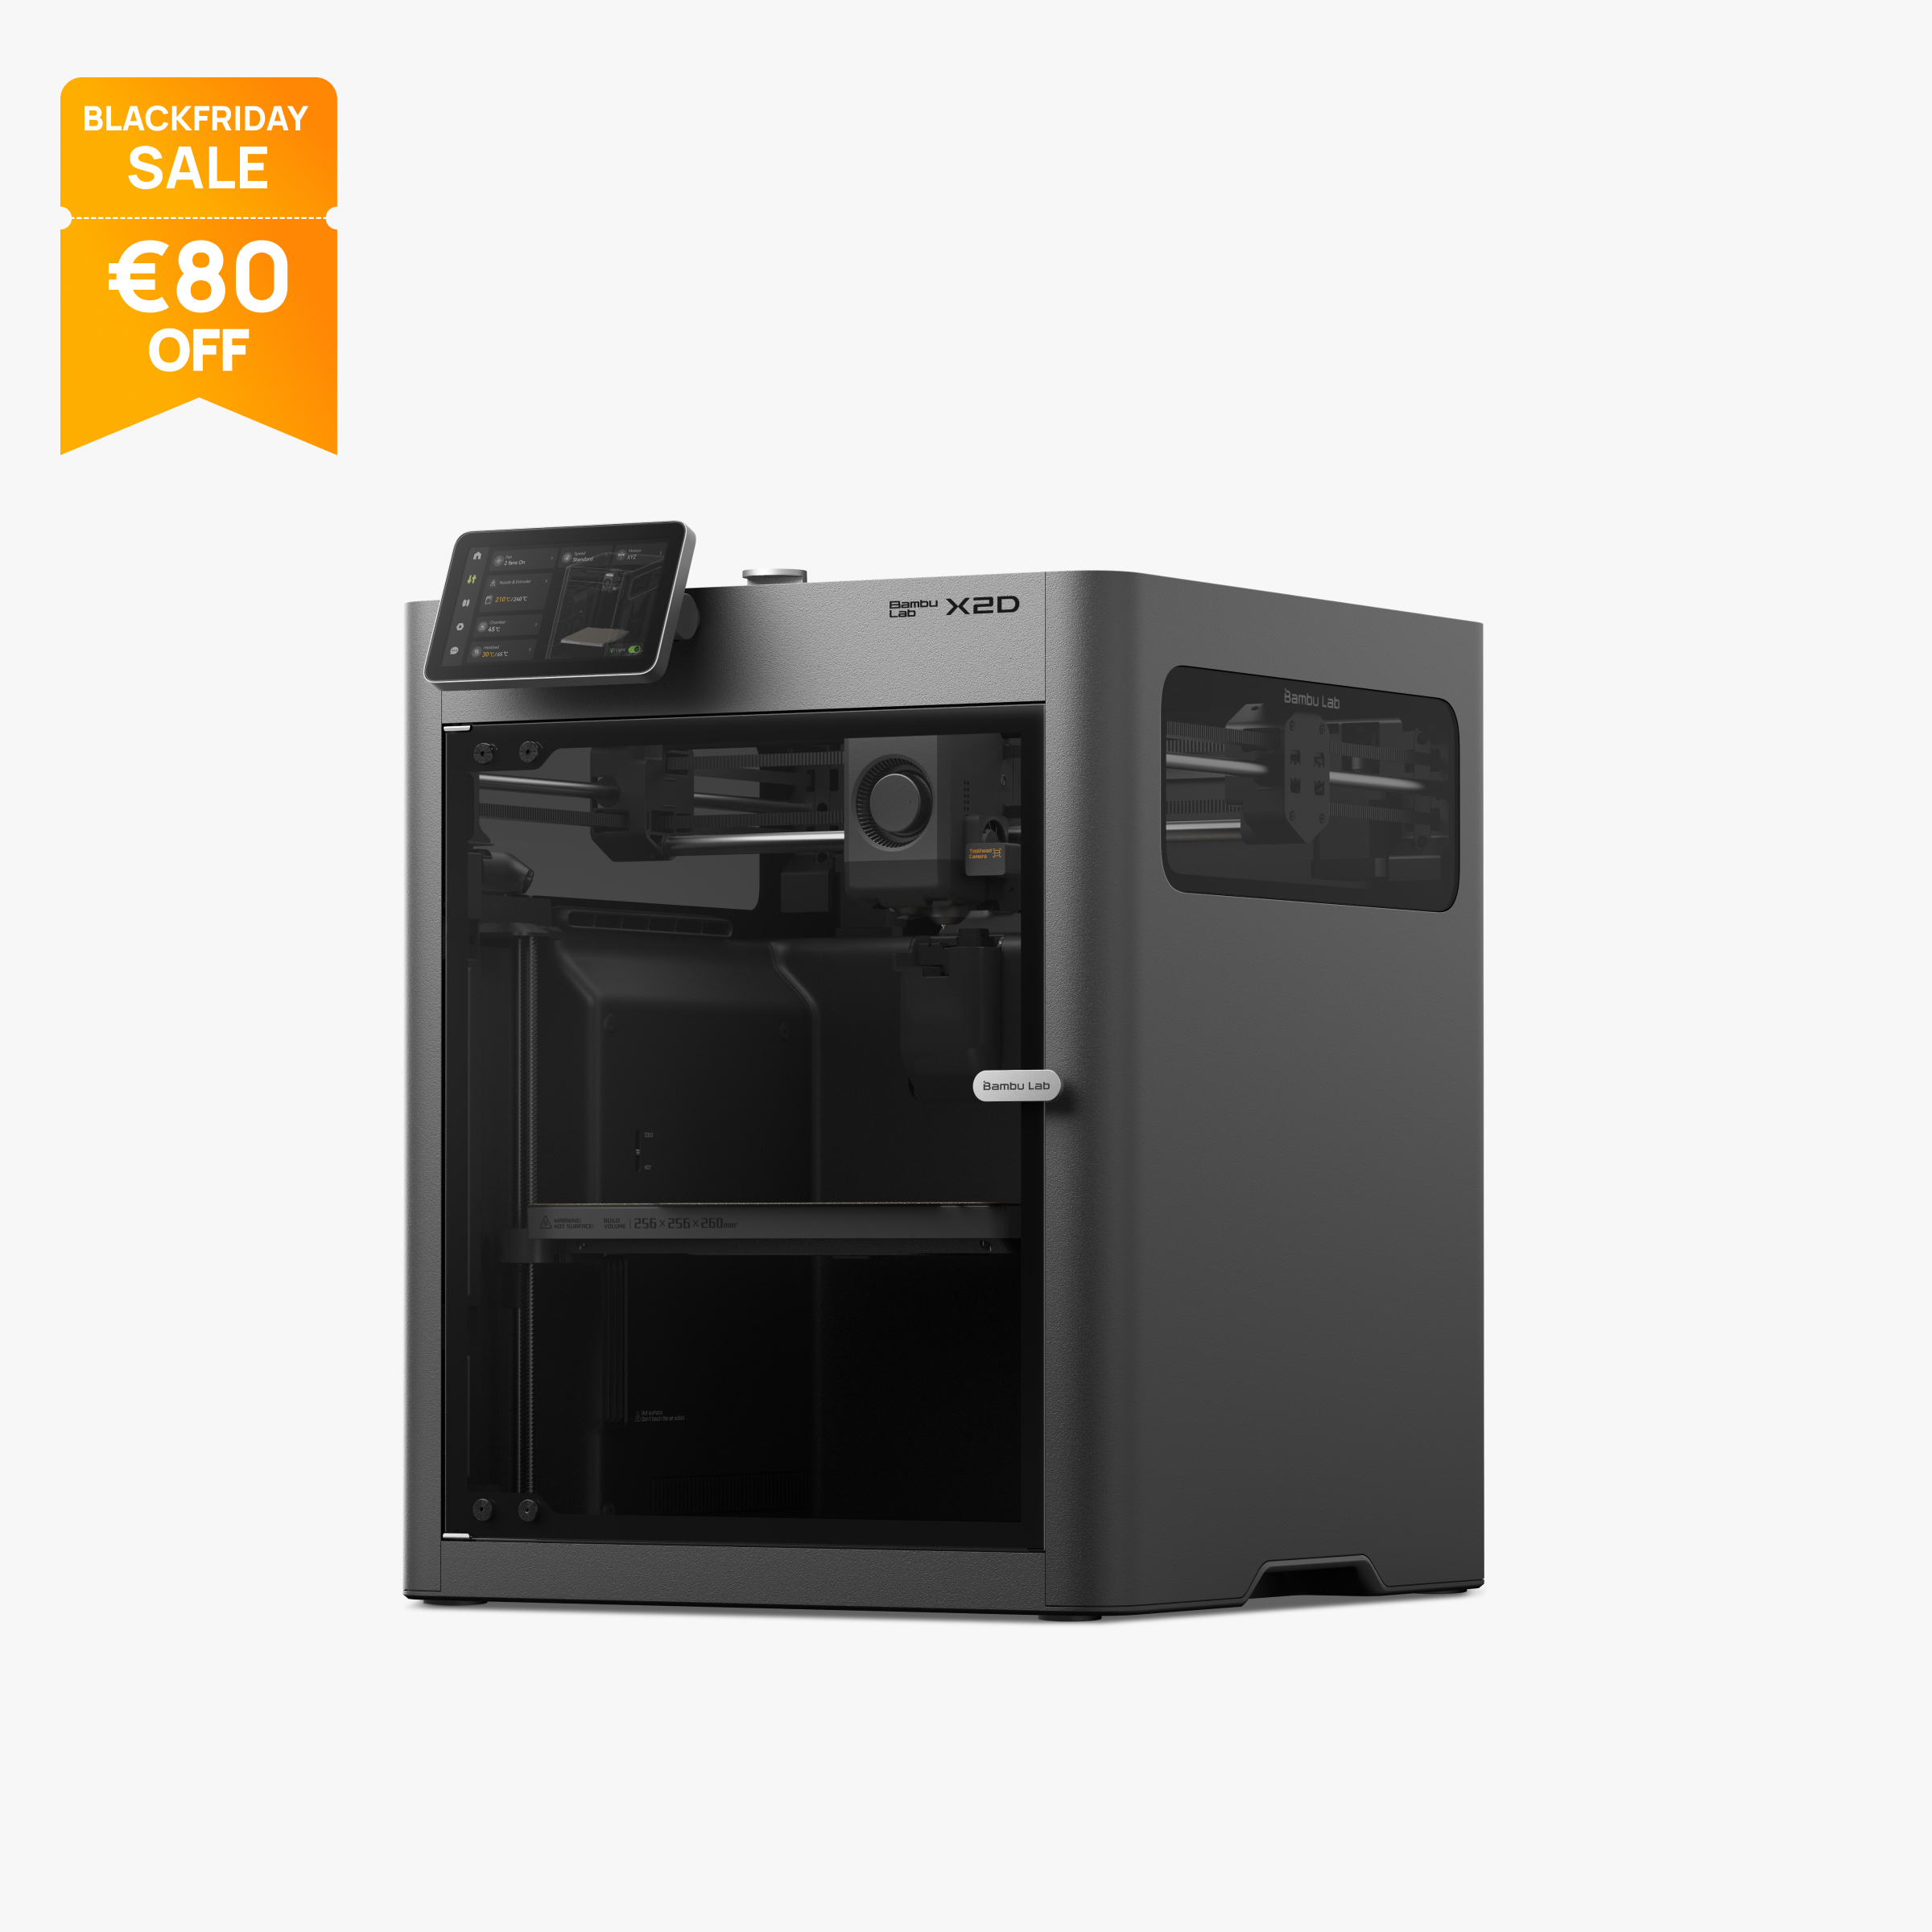
Bambu Lab EU Shop Bambu Lab X2D kaufen: Preisgünstiger 3D-Drucker mit Dual Extruder für einfaches Entfernen von Stützstrukturen eu.store.bambulab.com
preview

Hey everyone My sister wants to get into 3D printing. She has her birthday soon and we are thinking of gifting here a printer. What models wold you recommend?

What do you think of Bambu Lab X2D. What would you get for a beginer?

Edit: thank you all for the responses. I certainly did not expect so much engagement and such high quality answers. Will have a look at all the options you recommended. Hopefully our budget has enough room for a comparable morally righ choice.

Hey everyone My sister wants to get into 3D printing. She has her birthday soon and we are thinking of gifting here a printer. What models wold you recommend?

What do you think of Bambu Lab X2D. What would you get for a beginer?

Edit: thank you all for the responses. I certainly did not expect so much engagement and such high quality answers. Will have a look at all the options you recommended. Hopefully our budget has enough room for a comparable morally righ choice.

0

IKEA BESTA enclosure (another one!) with a how-to

preview

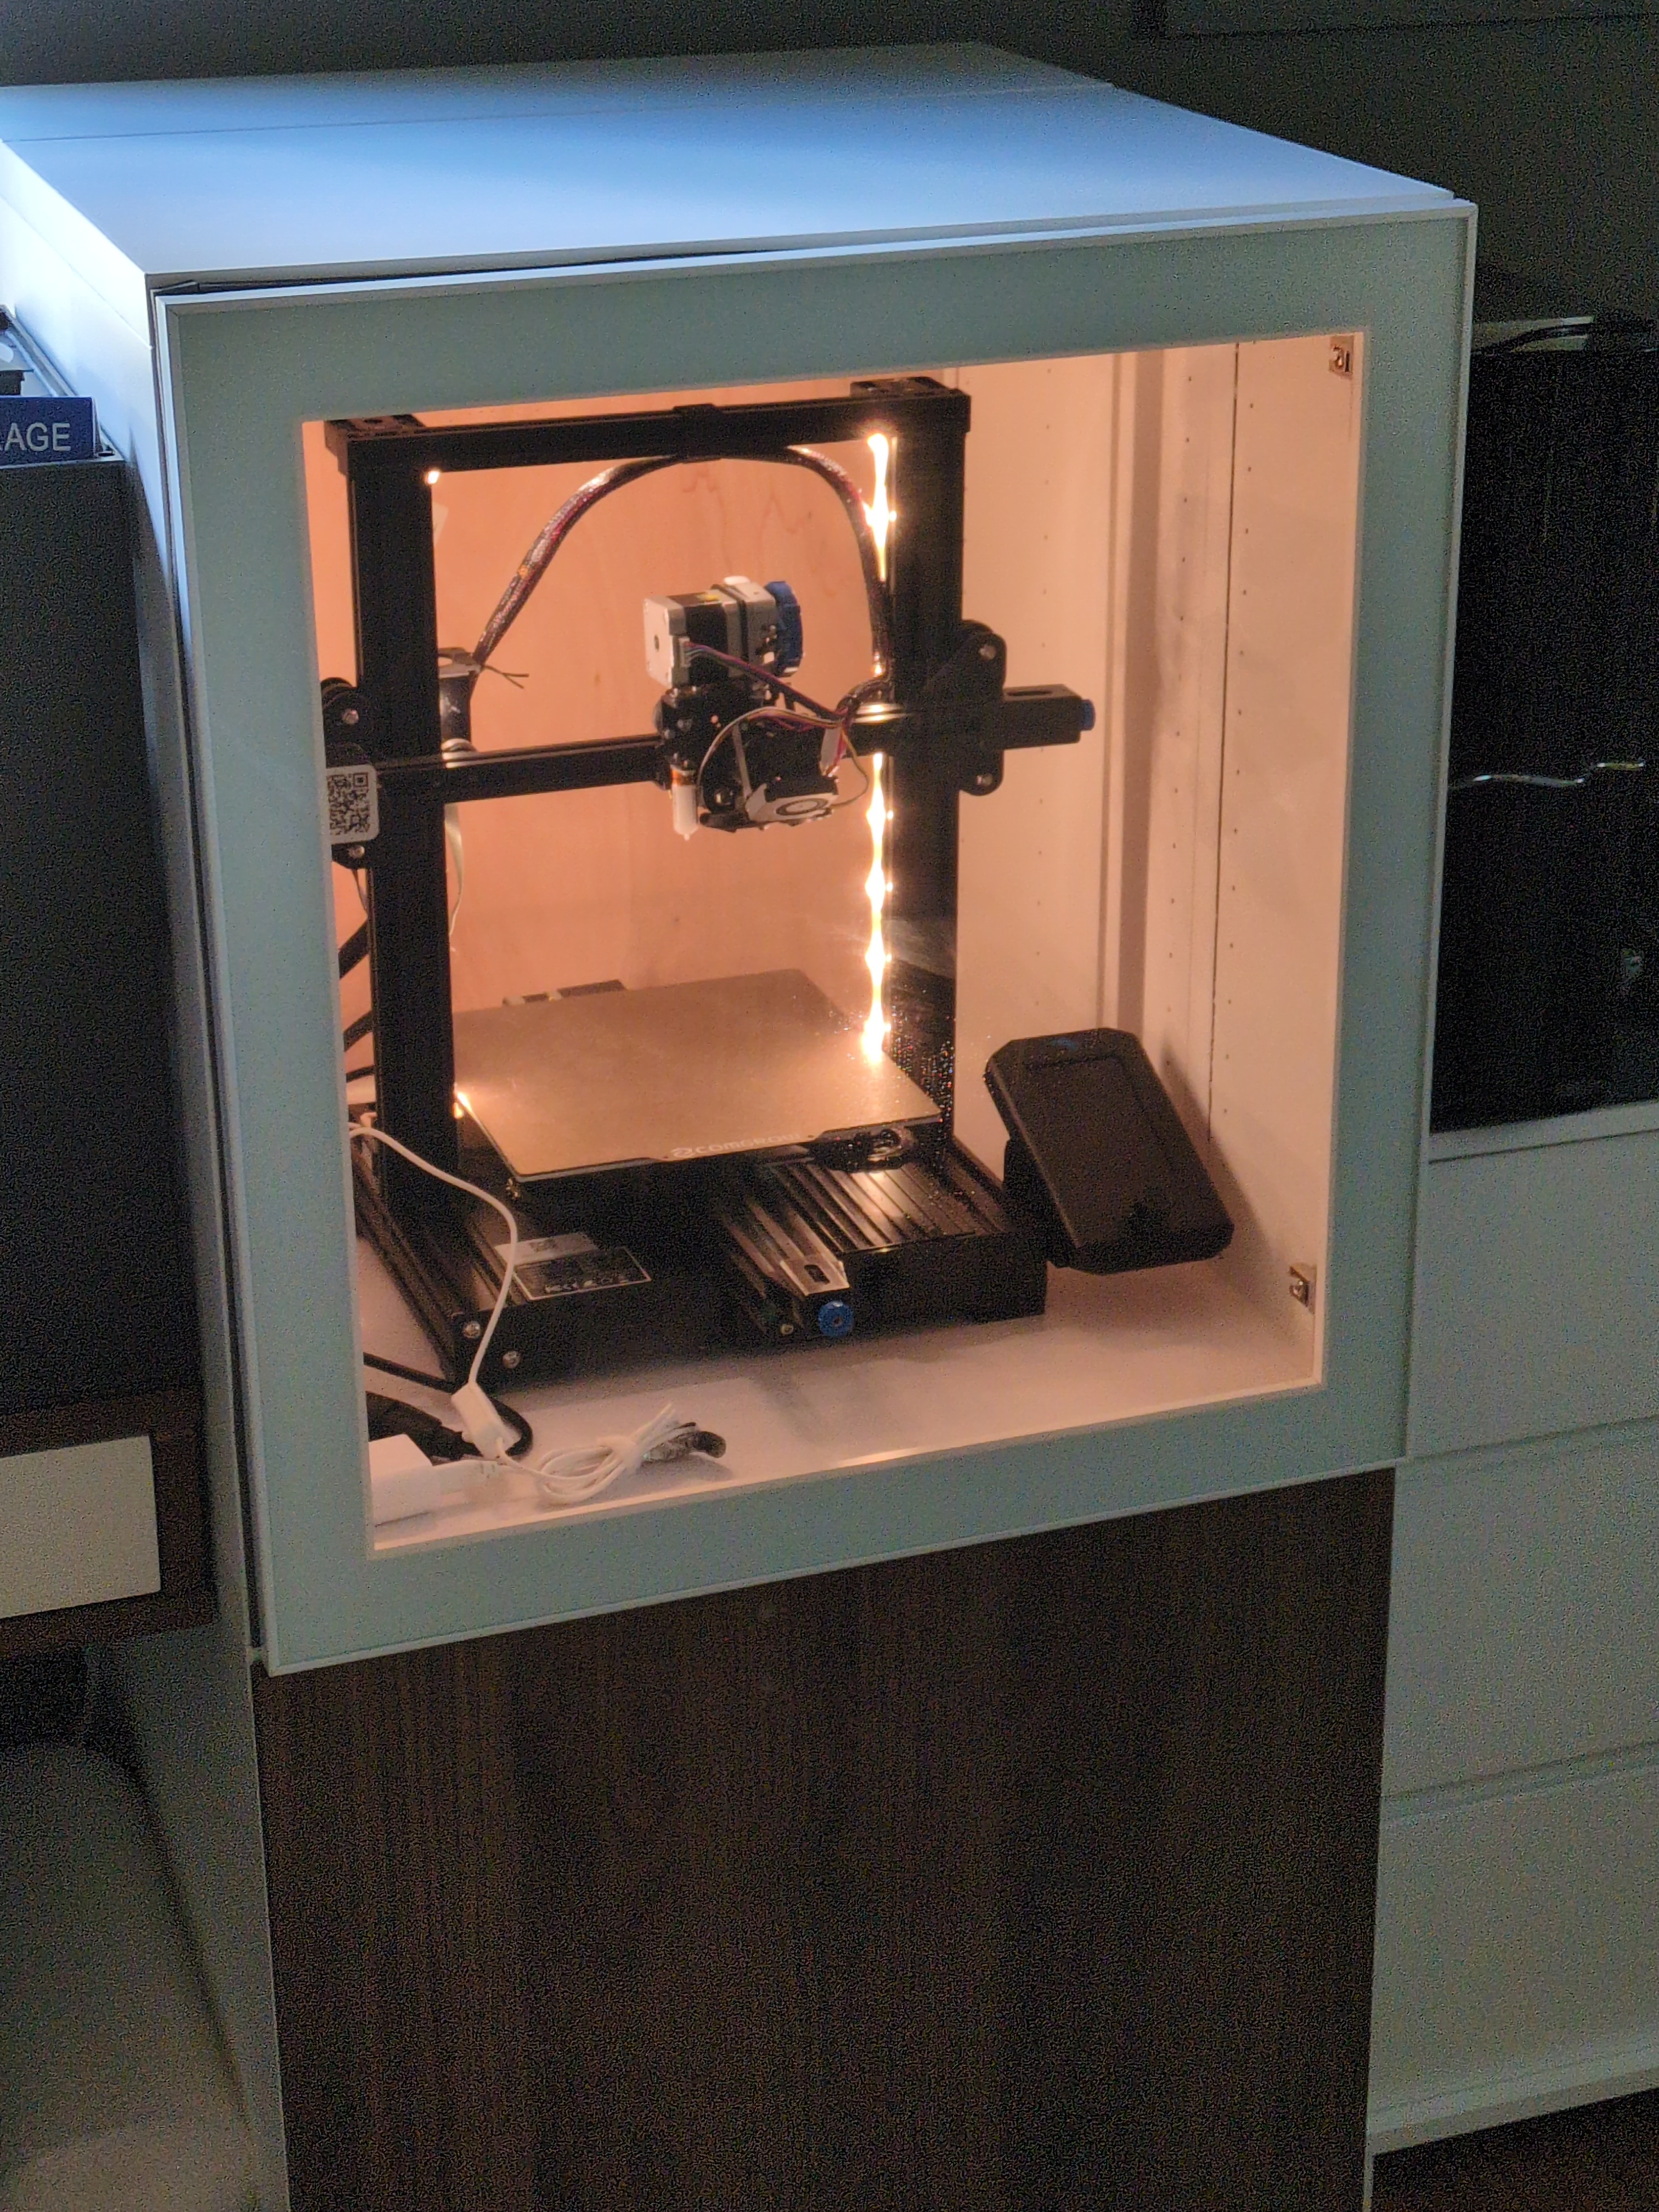
Finally built myself a nice 3D printer enclosure from IKEA cabinets.

Basic idea is to take a shallow (20cm) and a deep (40cm) cabinet frames and to stagger the bottom/top panels and wall panels, making a nice single-piece 60cm cube. A bit more info with a short how-to and a few ideas and nuances.

Finally built myself a nice 3D printer enclosure from IKEA cabinets.

Basic idea is to take a shallow (20cm) and a deep (40cm) cabinet frames and to stagger the bottom/top panels and wall panels, making a nice single-piece 60cm cube. A bit more info with a short how-to and a few ideas and nuances.

0

Advice for nylon/PA warped prints not sticking?

preview

Anyone have any advice with nylon aka polyamide and sticking to the bed plate? I’ve got an h2d (enclosed, heated) and printing without part cooling. The bed is pei with glue stick. The part is a rectangle that’s 2x as long as it is wide. It warps no matter the bed adhesion tricks I use.

Anyone have any advice with nylon aka polyamide and sticking to the bed plate? I’ve got an h2d (enclosed, heated) and printing without part cooling. The bed is pei with glue stick. The part is a rectangle that’s 2x as long as it is wide. It warps no matter the bed adhesion tricks I use.

0

I designed (and made) a thing!

preview

Printables link. Apologies for the… very lazy select + background blur. In the land of windows I would have used paint.net, but I’m coming to you from a mac today and haven’t found a great alternative.

Printables link. Apologies for the… very lazy select + background blur. In the land of windows I would have used paint.net, but I’m coming to you from a mac today and haven’t found a great alternative.

0

I fixed my first layer issue with a new z axis motor.

preview

Shortly after I posted about my weird first layer issue the z axis motor failed completely. It is an oddball cheap motor and I could not find a direct replacement. The screw was also a very small diameter piece of all thread. I replaced the motor with a standard nema motor with a printed bracket. I did have to do some surgery with a Dremel and drill in order to get the new nut mounted to the carrier. I also had to change the steps per mm in firmware for the new screw. I haven’t changed any of the slicer settings just different filament which is stringing pretty badly and I think the printer is going a bit fast. Other than that it’s running pretty good.

Shortly after I posted about my weird first layer issue the z axis motor failed completely. It is an oddball cheap motor and I could not find a direct replacement. The screw was also a very small diameter piece of all thread. I replaced the motor with a standard nema motor with a printed bracket. I did have to do some surgery with a Dremel and drill in order to get the new nut mounted to the carrier. I also had to change the steps per mm in firmware for the new screw. I haven’t changed any of the slicer settings just different filament which is stringing pretty badly and I think the printer is going a bit fast. Other than that it’s running pretty good.

0

Got this bad boy running again

preview

This is a clone of an original MakerBot Replicator with dual extruders, yes it’s made out of wood. I’ve had it for about 12 years and tinkered with it a lot. I started having problems with it and it got set aside for bigger and better printers. I got bored and decided to bring it out again. The biggest challenge has been setting up start gcode. It also can’t run standard gcode and instead uses a different format. I’m running octoprint with the GPX plugin. I have never printed using both extruders so my goal is to do that.

This is a clone of an original MakerBot Replicator with dual extruders, yes it’s made out of wood. I’ve had it for about 12 years and tinkered with it a lot. I started having problems with it and it got set aside for bigger and better printers. I got bored and decided to bring it out again. The biggest challenge has been setting up start gcode. It also can’t run standard gcode and instead uses a different format. I’m running octoprint with the GPX plugin. I have never printed using both extruders so my goal is to do that.

0

New California ghost gun lawsuit takes aim at company that sells 3-D printer filament

Los Angeles Times New California ghost gun lawsuit takes aim at company that sells 3-D printer filament www.latimes.com
preview

San Diego County jumped into California’s sprawling ghost gun fight this week, suing a 3-D printing filament manufacturer it says hocks material for homespun firearms in violation of state law.

Working with the Giffords Law Center, the county counsel sued manufacturer Polymaker, alleging the company made a “strategic business choice” to market and sell 3-D printer filament to Californians for the express purpose of building illegal weapons. The polymer filament is sold in spools that feed into 3-D printers, allowing the devices to form designs created by their owners.

San Diego County jumped into California’s sprawling ghost gun fight this week, suing a 3-D printing filament manufacturer it says hocks material for homespun firearms in violation of state law.

Working with the Giffords Law Center, the county counsel sued manufacturer Polymaker, alleging the company made a “strategic business choice” to market and sell 3-D printer filament to Californians for the express purpose of building illegal weapons. The polymer filament is sold in spools that feed into 3-D printers, allowing the devices to form designs created by their owners.

0

Odd issues that seemingly appeared out of nowhere

preview

After some issues started with an old hot end I can only chalk up to extreme clogging, I nabbed a new hot end, ran through calibration, and was met with odd issues I’ve never experienced before.

Certain layers on certain sections are acting like there has been extreme under extrusion, and gap fill is virtually non existent. Walls also don’t seem to be printing close enough to actually touch and results in what seems like paper thin layers next to each other.

This is on an Adventurer 5M, and we have tried another hot end in case the first one we bought had issues of its own.

I’ve tried increasing (through calibration in orca slicer) the flow rate and pressure advance. Both appear to be correctly calibrated. The base of this print is 100% infill and during print I saw nothing to suggest over/under flow.

At this point I’m wondering if the extruder motor is dying, but I am at a loss on how to test that, as most suggestions seem to be “rule everything else out.”

This is meant to be a very fat gap fill, however as you can see the result is essentially just a thin line of material between the two outer walls:

These are also meant to be gap filled, as well as 100% infill, and this section looks like under flow which makes no sense to me when the base printed perfectly:

After some issues started with an old hot end I can only chalk up to extreme clogging, I nabbed a new hot end, ran through calibration, and was met with odd issues I’ve never experienced before.

Certain layers on certain sections are acting like there has been extreme under extrusion, and gap fill is virtually non existent. Walls also don’t seem to be printing close enough to actually touch and results in what seems like paper thin layers next to each other.

This is on an Adventurer 5M, and we have tried another hot end in case the first one we bought had issues of its own.

I’ve tried increasing (through calibration in orca slicer) the flow rate and pressure advance. Both appear to be correctly calibrated. The base of this print is 100% infill and during print I saw nothing to suggest over/under flow.

At this point I’m wondering if the extruder motor is dying, but I am at a loss on how to test that, as most suggestions seem to be “rule everything else out.”

This is meant to be a very fat gap fill, however as you can see the result is essentially just a thin line of material between the two outer walls:

These are also meant to be gap filled, as well as 100% infill, and this section looks like under flow which makes no sense to me when the base printed perfectly:

0

Ender 5 complete redesign

preview

So the Creality Ender 5 is/was my first and only 3D printer. Over the years, as is tradition with Creality products, you replace parts and install upgrades here and there.

In the latest iteration only the frame is original. Everything else has been replaced.

Some of the highlights (screw AI for ruining that word)

-Cartesian -> CoreXY, inspired by the MercuryOne project.

-X strut replaced with two 10mm steel rods. The print head is in between the rods so that the reachable area can be increased.

-Redesigned toolhead allowing for a Phaetus Rapido UHF and Orbiter 1.5 or 2.0 extruder, as well as a BLTouch bed sensor.

-New bed, 314x314mm instead of 235x235mm.

-The bed motion system is placed outside the frame instead of inside. The bed will be raised to just below the top of the frame. The toolhead can freely move over the frame, the fan ducts will not hit the frame but the nozzle will.

-Oversized rails on the Y axis, 24mm rails of 530mm length. I got these from discarded lab equipment at my old job. They allow the toolhead to go over the frame bounds and allow the nozzle to reach the whole inside of the frame.

I now have a 260x310 usable print area, up from 220x220 with the stock unit. There is still room to improve and I believe 314x314 is also possible.

The FreeCAD design file is available here: printables.com/…/1867046-ender-5-radical-redesign

So the Creality Ender 5 is/was my first and only 3D printer. Over the years, as is tradition with Creality products, you replace parts and install upgrades here and there.

In the latest iteration only the frame is original. Everything else has been replaced.

Some of the highlights (screw AI for ruining that word)

-Cartesian -> CoreXY, inspired by the MercuryOne project.

-X strut replaced with two 10mm steel rods. The print head is in between the rods so that the reachable area can be increased.

-Redesigned toolhead allowing for a Phaetus Rapido UHF and Orbiter 1.5 or 2.0 extruder, as well as a BLTouch bed sensor.

-New bed, 314x314mm instead of 235x235mm.

-The bed motion system is placed outside the frame instead of inside. The bed will be raised to just below the top of the frame. The toolhead can freely move over the frame, the fan ducts will not hit the frame but the nozzle will.

-Oversized rails on the Y axis, 24mm rails of 530mm length. I got these from discarded lab equipment at my old job. They allow the toolhead to go over the frame bounds and allow the nozzle to reach the whole inside of the frame.

I now have a 260x310 usable print area, up from 220x220 with the stock unit. There is still room to improve and I believe 314x314 is also possible.

The FreeCAD design file is available here: printables.com/…/1867046-ender-5-radical-redesign

0

Temperature is merely a suggestion

preview

An nozzle of my Snapmaker U1 failed with printing and the clog ended up breaking the frail temperature sensor.

The spare about are expected to arrive within about a month (stock runners out, and I didn’t had spare parts of these because they have never broken on my old printer).

I moved the nozzle heater and sensor from head 2 (E1) to head 1,since the left head is like a master and you can’t do without apparently. I set the min_temp of [extruder1] in the printer.cfg file super low. And now it can boot up again.

The printer runs just fine on the other nozzles now, just can not do a nozzle offset calibration and such since that requires heating the nozzles. Meaning nozzle 1 has a wrong offset (but can be used on its own), nozzle 2 is completely out, and nozzle 3 and 4 can be used for multi material printing.

It’s current printing! So no time to waste. Let us engineer and print more, and enjoy the hobby

An nozzle of my Snapmaker U1 failed with printing and the clog ended up breaking the frail temperature sensor.

The spare about are expected to arrive within about a month (stock runners out, and I didn’t had spare parts of these because they have never broken on my old printer).

I moved the nozzle heater and sensor from head 2 (E1) to head 1,since the left head is like a master and you can’t do without apparently. I set the min_temp of [extruder1] in the printer.cfg file super low. And now it can boot up again.

The printer runs just fine on the other nozzles now, just can not do a nozzle offset calibration and such since that requires heating the nozzles. Meaning nozzle 1 has a wrong offset (but can be used on its own), nozzle 2 is completely out, and nozzle 3 and 4 can be used for multi material printing.

It’s current printing! So no time to waste. Let us engineer and print more, and enjoy the hobby

0

Finally got the Box Turtle AFC mostly dialed in, yay multicolor!

Oblique angle of a rugged-looking hinged yellow box, approximately the size and shape required to hold a deck of cards. It has two hinges, one pink and one black. On the front in landscape, in black text, it says "Taco Cat Goat Cheese Pizza". To the right of that are three vertical lines, the first two black and the third pink. The middle line is slightly longer.
preview

Finally got the Box Turtle AFC mostly dialed in, yay multicolor!

Our multimedia dept lends out this card game, and I guess the thin cardboard box fell apart? So they asked for a sturdier one. Made from 100% ASTM6691-certified biodegradable PHA of course.

#3dprinting #PHA #makerspace #library #TacoCatGoatCheesePizza @3dprinting@lemmy.world

Finally got the Box Turtle AFC mostly dialed in, yay multicolor!

Our multimedia dept lends out this card game, and I guess the thin cardboard box fell apart? So they asked for a sturdier one. Made from 100% ASTM6691-certified biodegradable PHA of course.

#3dprinting #PHA #makerspace #library #TacoCatGoatCheesePizza @3dprinting@lemmy.world

0

Filling 3D prints with filler material

preview

Do you have any experience doing so?

I have a project coming up where I would like to print a large object and fill it with sand and resin.

Sand, as we all know is coarse, rough and irritating and it gets everywhere. So it’s good filler material.

Afterwards I want to solidify it by adding resin, hoping that it gets everywhere as well.

What other materials are usable? Perhaps concrete but it can’t really dry inside a printed object right?

The infill should be Gyroid with 10% with at least 3 perimeters IMO. Would something like tree infill work as well? Or removable infill? I’m not sure how to get a slicer to do that though.

I intend to build parts for a CNC machine so I value weight and rigidity in this project.

Do you have any experience doing so?

I have a project coming up where I would like to print a large object and fill it with sand and resin.

Sand, as we all know is coarse, rough and irritating and it gets everywhere. So it’s good filler material.

Afterwards I want to solidify it by adding resin, hoping that it gets everywhere as well.

What other materials are usable? Perhaps concrete but it can’t really dry inside a printed object right?

The infill should be Gyroid with 10% with at least 3 perimeters IMO. Would something like tree infill work as well? Or removable infill? I’m not sure how to get a slicer to do that though.

I intend to build parts for a CNC machine so I value weight and rigidity in this project.

0

Weird first layer issue.

preview

I have an old Monoprice Select Mini Pro (v3) that has sat for years. I got it out today to see if it still works and it does. It printed fine the last time I used it but I’ve gotten bigger and better printers since then. However I lost the slicer profile I was using and decided to start from scratch with Orca. I just plugged in the dimensions and changed some start g code for the initial purge line as the default was going well off the bed. I also tried changing the retraction distance to 4.5 because this is a bowden tube which did not change this issue. The initial purge line and outer perimeter of the first layer stick really well but the middle infill is blobbing at one end and stringing through the middle and not sticking to the bed at all. I have been playing with the z height end stop (the level sensor is bad so I had printed an adjuster for the z end stop) to adjust the initial layer height and I’m pretty sure I went from too high to too low facing the same issue. I know it’s not the filament because it’s a new spool that I just printed on another printer with yesterday. I’m leaning towards it being a slicer setting of some kind having to do with the extrusion, I’m just not sure which setting it could be. Thanks for any help.

Edit: well the z axis motor just died because I lowered the z axis too far and it hit the bed and it was acting funny earlier so that’s probably the issue.

I have an old Monoprice Select Mini Pro (v3) that has sat for years. I got it out today to see if it still works and it does. It printed fine the last time I used it but I’ve gotten bigger and better printers since then. However I lost the slicer profile I was using and decided to start from scratch with Orca. I just plugged in the dimensions and changed some start g code for the initial purge line as the default was going well off the bed. I also tried changing the retraction distance to 4.5 because this is a bowden tube which did not change this issue. The initial purge line and outer perimeter of the first layer stick really well but the middle infill is blobbing at one end and stringing through the middle and not sticking to the bed at all. I have been playing with the z height end stop (the level sensor is bad so I had printed an adjuster for the z end stop) to adjust the initial layer height and I’m pretty sure I went from too high to too low facing the same issue. I know it’s not the filament because it’s a new spool that I just printed on another printer with yesterday. I’m leaning towards it being a slicer setting of some kind having to do with the extrusion, I’m just not sure which setting it could be. Thanks for any help.

Edit: well the z axis motor just died because I lowered the z axis too far and it hit the bed and it was acting funny earlier so that’s probably the issue.

0

Does anyone have experience with Zonestar printers?

preview

Hi, I recently picked up a Zonestar Z9V5-MK3 for too much money, too far from my house but what’s done is done. I bought another hot end on eBay off a MK5 or 6 but spares seem to be few and far between though it looks like I can still get parts new. I found some info on a Facebook group for these things and their GitHub looks like it has a decent amount of info. I’m really looking for opinions or experience, what are their quirks, etc. Ultimately I want to replace the belts, trade the glass bed for magnetic, and upgrade the extruders but all that needs to wait until I’ve actually powered this thing on. In the near term I need to replace all the missing hardware on the machine (8 screws and a rubber foot), hook up the electrics, fire it up and see what happens.

Hi, I recently picked up a Zonestar Z9V5-MK3 for too much money, too far from my house but what’s done is done. I bought another hot end on eBay off a MK5 or 6 but spares seem to be few and far between though it looks like I can still get parts new. I found some info on a Facebook group for these things and their GitHub looks like it has a decent amount of info. I’m really looking for opinions or experience, what are their quirks, etc. Ultimately I want to replace the belts, trade the glass bed for magnetic, and upgrade the extruders but all that needs to wait until I’ve actually powered this thing on. In the near term I need to replace all the missing hardware on the machine (8 screws and a rubber foot), hook up the electrics, fire it up and see what happens.

0

Persistent Curling

preview

The photo shows serious warping (or curling) of my print from my old PEI sheet which was printed on my MK4 with my old heatbed. All four of the corners warped (only the worst corner is shown).

This has been a persistent problem for the last couple of years. Smaller models printed closer to the center of the bed are fine. Only bigger prints which approach the edges of the bed curl up.

I recently upgraded my MK4 to the MK4S. While I was at it, I replaced the heatbed and I bought a new PEI sheet. And even though the sheet was brand new, I did wash it thoroughly with warm water and Dawn dish soap before using it.

After running through the full calibration and reslicing my model for the new high-flow nozzle using the latest stable release of PrusaSlicer, I reprinted it with high expectations.

Unfortunately, I was disappointed. One of the corners warped. It wasn’t quite as severe as before, so that’s a slight improvement. The corner that did warp happens to be the same one shown in the pic.

Print Settings: Prusa MK4S printer (no enclosure) 0.4 mm high-flow nozzle 0.2 mm resolution 15% infill Prusament Army Green PLA

– Edit –

Wow, there are lots of good ideas here. Thanks everyone!

The things I’m going to try (in no paticular order).

  • Covering the printer with a cardboard box or insulation sheets to see if an enclosure would help.
  • Cutting a tiny relief across the sides on the first layer.
  • Adding a brim.
  • Slow down the first layer.
  • Spraying 3DLac on the corners

– Final Report –

I tried all of the above suggestions. Spraying 3DLac works! I will definitely keep this stuff in stock. Thanks again everyone!

The photo shows serious warping (or curling) of my print from my old PEI sheet which was printed on my MK4 with my old heatbed. All four of the corners warped (only the worst corner is shown).

This has been a persistent problem for the last couple of years. Smaller models printed closer to the center of the bed are fine. Only bigger prints which approach the edges of the bed curl up.

I recently upgraded my MK4 to the MK4S. While I was at it, I replaced the heatbed and I bought a new PEI sheet. And even though the sheet was brand new, I did wash it thoroughly with warm water and Dawn dish soap before using it.

After running through the full calibration and reslicing my model for the new high-flow nozzle using the latest stable release of PrusaSlicer, I reprinted it with high expectations.

Unfortunately, I was disappointed. One of the corners warped. It wasn’t quite as severe as before, so that’s a slight improvement. The corner that did warp happens to be the same one shown in the pic.

Print Settings: Prusa MK4S printer (no enclosure) 0.4 mm high-flow nozzle 0.2 mm resolution 15% infill Prusament Army Green PLA

– Edit –

Wow, there are lots of good ideas here. Thanks everyone!

The things I’m going to try (in no paticular order).

  • Covering the printer with a cardboard box or insulation sheets to see if an enclosure would help.
  • Cutting a tiny relief across the sides on the first layer.
  • Adding a brim.
  • Slow down the first layer.
  • Spraying 3DLac on the corners

– Final Report –

I tried all of the above suggestions. Spraying 3DLac works! I will definitely keep this stuff in stock. Thanks again everyone!

0

CNC design with ballscrews.

preview

I’m designing a partially 3D printable CNC machine and have some options regarding the motion system.

I can choose between belts and ballscrews. Currently I have 2 ballscrews. One for X which is easy but what is the best way to control the Y axis?

Either I use one ballscrew and move the workpiece back and forth or I get two of them and push/pull the X gantry back and forth. A second ballscrew significantly adds to the cost of the machine but is there any benefit to doing so?

Bed slinging seems fine for slow speed operations such as CNC milling.

I’m designing a partially 3D printable CNC machine and have some options regarding the motion system.

I can choose between belts and ballscrews. Currently I have 2 ballscrews. One for X which is easy but what is the best way to control the Y axis?

Either I use one ballscrew and move the workpiece back and forth or I get two of them and push/pull the X gantry back and forth. A second ballscrew significantly adds to the cost of the machine but is there any benefit to doing so?

Bed slinging seems fine for slow speed operations such as CNC milling.

0

What are some dumb mistakes you have made with 3D printing?

preview

I’ll start off with a recent one. I forgot to connect the hotend cooling fan when remounting the hotend. After a while the printer jammed and the whole toolhead got so hot that it started to melt. The brass inserts were coming out of their sockets and the hotend stood at an angle instead of straight down.

I also noticed that the “teflon” tube connecting the extruder to the hotend was not in fact teflon. The slowly melting ABS was blowing a bubble in that tube and it was clearly starting to melt.

It was quite a pain in the ass to fix as I did not have a second toolhead nor a second 3D printer to print a new one so I had to fix the extruder/hotend in place using 2-part glue hoping that the printer lasts long enough to print a new toolhead.

I should probably have either a thermal fuse or a smart filament sensor that notices jams as well. When your hotend cooling fan fails, or the operator forgets to connect it, the filament will jam in the heatbreak and if it goes long enough the whole hotend will be plastic-meltingly hot. A jam sensor should see it before the toolhead starts to melt.

I’ll start off with a recent one. I forgot to connect the hotend cooling fan when remounting the hotend. After a while the printer jammed and the whole toolhead got so hot that it started to melt. The brass inserts were coming out of their sockets and the hotend stood at an angle instead of straight down.

I also noticed that the “teflon” tube connecting the extruder to the hotend was not in fact teflon. The slowly melting ABS was blowing a bubble in that tube and it was clearly starting to melt.

It was quite a pain in the ass to fix as I did not have a second toolhead nor a second 3D printer to print a new one so I had to fix the extruder/hotend in place using 2-part glue hoping that the printer lasts long enough to print a new toolhead.

I should probably have either a thermal fuse or a smart filament sensor that notices jams as well. When your hotend cooling fan fails, or the operator forgets to connect it, the filament will jam in the heatbreak and if it goes long enough the whole hotend will be plastic-meltingly hot. A jam sensor should see it before the toolhead starts to melt.